Tuesday, December 13, 2022

DIY: Handmade Christmas Cards

Under The Plum Blossom Tree, DIY: Handmade Christmas Cards, a blog post about making Christmas cards from colorful card stock papers which have been cut from metal dies, hand stitched and have gold embellishments and gems attached.

Hello friends! Once again I am trying my hand at creating some handmade greeting cards, this time for Christmas.

The main attraction on these new cards is a die cut ornament stitched with embroidery floss, decorated with a gold filigree-like element on the top and bottom, embellished with tiny sparkly gems, and finished with a fancy hanger top. The light green leaf sprigs are also part of the die set.

For each ornament I used the Spellbinders Stitched Ornament detailed cutting die set to cut the shapes shown above using my Sizzix Big Shot machine.

For the red finished ornament, (seen in the middle of the above photo and below), I first stitched the white floss to the red top piece, then glued it to one of the gold back pieces, then glued all the other die cut pieces and the Spellbinders Color Essentials gold gems onto the top.

Under The Plum Blossom Tree, DIY: Handmade Christmas Cards, a blog post about making Christmas cards from colorful card stock papers which have been cut from metal dies, hand stitched and have gold embellishments and gems attached.

The dark green card base was made by running a Sizzix 3-D Textured Impressions embossing folder in the Delicate Mistletoe pattern through my Sizzix machine. Right now the stitched ornament is just sitting on the card base as a kind of mock up as I haven't figured out the exact placement yet.

I also have a Spellbinders Mini Christmas Greetings stamp and die cutting set (not shown) that I will use to add the sentiments to the front and inside of the cards.

Who knows how many of the one dozen ornament shapes plus embellishments that I will actually get stitched and assembled so I’m sharing what I have so far! As you can see, this is an ambitious project I’ve set myself up for but I'm hoping to get about eight of them made before Christmas. (Now I'm understanding why the professional crafts people start their projects in July!) With work, family and all the other holiday activities happening I’m trying not to stress myself. Nuff said, right?

So I'll just be over here stitching and gluing whenever I can and hopefully I'll have more to share in a week or so.

Thanks for looking and bye for now.

SHARE:

Wednesday, November 23, 2022

DIY: Autumn Blessings Handmade Greeting Cards

Under The Plum Blossom Tree DIY: Autumn Blessings Handmade Greeting Cards, a blog post showing paper greeting cards made using a die cut machine and metal dies which are then glued onto a card base.

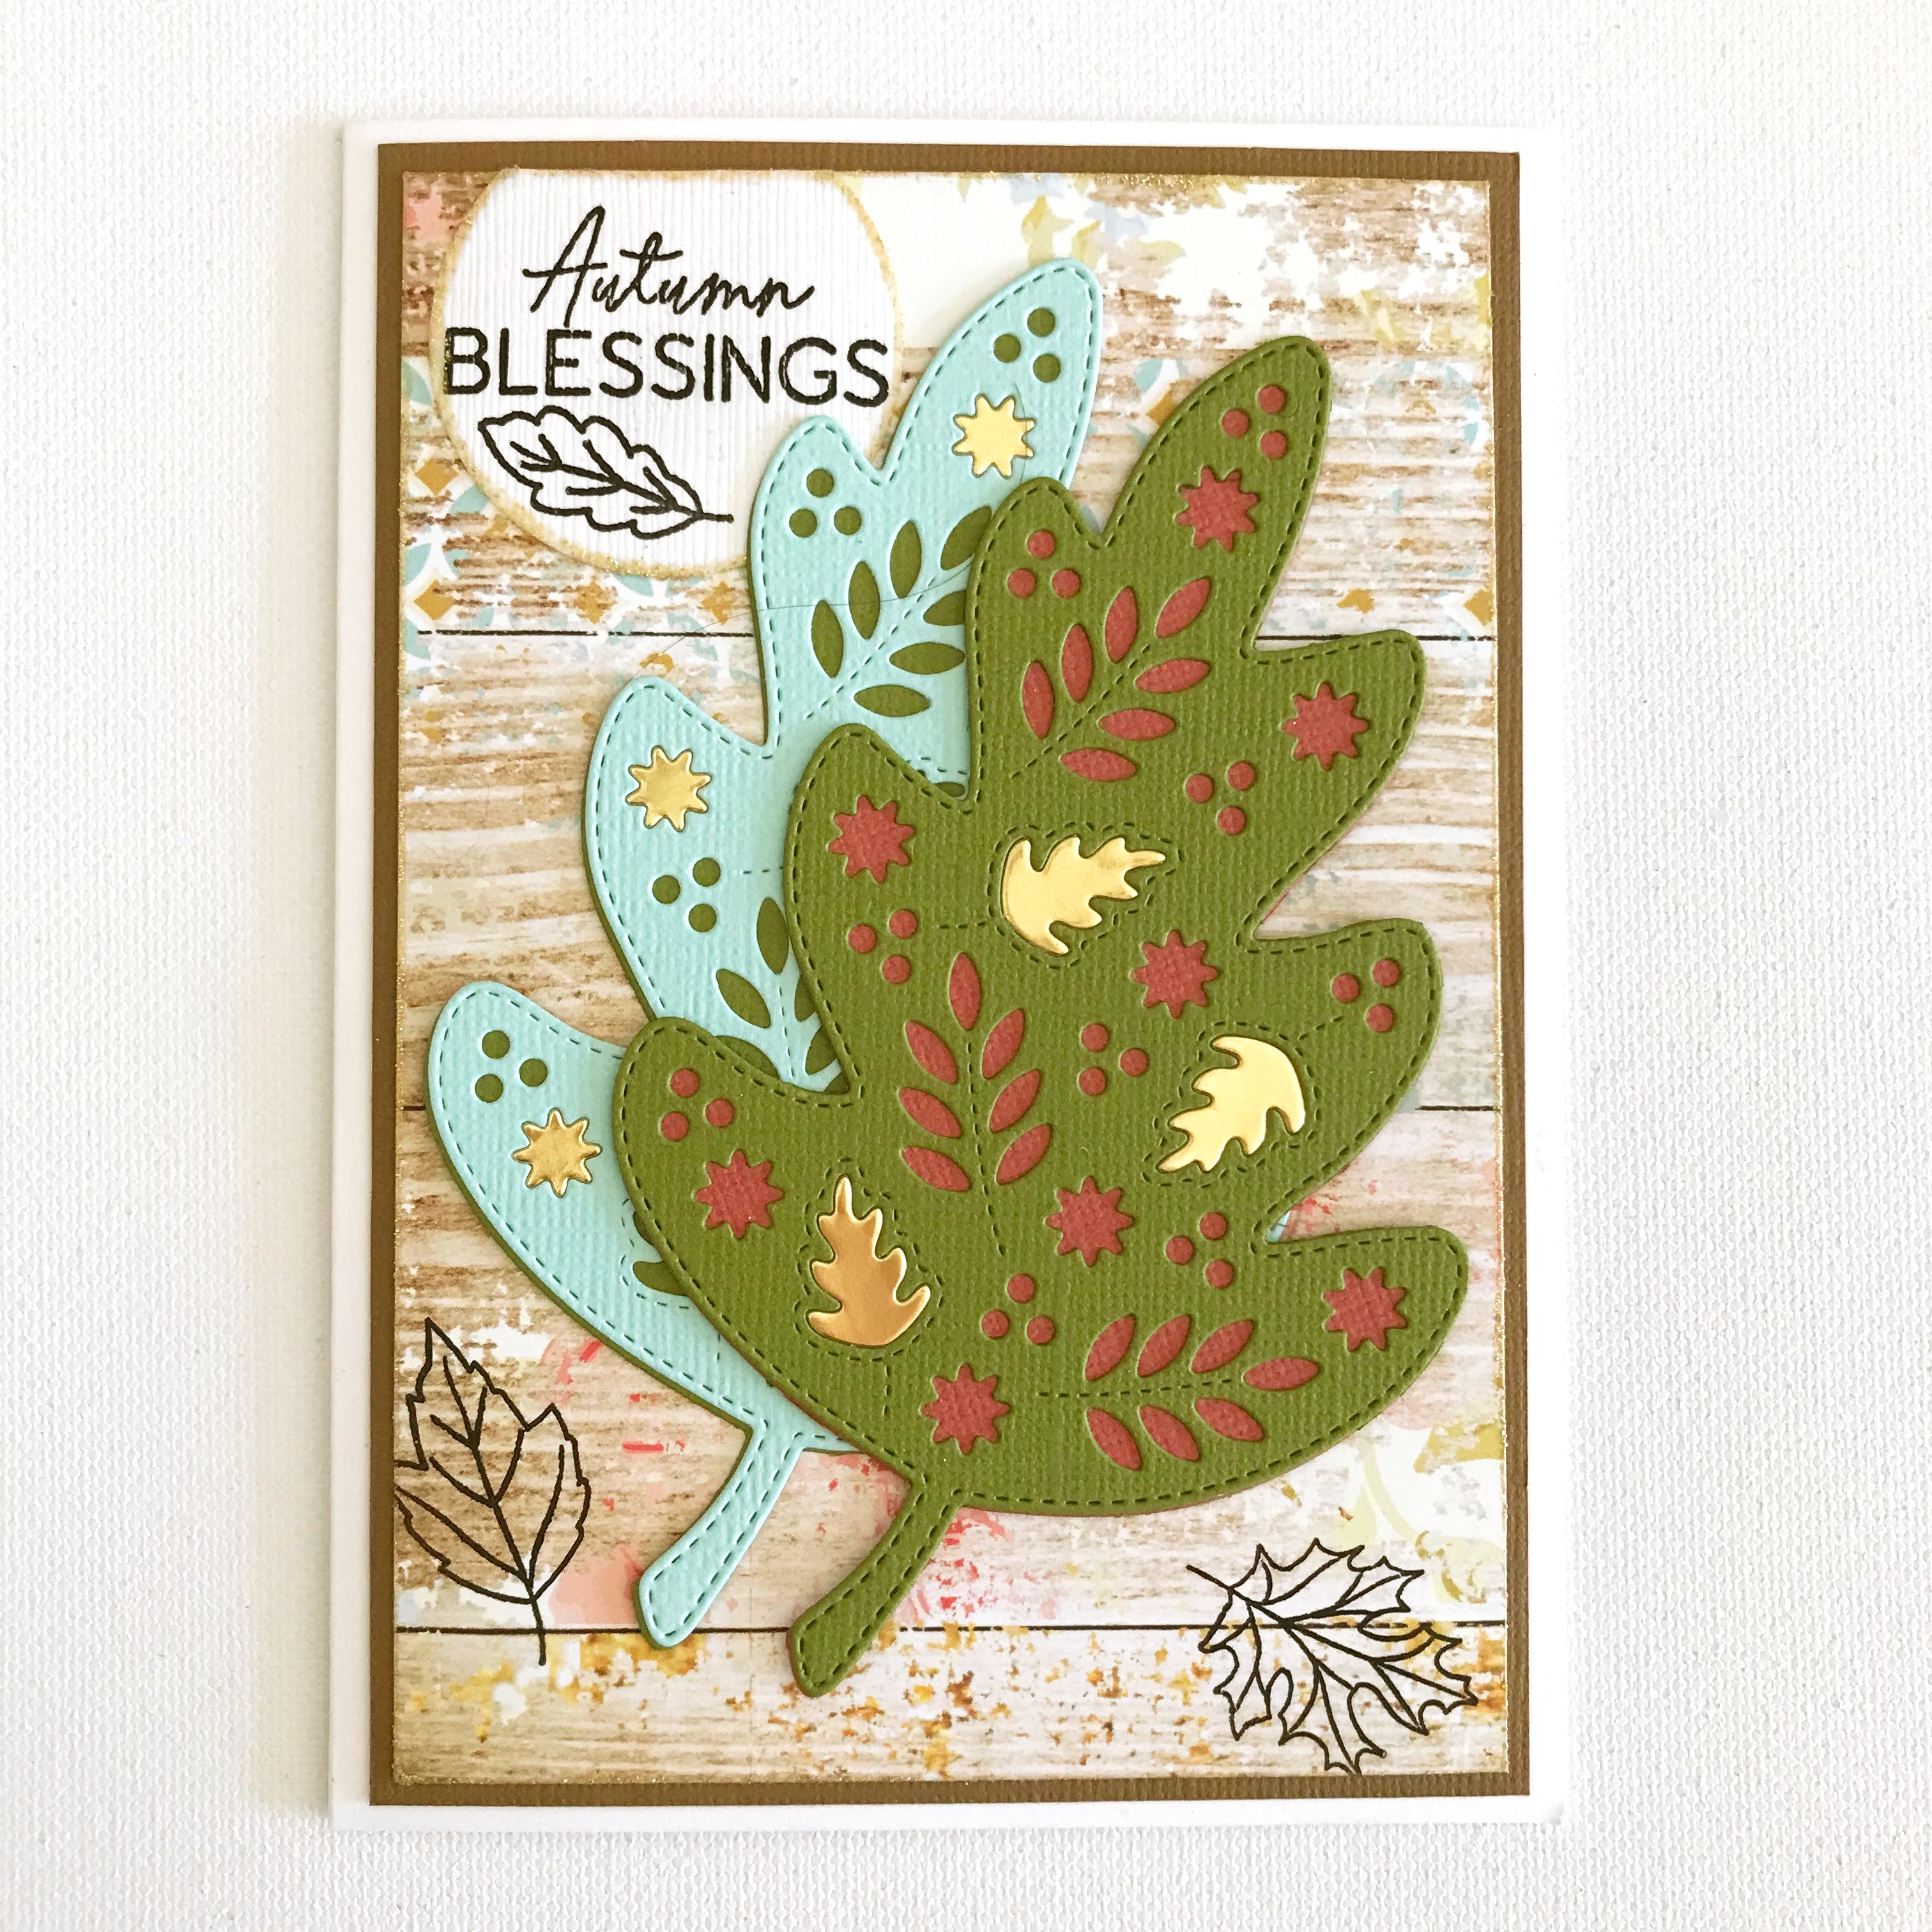
Hello friends! I'm so excited to show you this group of four 'Autumn Blessings' handmade greeting cards I recently crafted to send to my cousins. These incredible leaves were made with my Sizzix Big Shot Die Cutter, and the Concord and 9th Triple Step Autumn Leaf Dies.

Each leaf is a double layer - the bottom layer is a solid leaf and the top layer is a pattern. The bottom layer is cut from a leaf-shaped outline die and the top layer is cut from a patterned die that fits inside the leaf-shaped outline die. When glued together, the leaves become dimensional and are so colorful. The possibilities for color combinations are endless. This is a great way to use up your card stock scraps. I had fun looking through mine and creating the color combinations shown here.

Under The Plum Blossom Tree DIY: Autumn Blessings Handmade Greeting Cards, a blog post showing paper greeting cards made using a die cut machine and metal dies which are then glued onto a card base.

To make the cards, I first applied Recollections Sparkle embossing powder to a piece of Webster's Pages 'Begin Again' wood grain paper (I think it was produced around 2016) and to the white card stock circle embellishment (punched using a circle punch) using Honey Bee clear embossing ink and set them with my heat tool. (I bought my heat tool years ago but here are some options if you want one.)

I then created a card base by gluing a piece of brown card stock onto a Tonic Studio A6 card base and then glued the embossed Webster's Pages paper on top of the brown card stock. I glued each leaf pair together and then adhered onto the base, along with the white circle which I trimmed along the top. And lastly, I wanted to add a little more gold so I die cut more leaves from a piece of Lawn Fawn Metallic card stock (saved for another project) and glued some of the leaf and star-like cut outs into a few of the cut out portions of the leaves.

Under The Plum Blossom Tree DIY: Autumn Blessings Handmade Greeting Cards, a blog post showing paper greeting cards made using a die cut machine and metal dies which are then glued onto a card base.

I used black ink to stamp the 'Autumn Blessings' sentiment from the Spellbinders Fall Greetings stamp set and the three Paige Evans Garden Shoppe leaves (a Scrapbook.com exclusive freebie now gone) using my MISTI stamp tool.

Under The Plum Blossom Tree DIY: Autumn Blessings Handmade Greeting Cards, a blog post showing paper greeting cards made using a die cut machine and metal dies which are then glued onto a card base.

On the inside of the card I stamped the 'May the Season's Bounty fill your heart' sentiment from the same Spellbinders Fall Greetings stamp set, again using the MISTI stamp tool.

Under The Plum Blossom Tree DIY: Autumn Blessings Handmade Greeting Cards, a blog post showing paper greeting cards made using a die cut machine and metal dies which are then glued onto a card base.

And that's it! Which one is your favorite?

If you have any questions, let me know!

SHARE:

Sunday, October 30, 2022

Happy Halloween from Matilda

Happy Halloween from Matilda, a paper collage of a Victorian woman holding a raven and wearing a Halloween mask and surrounded by flowers, a spider and a raven flying in the background

Friends, it's the night before Halloween and my friend Matilda is stopping in to wish you a Happy Halloween!

By this time tomorrow evening, she will be sitting at a large round table with a group of strangers, each one anxious to have 'Madame Matilda' summon their dead loved ones.

They will all gather in the 'Occult Room' of Matilda's large, dark, musty Victorian house. First, she will dim all the gas-lit lamps. Then she will instruct the group of strangers to close their eyes, and when they do, she will raise her arms and commence to move them in a counter clockwise direction. She will then call out to the unkindness of ravens she keeps as her assistants and they will gather on the rooftops. They will flap their wings and cackle loudly. The winds will blow and the gas-lit lamps will flicker, and Matilda, now in a trance, will beckon the dead as they float and rise above the table. And the strangers, terrified, will call out their grief loudly as they learn the secrets of their dead ancestors - secrets they were never meant to know... 

The strangers will beg Matilda to cease her summoning. Matilda, still in a trance, cannot hear their pleas. Suddenly the ravens have mysteriously gotten inside the house and are flying inside the room with the dead ancestors, croaking, cackling and hissing at the strangers! Matilda, laughs maniacally, picks up her wand and thrusts it into the air. A bolt of lightening crashes into the house and the light, now bright and blinding, flashes! Suddenly all the dead ancestors vaporize and the table is littered with shiny black rocks that look like ravens.

The next morning, Matilda is walking slowly through her garden, tending to her flowers, plants and trees. A stranger walks by and lets out a loud croaking, cackling noise. Matilda pretends not to notice and the stranger croaks and cackles even louder. Matilda raises her arm, then brings it down quickly, pointing to the ground. The stranger, animated and lively in their demand that Matilda look their way, suddenly becomes mute.

Matilda smiles, picks a bouquet of orange chrysanthemums, walks into her house, and shuts the door.

SHARE:

Wednesday, October 26, 2022

The Big Send with Vote Forward

The Big Send with Vote Forward graphic which encourages volunteers to write letters to registered voters encouraging them to vote in the upcoming election.

Friends, an important election is coming up here in the United States and I would like to invite my fellow cititzens to join me in writing non-partisan letters to registered voters.

It's very easy.  Just go to VoteForward.org, create an account, 'adopt' voters to write your letters to and start writing. The guideline is easy - write a short sentence or two telling the recipient why you vote.

Here's a few examples of what I am writing in my letters:

(I vote because) "I want to live in a society where our collective voices are heard, honored, and respected."

(I vote because) "I want to live in a society where the people can elect officials that will represent us in our pursuit of life, liberty and happiness."

(I vote because) "democracy protects the people from potential harm and its goals are to move the country towards equality and freedom for all."

You can write as few as five letters or as many as you can. 'The Big Send', or date the letters will be mailed, is October 29th.

I hope you will consider participating in helping to boost voter turnout for 2022!

SHARE:

Sunday, October 9, 2022

DIY: Decoupage Chinoiserie Mini Pumpkins

Under the Plum Blossom Tree, DIY: Decoupage Chinoiserie Mini Pumpkins, a blog post lesson in how to create autumn season faux decoupage pumpkins to use as holiday decorations.

Hello friends! October is here and it's time to get crafty with some faux mini pumpkins! As one who enjoys making scrapbook pages, decoupage is another fun way to be creative with paper. And while I'm new to this wildly popular activity, despite some challenges, I managed to come up with the three designs shown.

It's actually very easy, just tedious and messy.

So let's gather our supplies:

Under the Plum Blossom Tree, DIY: Decoupage Chinoiserie Mini Pumpkins, a blog post lesson in how to create autumn season faux decoupage pumpkins to use as holiday decorations.

You will need:

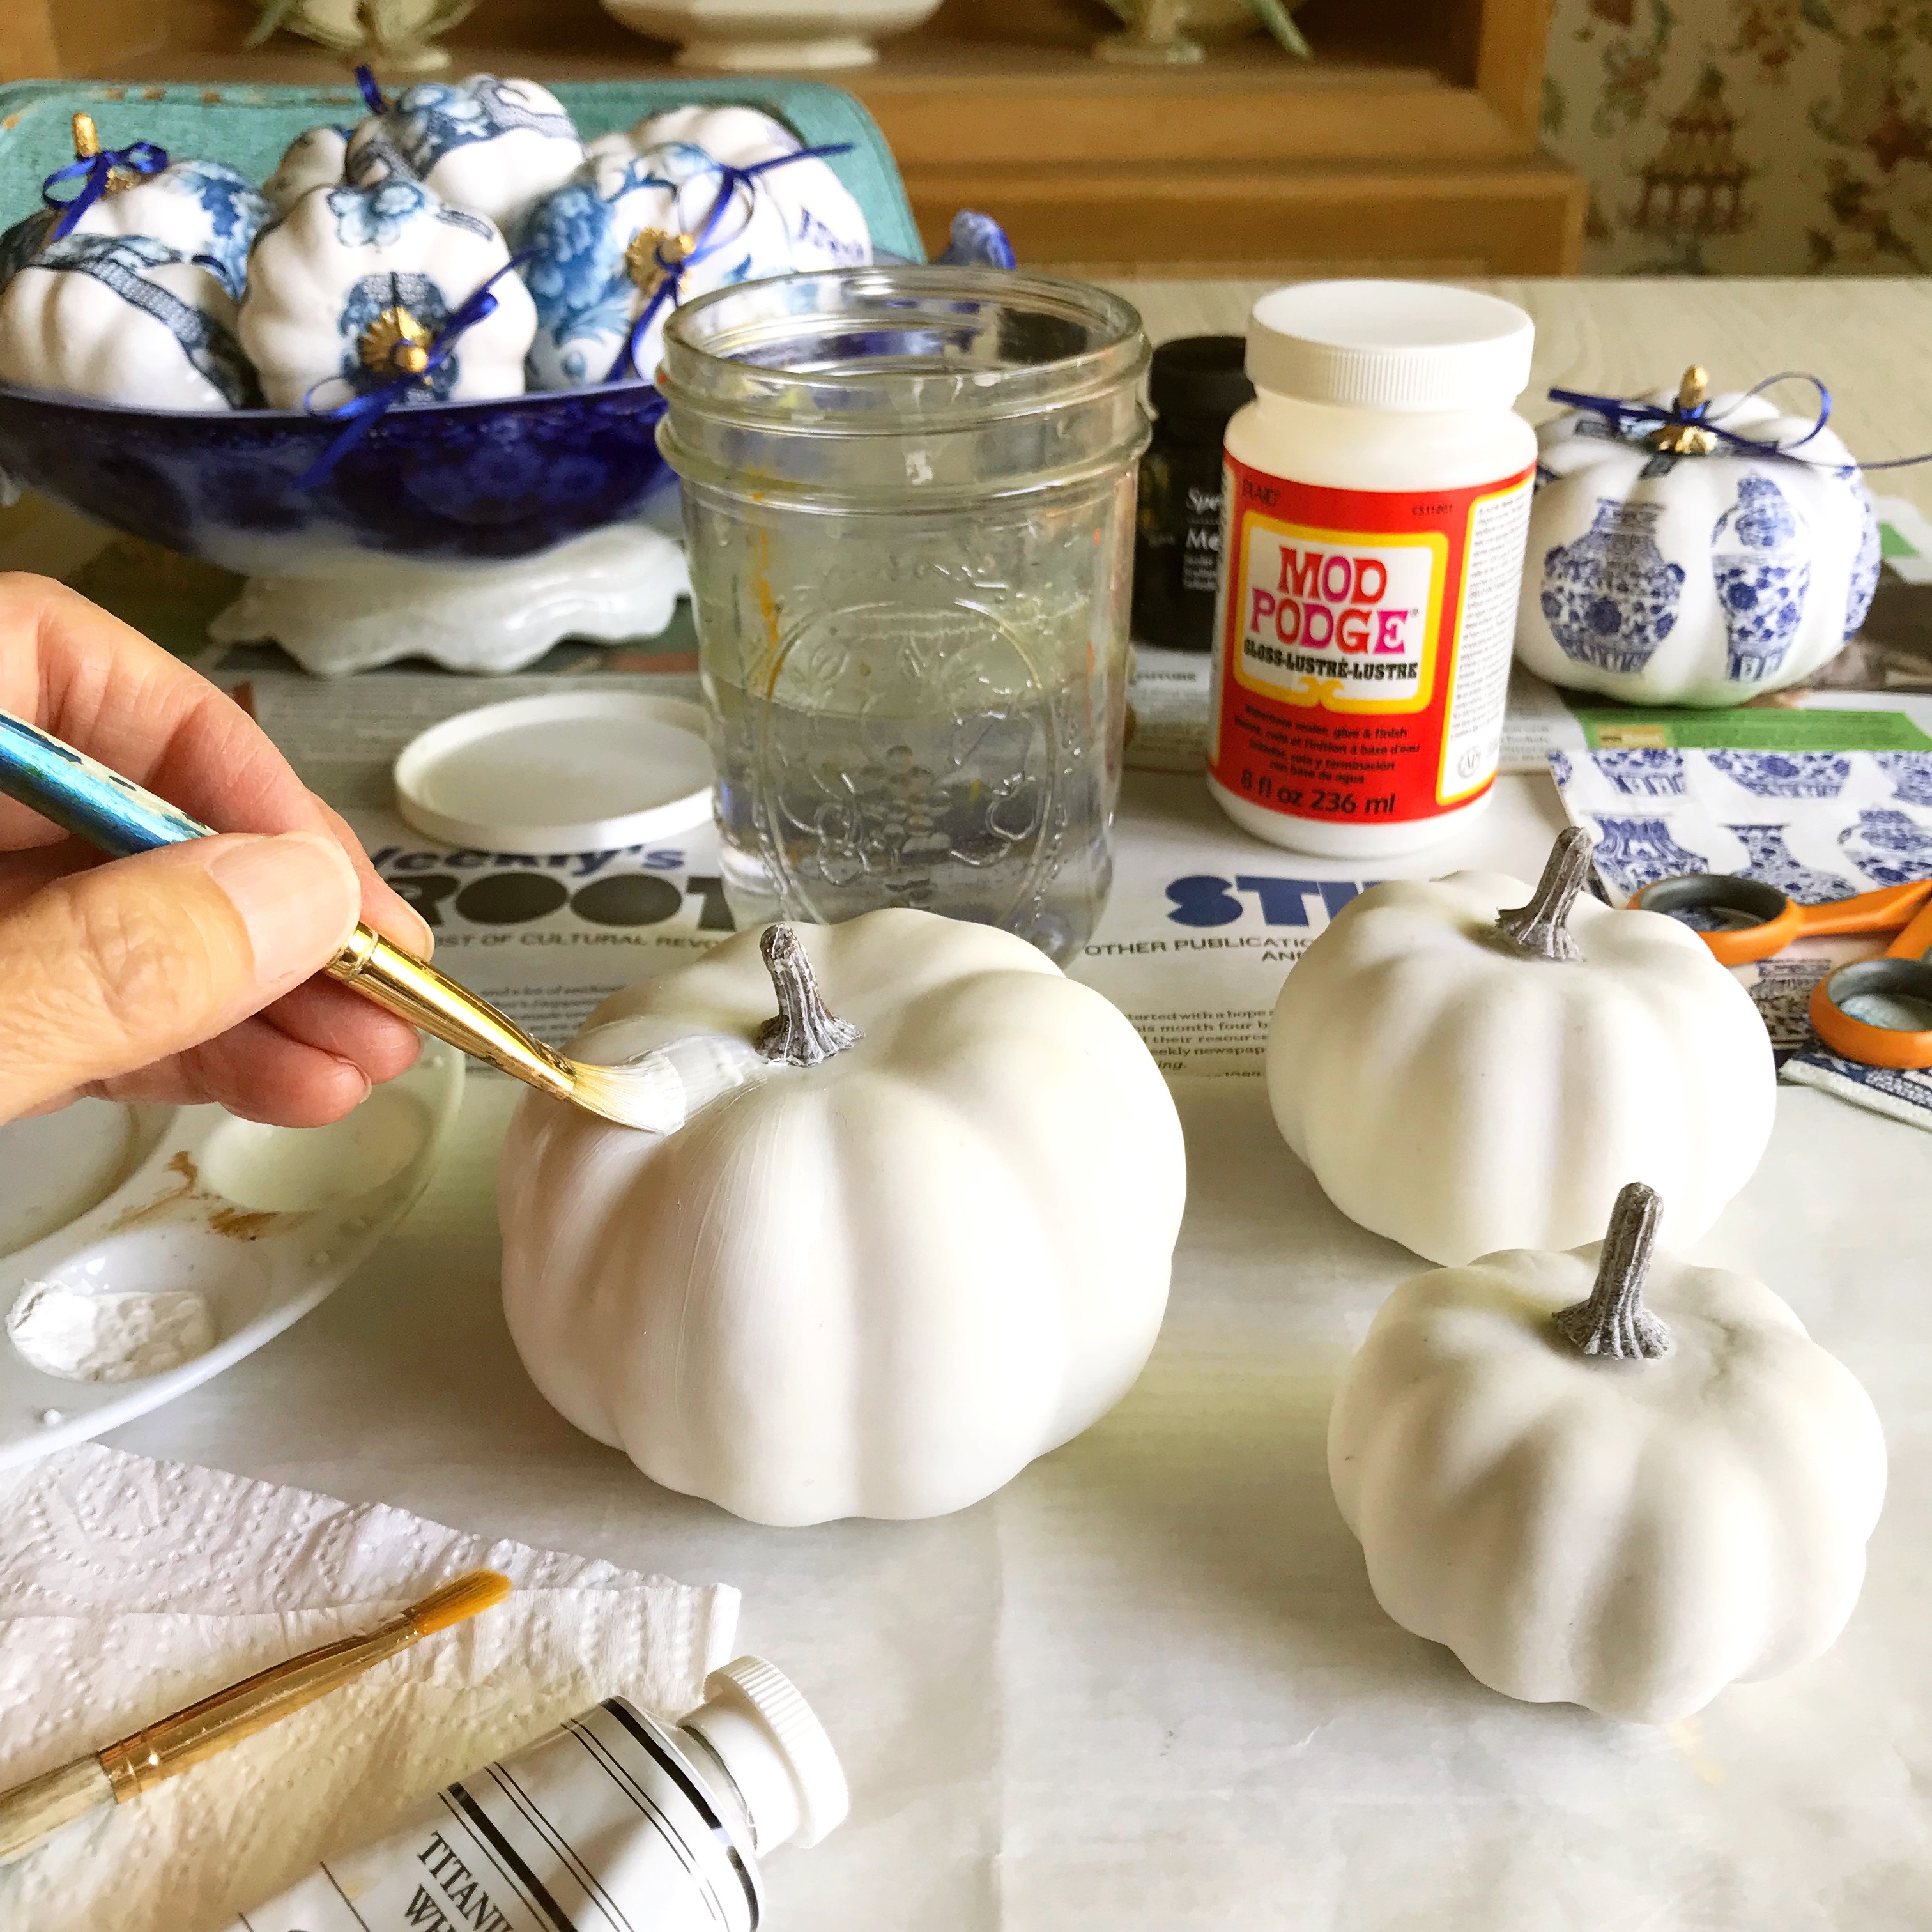
Step 1 - Apply white acrylic paint to the surface of each of your pumpkins. The paint will provide 'grip' for your napkins to adhere to. I used white because my pumpkins have a lot of negative space showing. You might consider the colors in your napkins as to what your choice of paint color would be.

Under the Plum Blossom Tree, DIY: Decoupage Chinoiserie Mini Pumpkins, a blog post lesson in how to create autumn season faux decoupage pumpkins to use as holiday decorations.

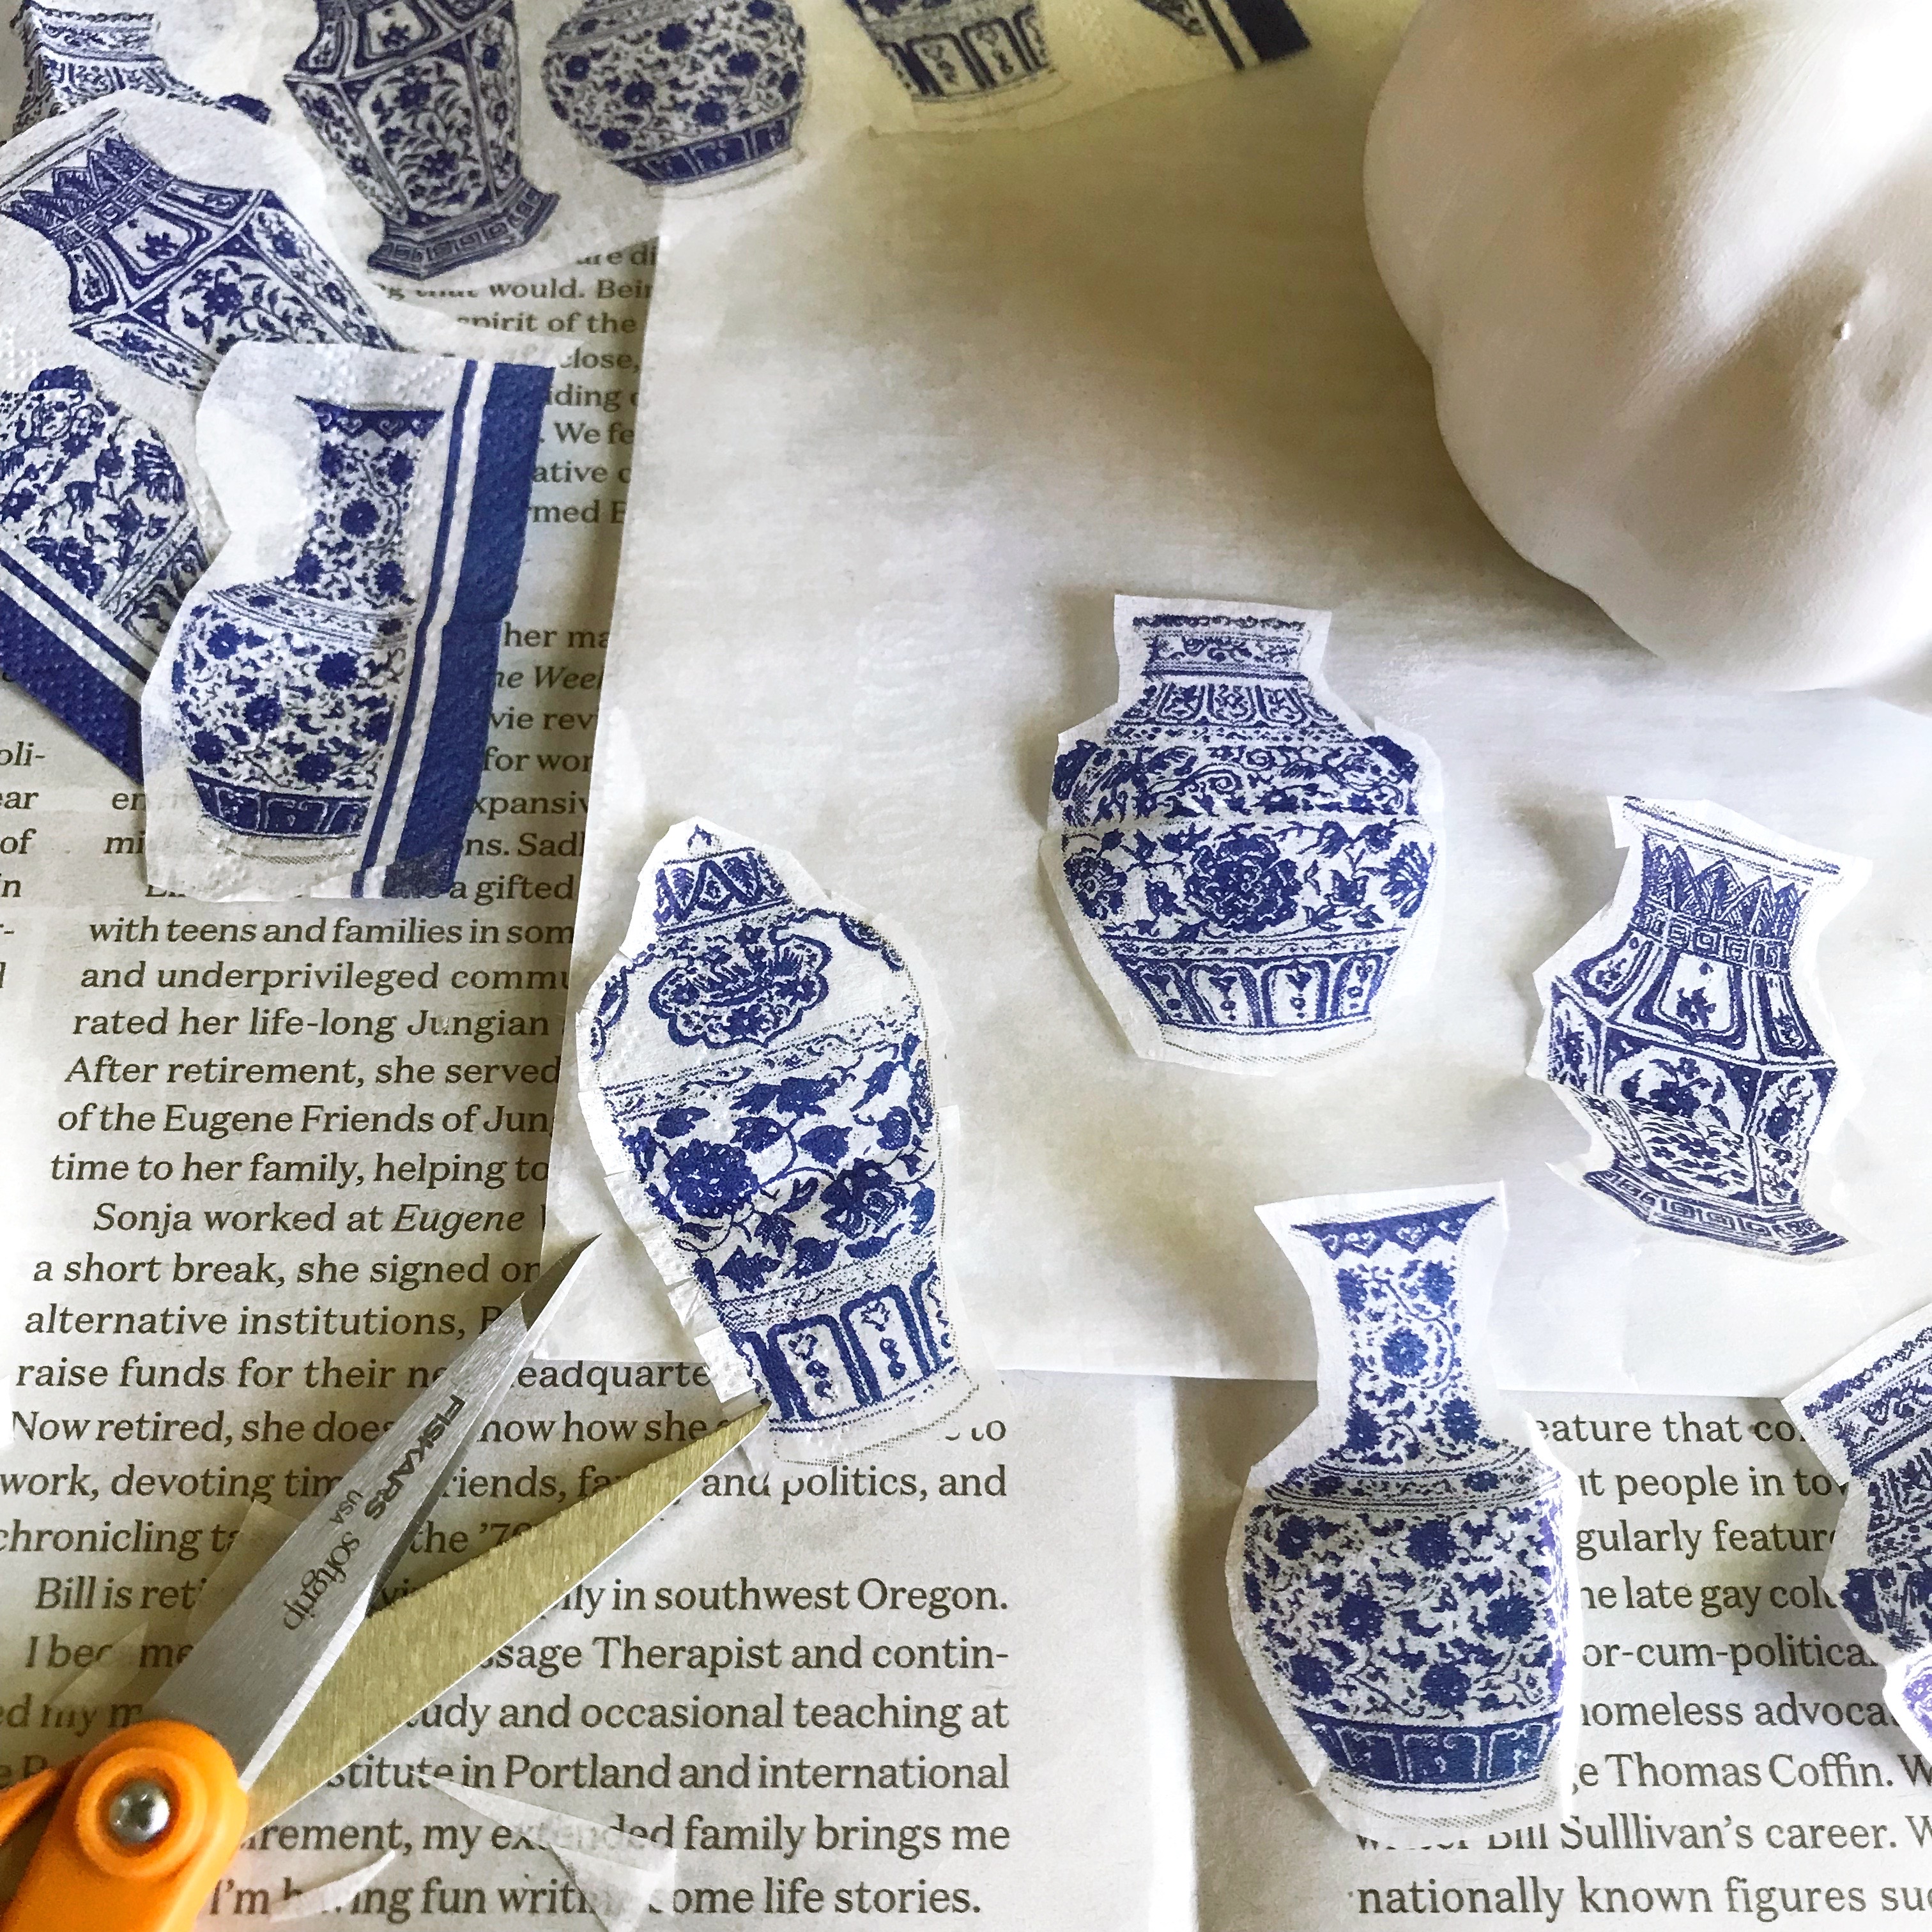
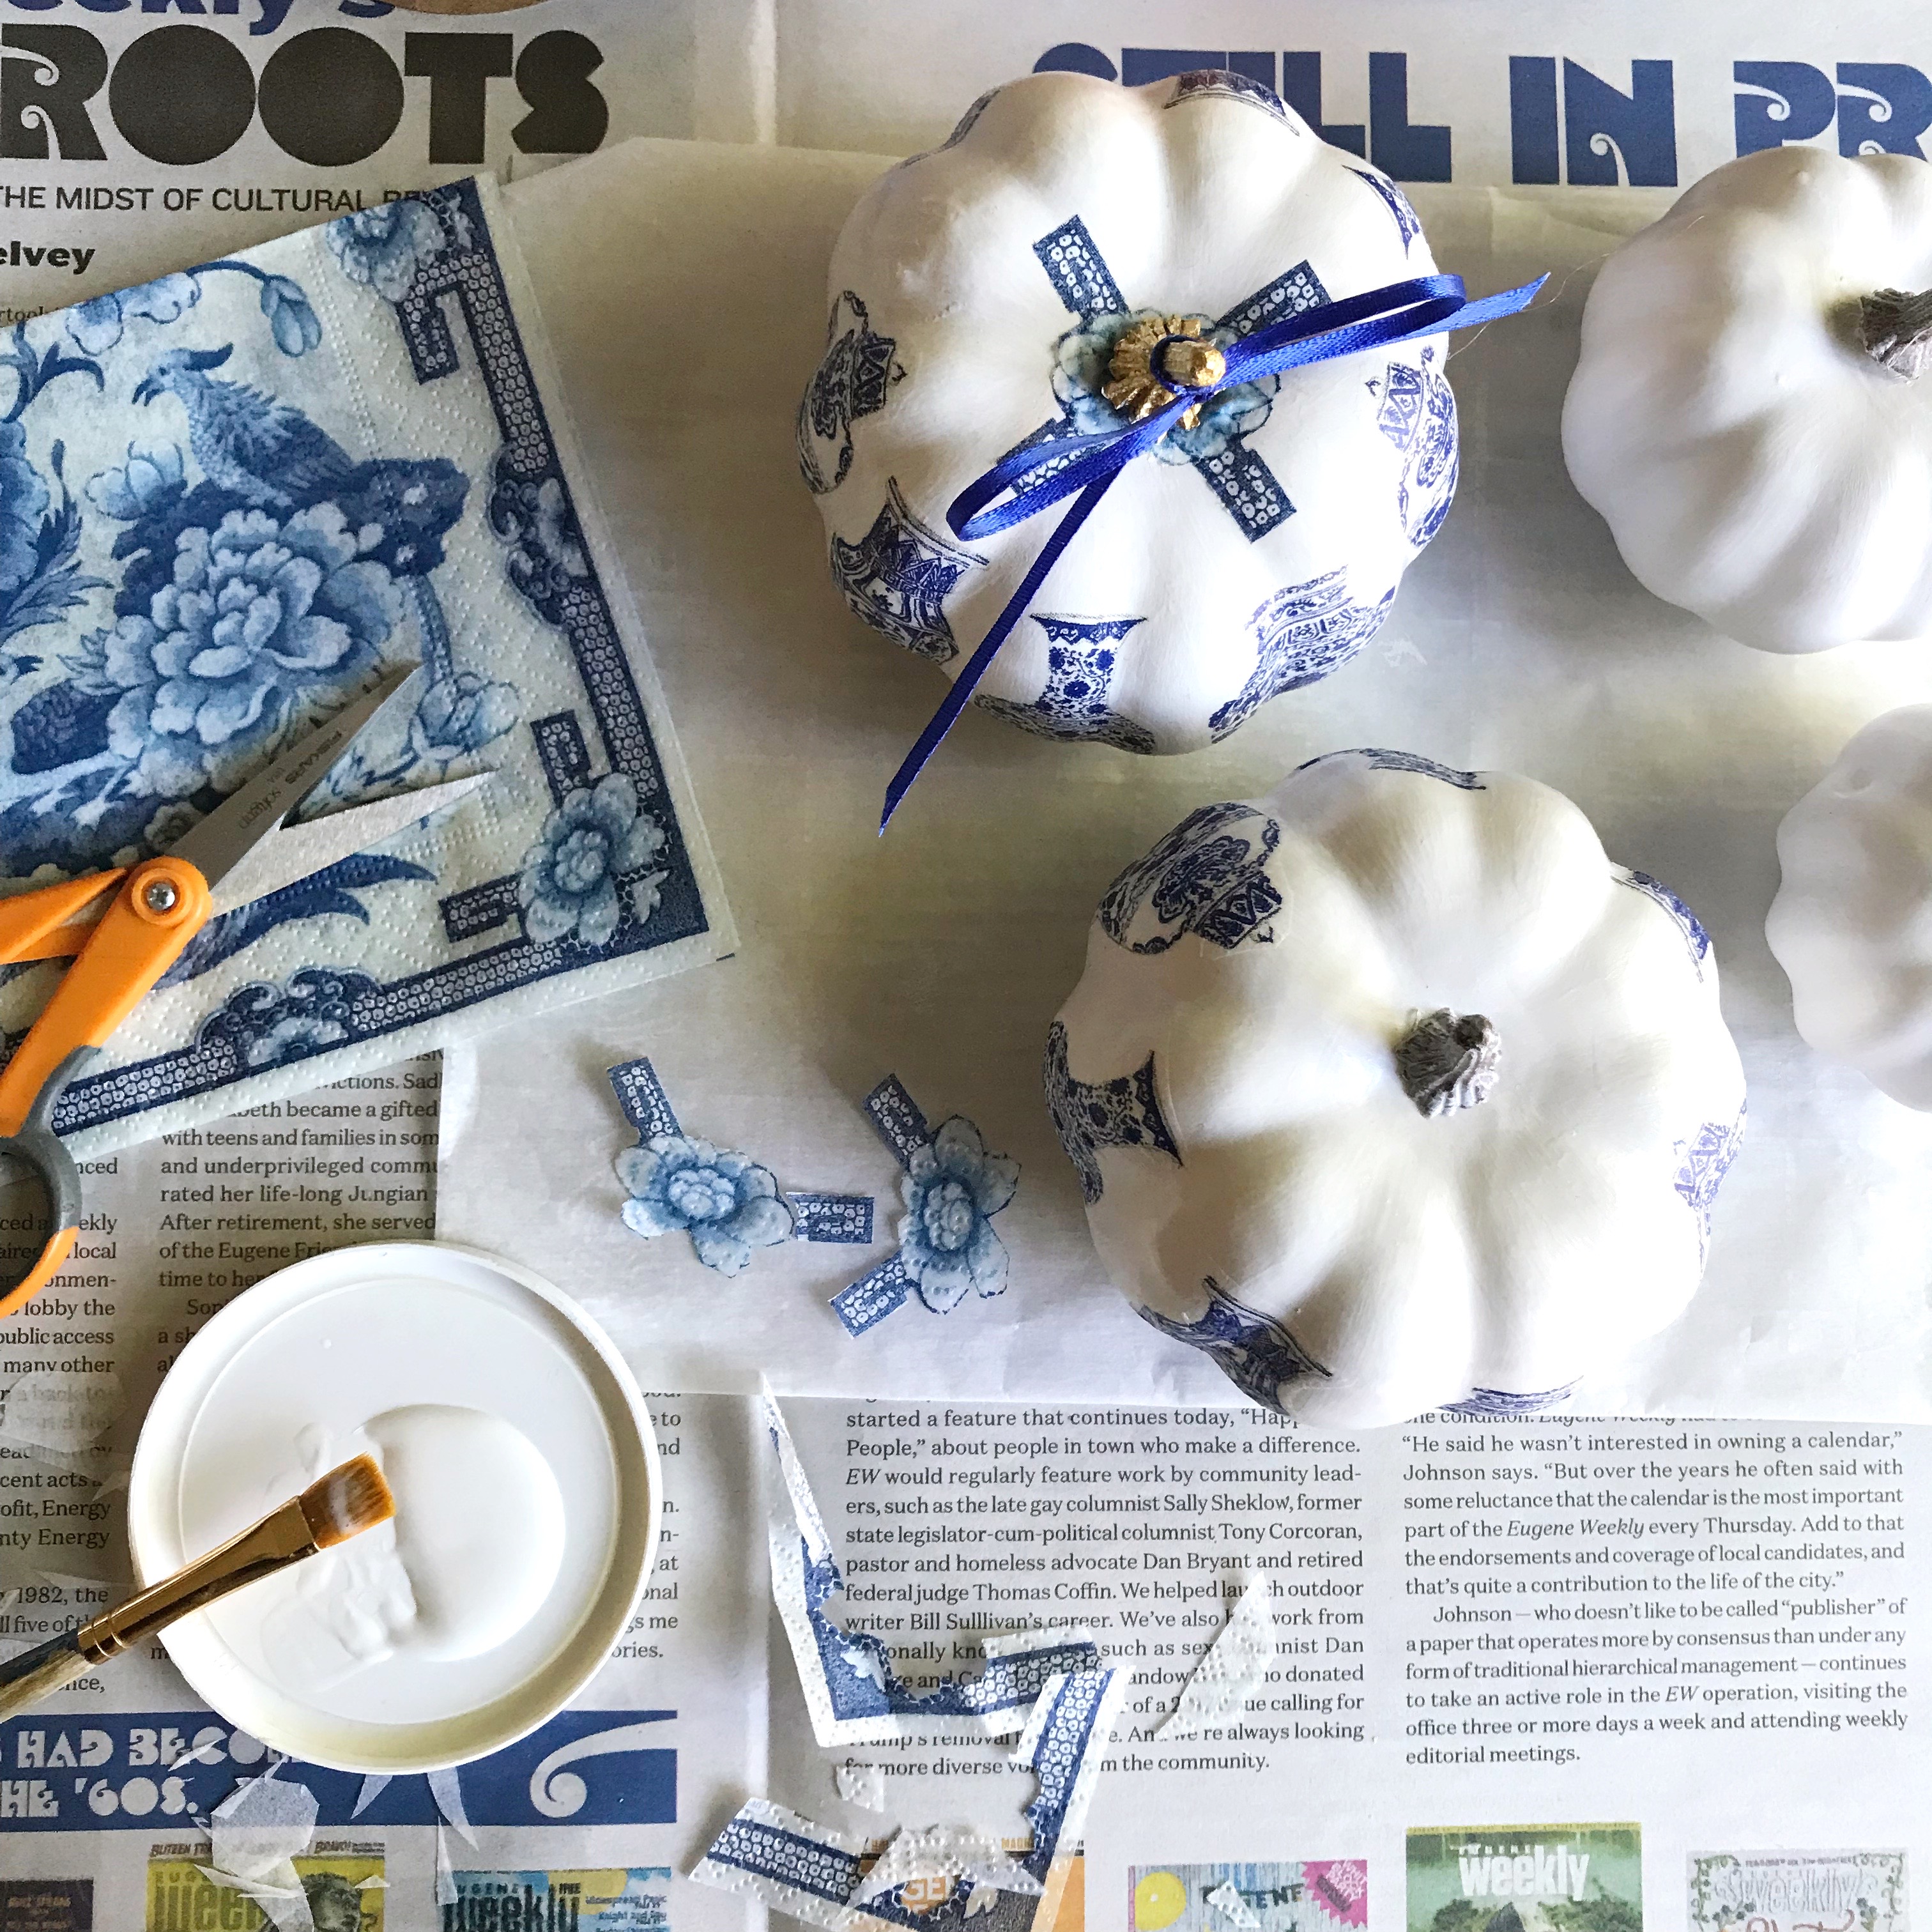
Step 2 - Separate the printed layer of your napkin from the other one or two layers. You only need the printed layer. It will be very thin.

Under the Plum Blossom Tree, DIY: Decoupage Chinoiserie Mini Pumpkins, a blog post lesson in how to create autumn season faux decoupage pumpkins to use as holiday decorations.

Step 3 - Fussy cut your desired elements from your napkin. This is not an exact process - you don't have to cut on the lines and your cuts do not have to be perfect.

Under the Plum Blossom Tree, DIY: Decoupage Chinoiserie Mini Pumpkins, a blog post lesson in how to create autumn season faux decoupage pumpkins to use as holiday decorations.

It's a good idea to cut little snips around the perimeter of your cut-out shape. It helps the image ease onto the round pumpkin better.

Under the Plum Blossom Tree, DIY: Decoupage Chinoiserie Mini Pumpkins, a blog post lesson in how to create autumn season faux decoupage pumpkins to use as holiday decorations.

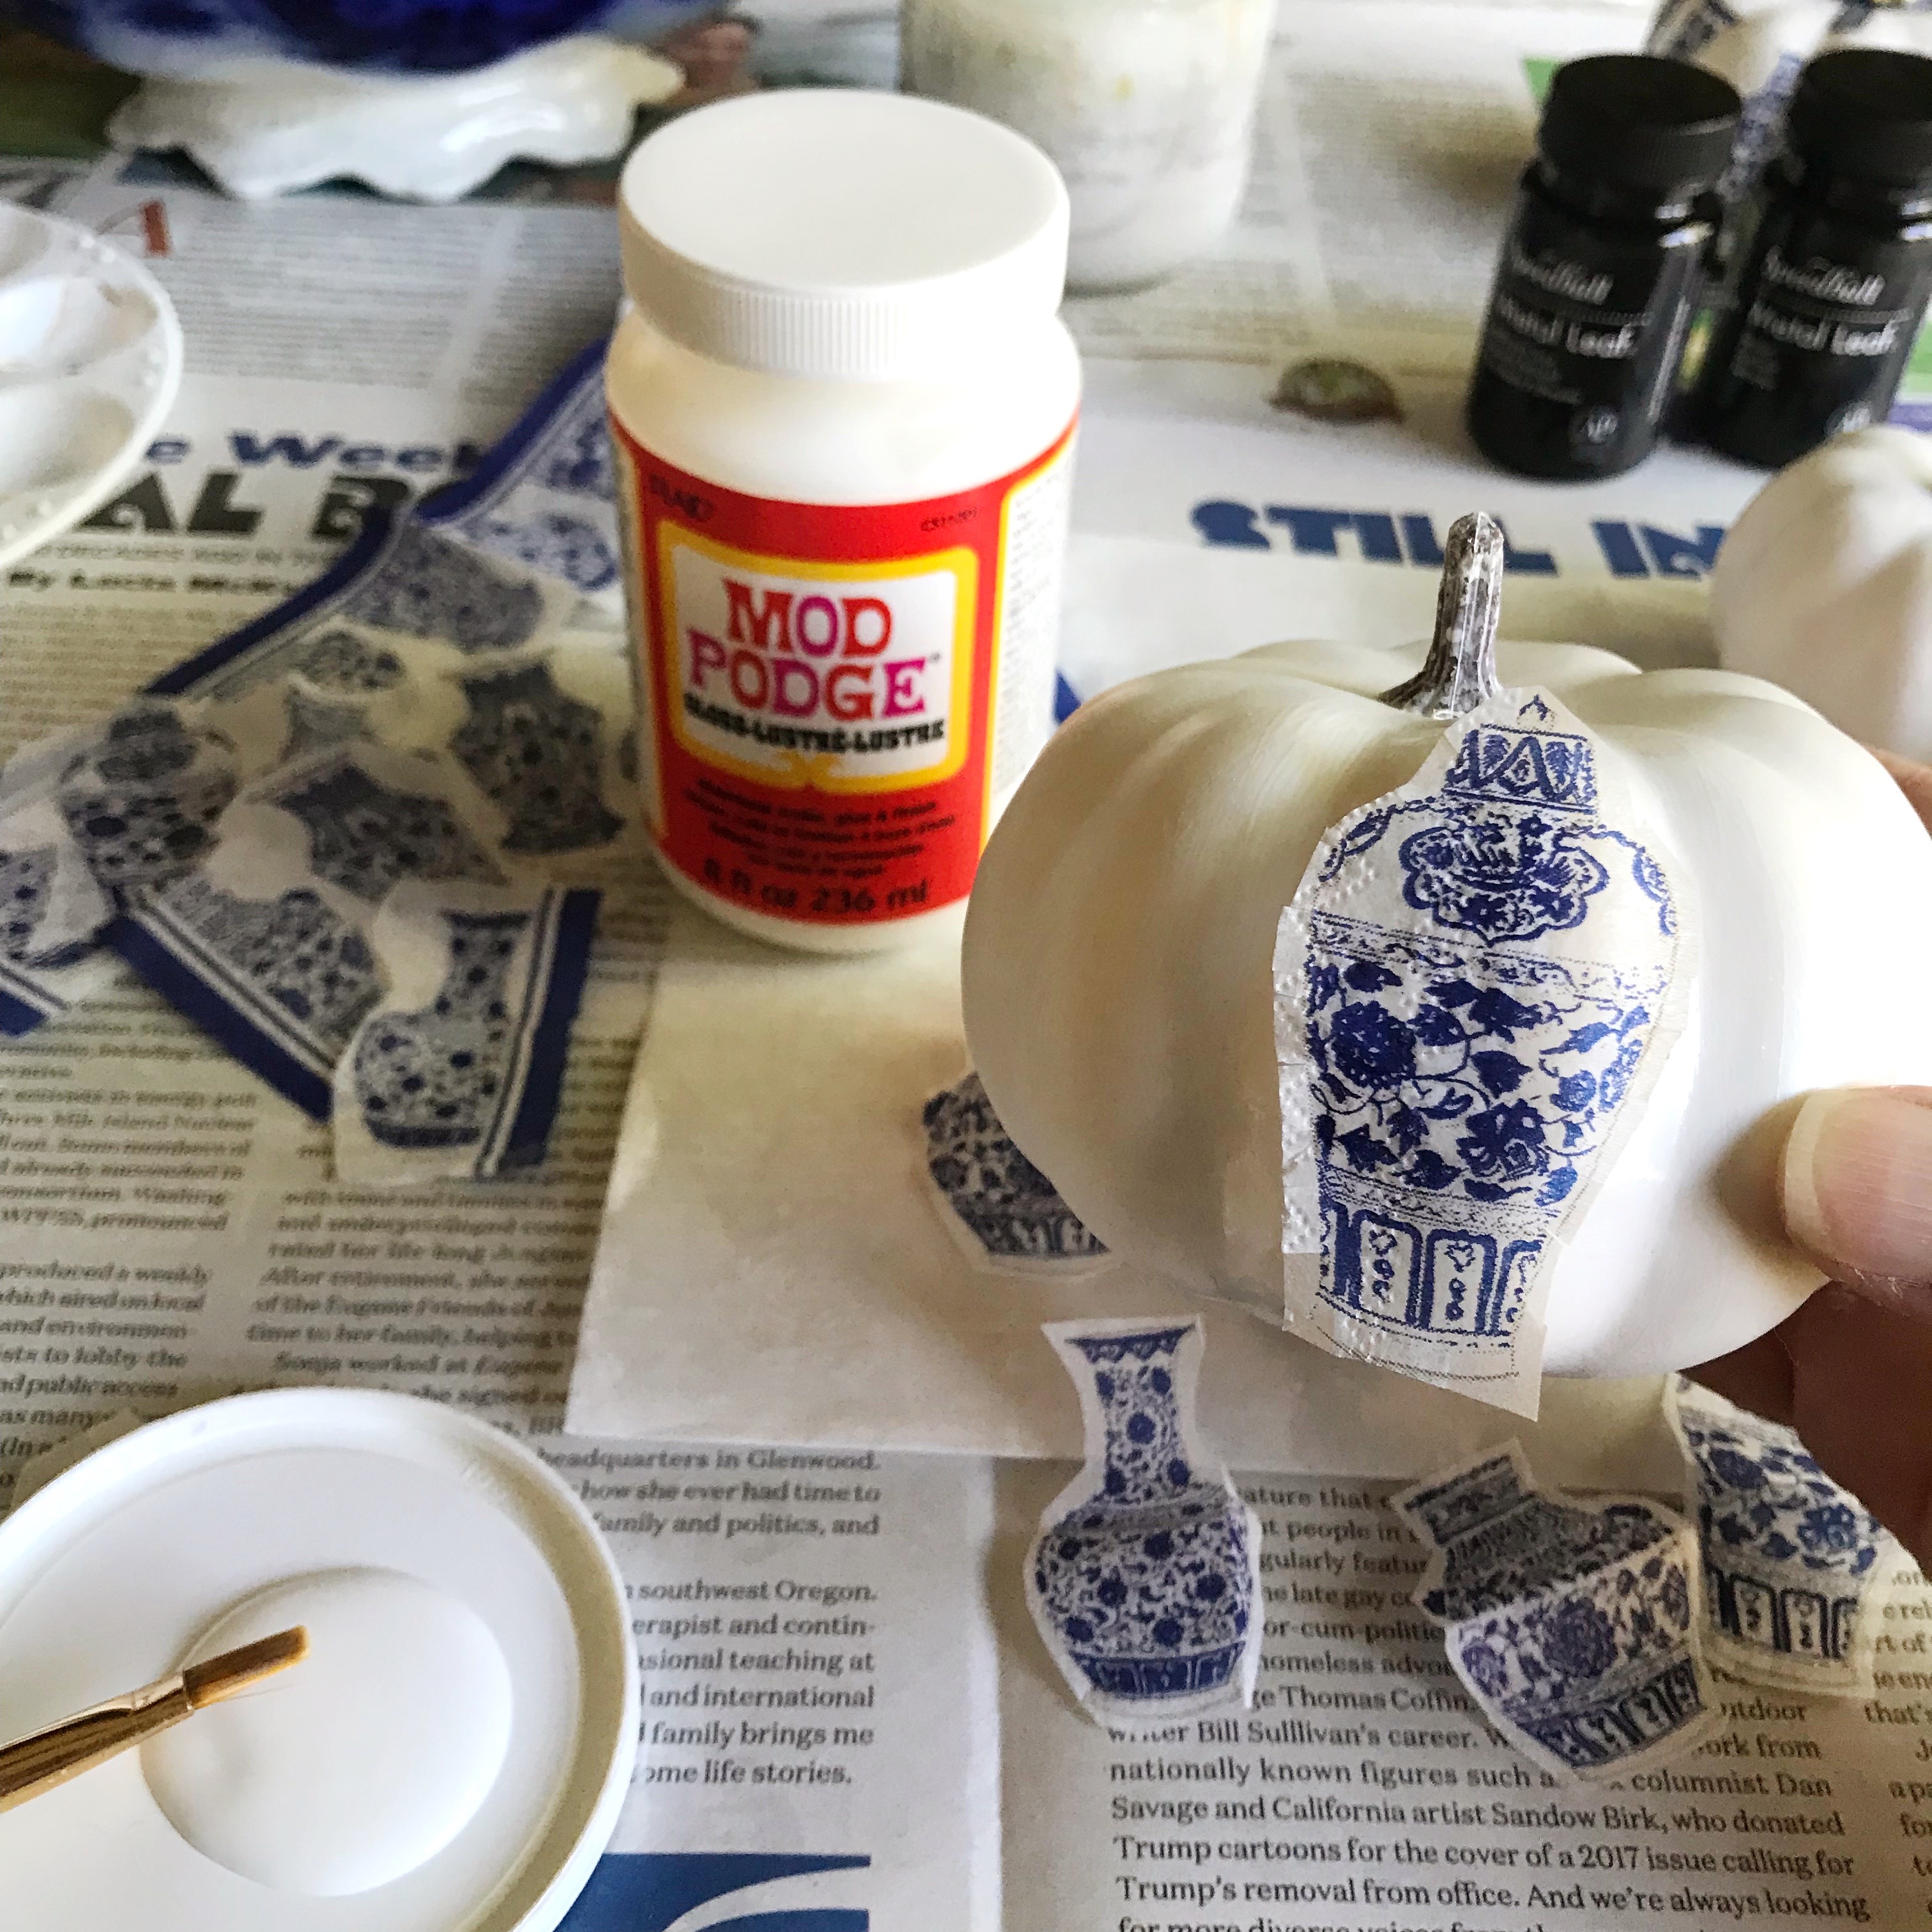
Step 4 - Apply a small amount of Mod Podge to your pumpkin in the area where you want to adhere your image. Lightly tack your image to the wet medium and adjust as needed.

Under the Plum Blossom Tree, DIY: Decoupage Chinoiserie Mini Pumpkins, a blog post lesson in how to create autumn season faux decoupage pumpkins to use as holiday decorations.

Apply a thin coat of Mod Podge to the remaining areas behind your tacked image. Now you'll want to work quickly using a generous amount of Mod Podge on your brush to apply the medium over the top of your image using light pressure and working from the middle (where you tacked the image) outward. Keep your brush wet with the medium and gently 'push' the paper into place. Be careful because the more wet your paper becomes the easier it will tear. Don't worry about the wrinkles - they will take care of themselves. Once your image is adhered, use your brush to gently smooth the image to the surface. Again, make sure your brush is wet and use light strokes. Repeat for the remainder of your cut-outs.

Under the Plum Blossom Tree, DIY: Decoupage Chinoiserie Mini Pumpkins, a blog post lesson in how to create autumn season faux decoupage pumpkins to use as holiday decorations.

Here's how I cut my napkins to make the other two pumpkin designs:

Under the Plum Blossom Tree, DIY: Decoupage Chinoiserie Mini Pumpkins, a blog post lesson in how to create autumn season faux decoupage pumpkins to use as holiday decorations.

And here are a couple of ideas I had for embellishing the tops of two of the pumpkins:

Under the Plum Blossom Tree, DIY: Decoupage Chinoiserie Mini Pumpkins, a blog post lesson in how to create autumn season faux decoupage pumpkins to use as holiday decorations.

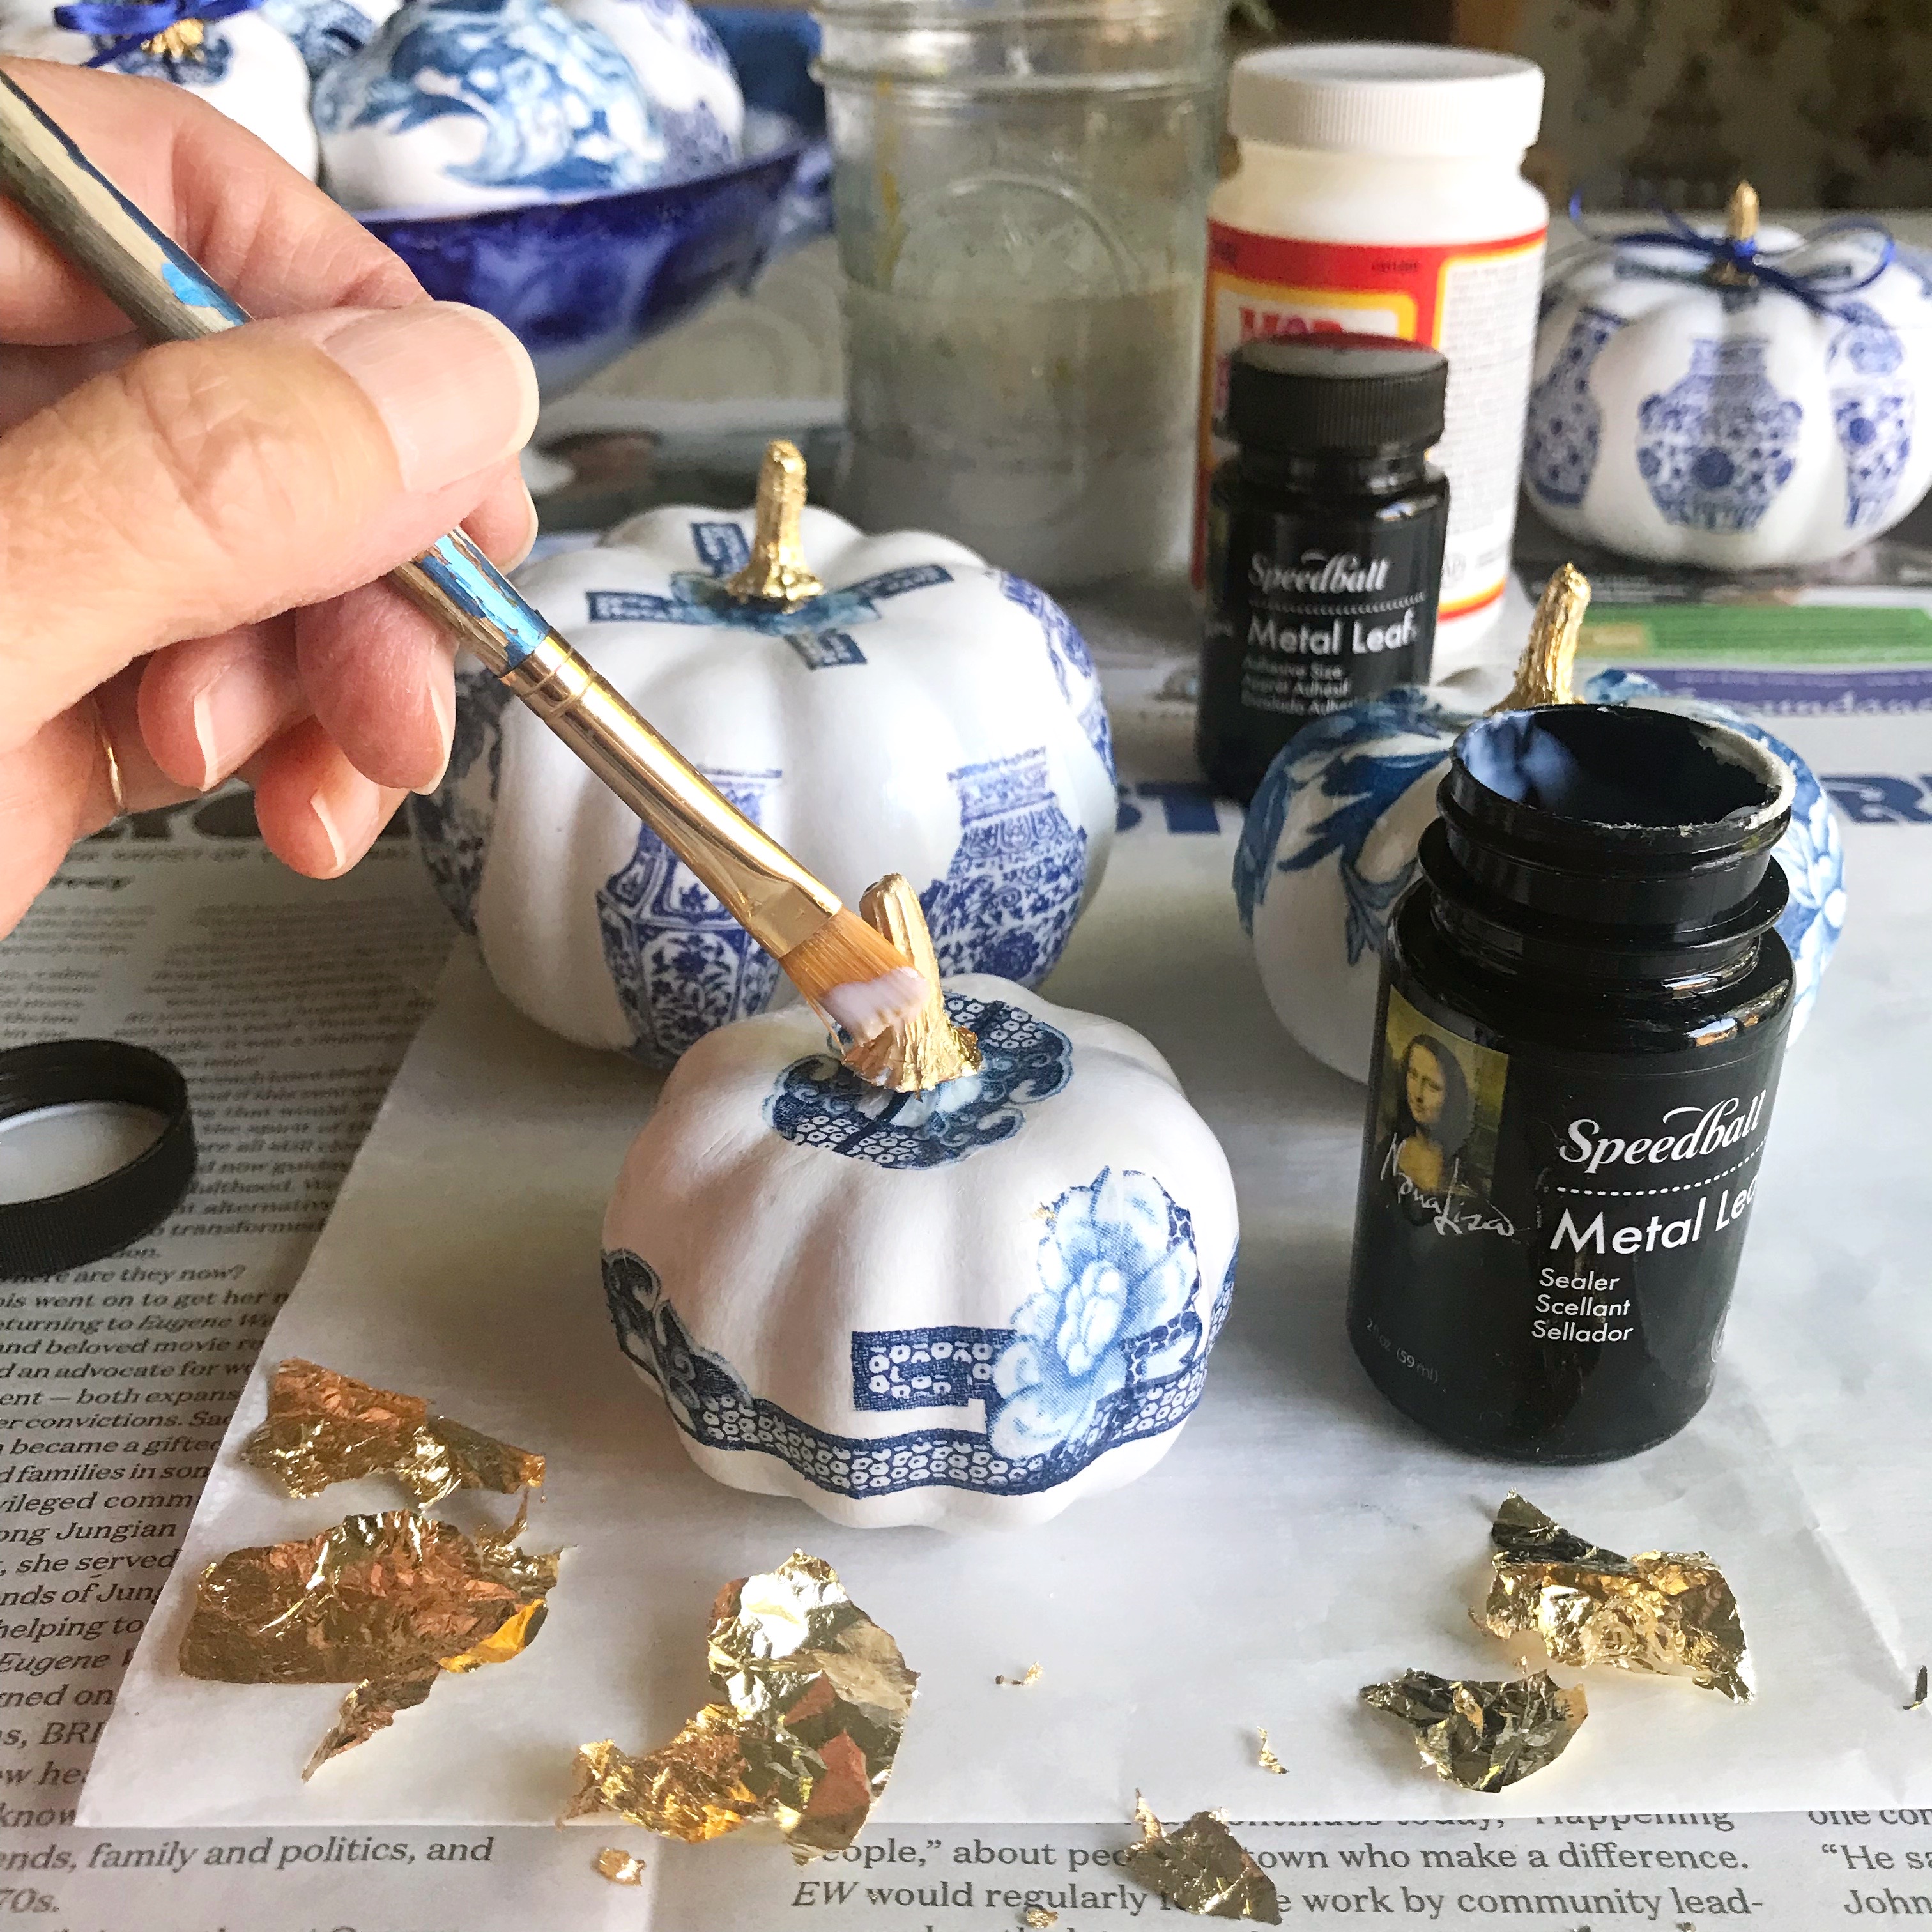
Step 5 - The last step is applying the gold leaf to the stems of the pumpkins. The gold leaf kit has three parts - the adhesive 'size', the metal leaf (thin sheets of metal) and the sealer. (Tip: pull the stems of your pumpkins up about 1/4" so there is a gap - this will make applying the gold leaf easier.) First, apply the adhesive size with a paint brush. The size is very watery so use caution when dipping your brush into it. Be sure your brush goes into the crevices of the pumpkin stem. Let the size dry to a tacky consistency.

Under the Plum Blossom Tree, DIY: Decoupage Chinoiserie Mini Pumpkins, a blog post lesson in how to create autumn season faux decoupage pumpkins to use as holiday decorations.

After the size becomes tacky, cut a piece of the gold leaf. It should be larger than the surface area that you want to cover. Hold the gold leaf up to your pumpkin stem and use a dry paintbrush to gently push the leaf onto the stem. When you see the leaf is adhered to the stem, gently work the leaf into the crevices with your brush.

Under the Plum Blossom Tree, DIY: Decoupage Chinoiserie Mini Pumpkins, a blog post lesson in how to create autumn season faux decoupage pumpkins to use as holiday decorations.

Push the leaf with your brush so that it goes under the stem (see tip above). Gently work your way around the stem with your brush until the leaf is adhered to all the tacky areas. As you cover the size, the still dry parts of the leaf will begin to fall away.

Under the Plum Blossom Tree, DIY: Decoupage Chinoiserie Mini Pumpkins, a blog post lesson in how to create autumn season faux decoupage pumpkins to use as holiday decorations.

And lastly, apply the sealer to the stems with a paintbrush and let dry completely. Now you can push your stems back down onto the surface of your pumpkins.

Under the Plum Blossom Tree, DIY: Decoupage Chinoiserie Mini Pumpkins, a blog post lesson in how to create autumn season faux decoupage pumpkins to use as holiday decorations.

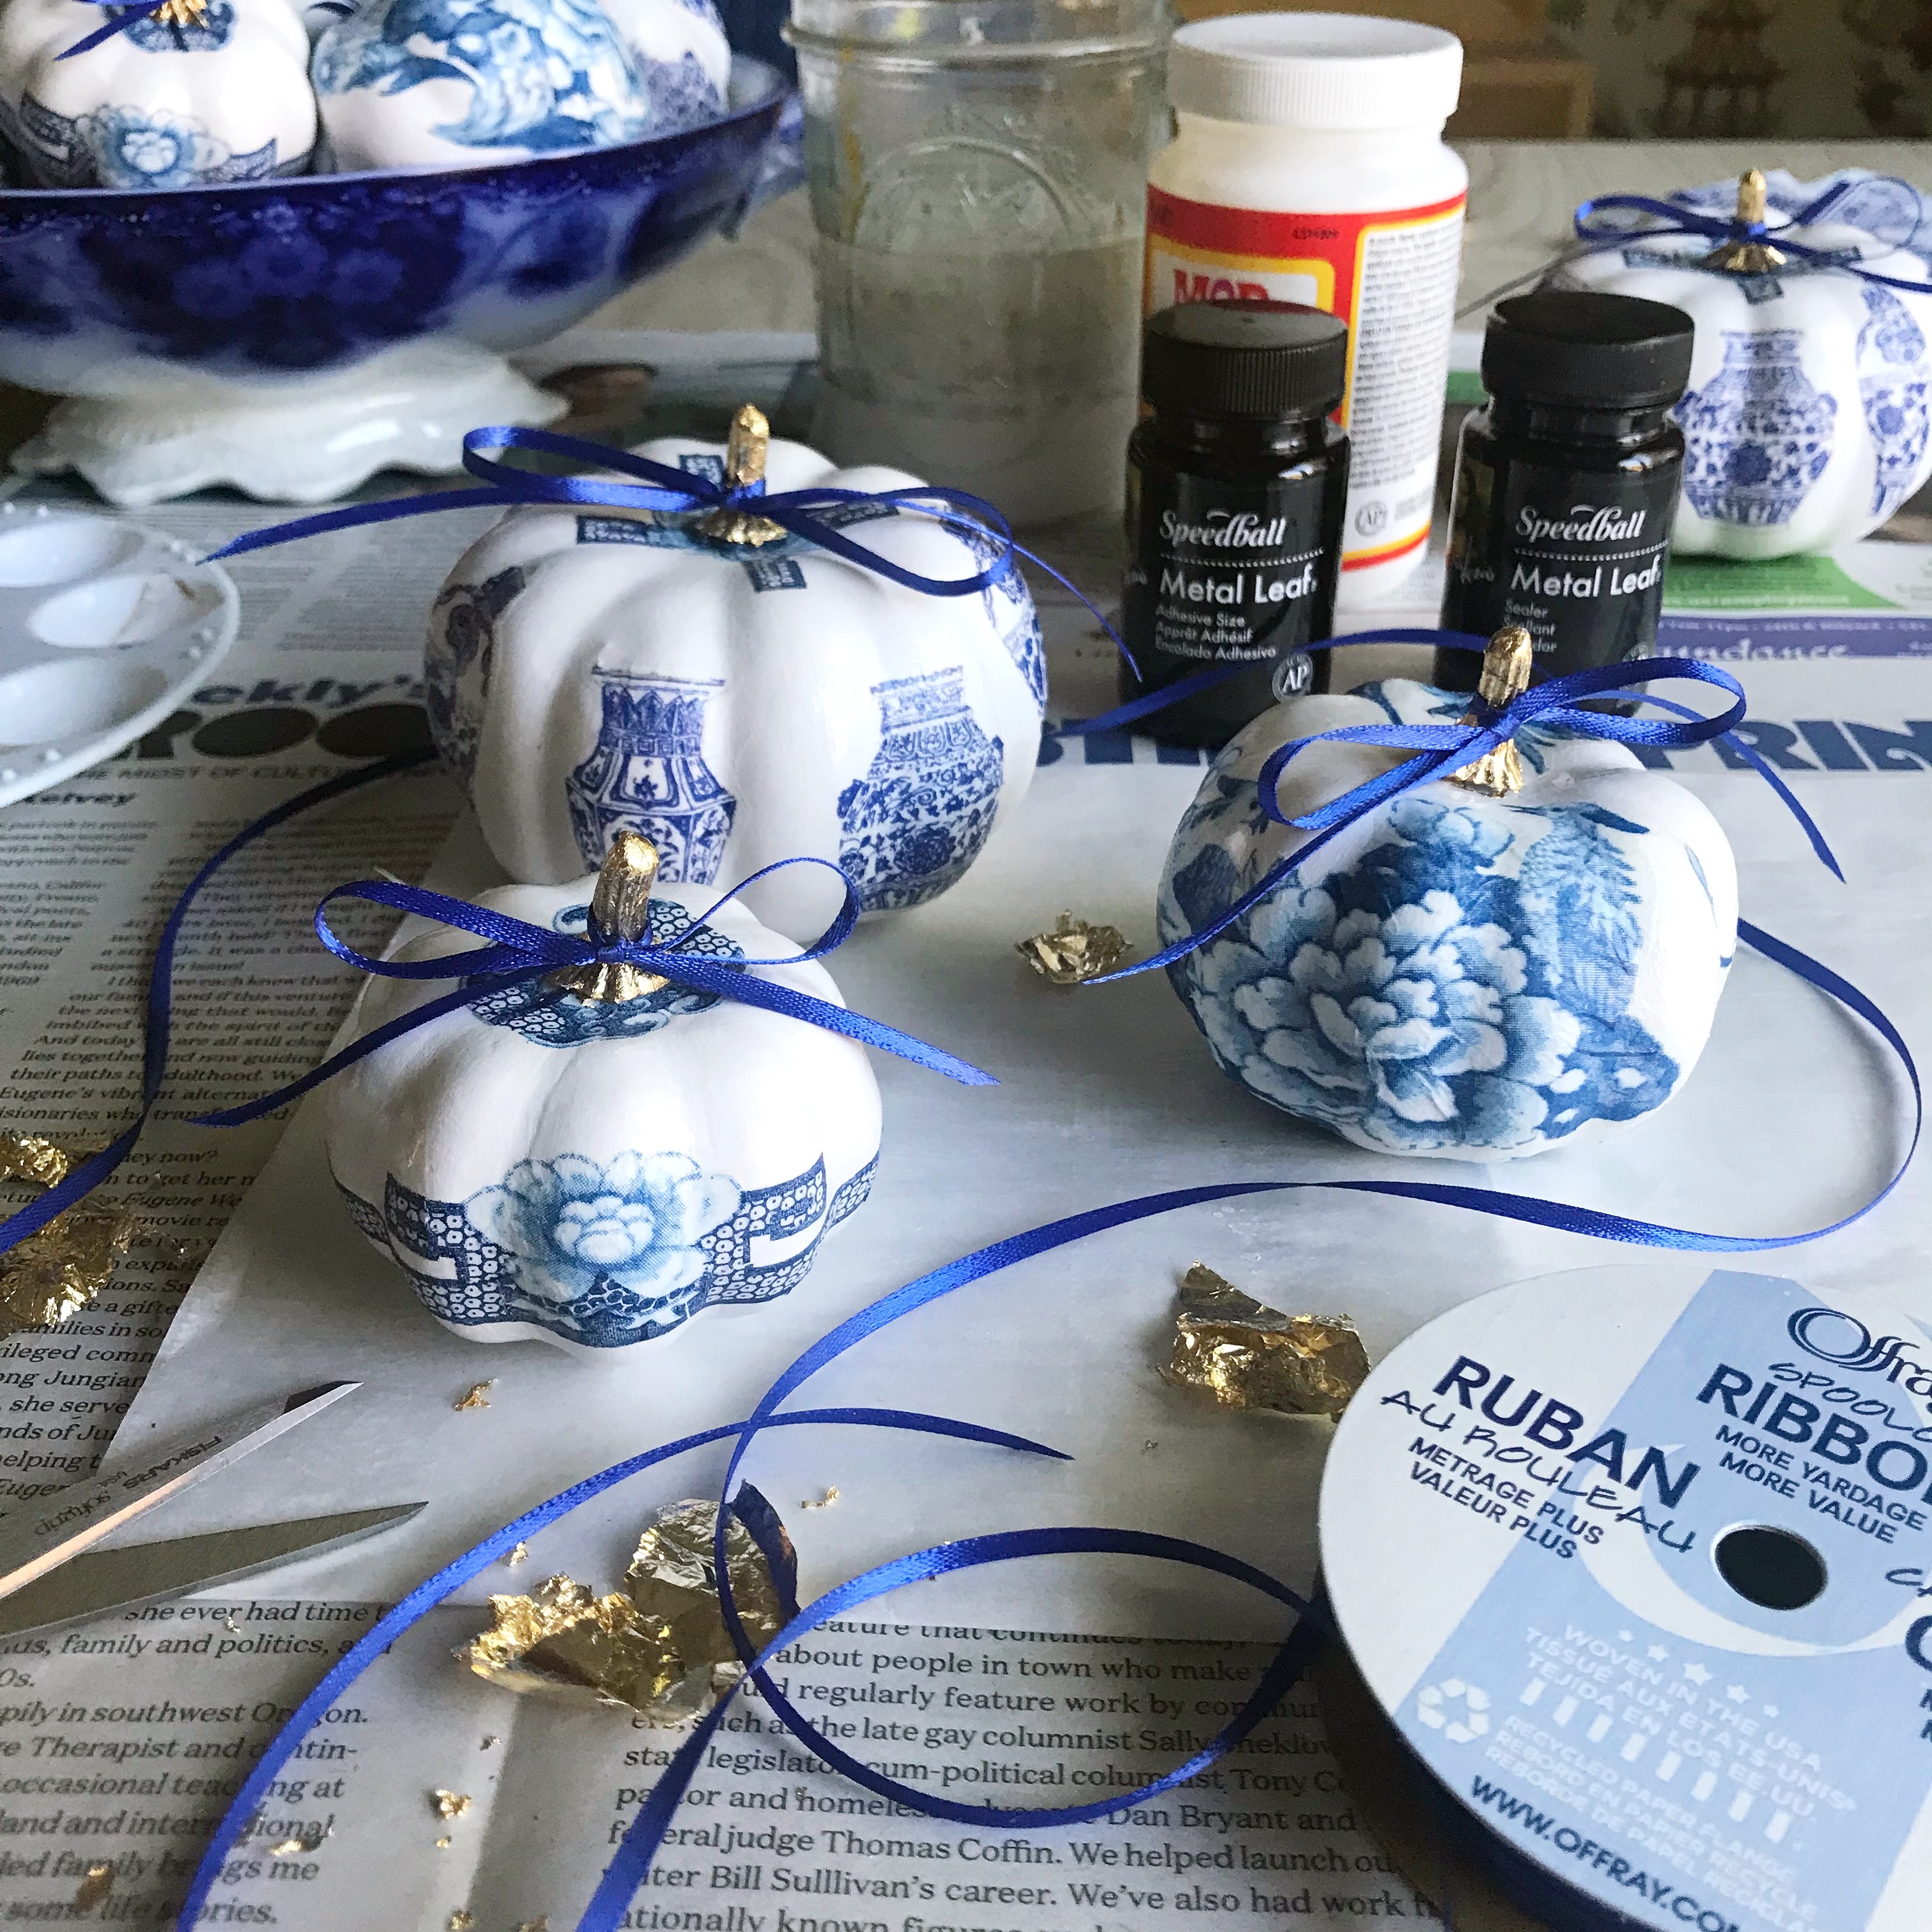
Step 6 - Tie some ribbon to the stems and you are done! Now you have a beautiful hand made craft to enjoy every autumn season for years to come.

Under the Plum Blossom Tree, DIY: Decoupage Chinoiserie Mini Pumpkins, a blog post lesson in how to create autumn season faux decoupage pumpkins to use as holiday decorations.

If you made it this far, thank you for looking! If you have any questions, please leave a comment.


SHARE:

Thursday, September 29, 2022

Autumn Photo Shoot - A Scrapbook Layout

Under The Plum Blossom Tree, Autumn Photo Shoot - A Scrapbook Layout

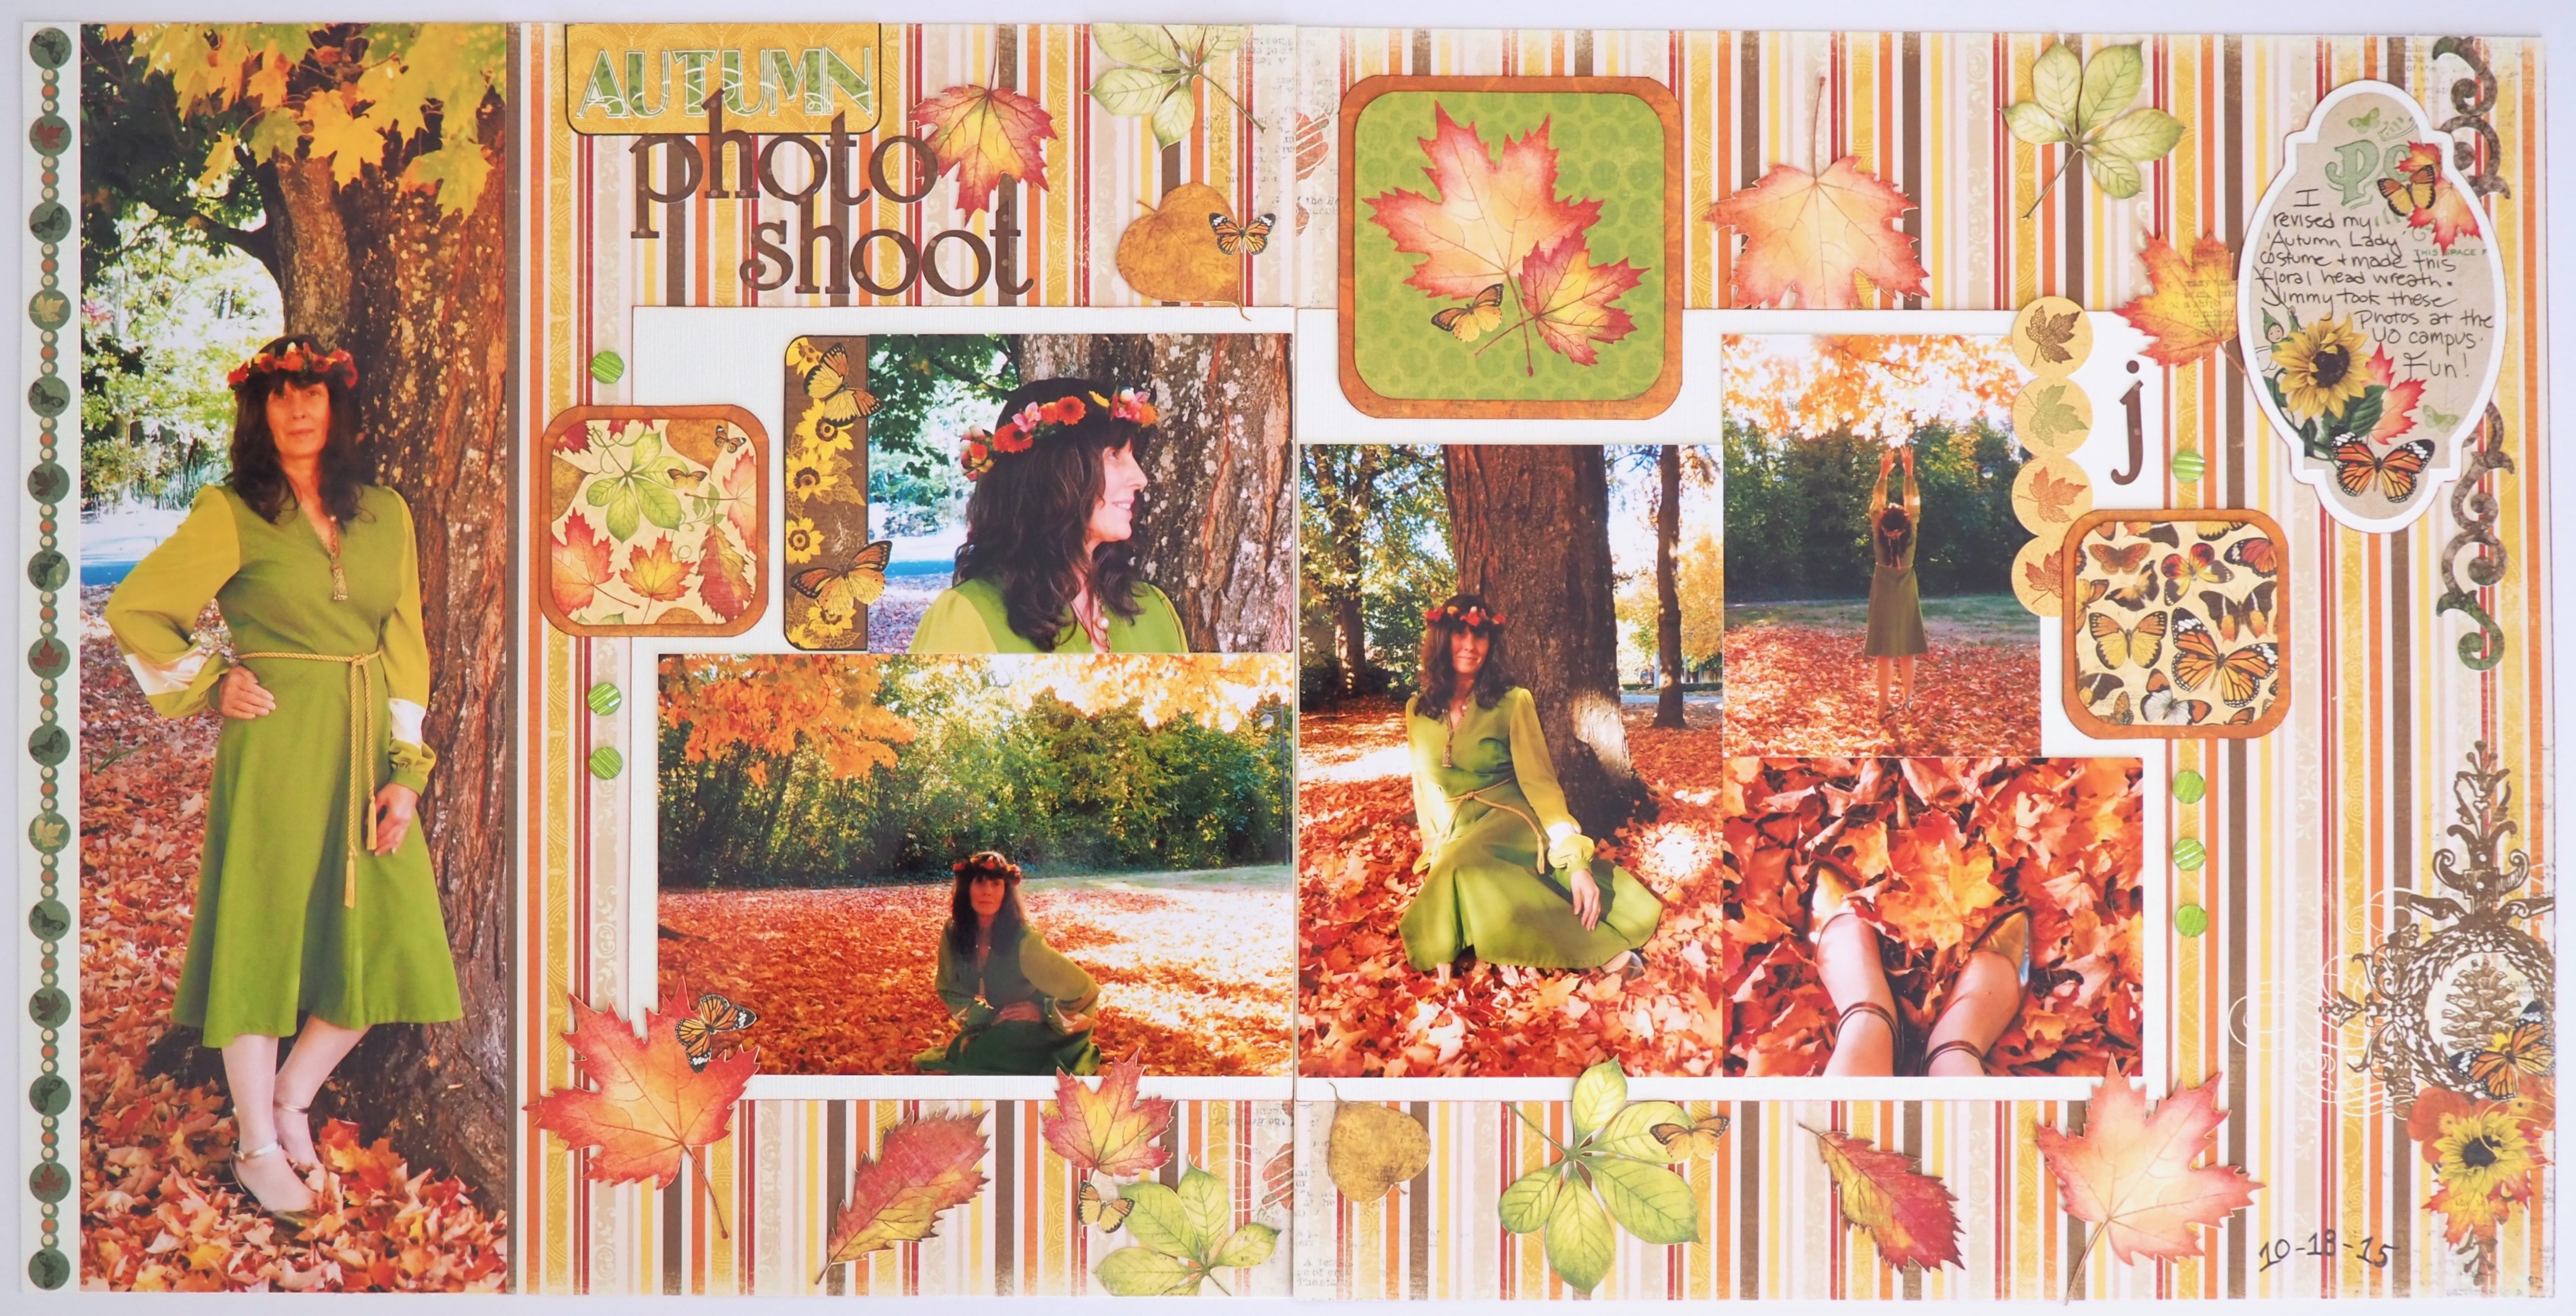
Hello friends, happy autumn! The wheels of 2022 are spinning fast, don't you agree? I was able to finish this autumn themed scrapbook layout a few months ago and it reminded me that it's never too late to finish a project that's been on your bucket list, even if the project has been on the list since 2015!

That was the year Jimmy took the photos of me featured in the layout. It was a 'just for fun' adventure, where we went around town taking pictures in a few different areas. The photos featured in this layout were the best ones from that day.

I purchased the supplies to make this layout back in 2015 and they have been sitting in a folder all these years. So never say never, right?

First, though, the photos. I have been getting my photographs printed at Persnickety Prints for several years now. The owner, Chari Pack, is a scrapbooker that understands the unique needs of those that enjoy this craft. For example, there are three sizes of photos on my layout - a 4x12, two 4x6's and three 2x3's. I enjoy using a variety of photo sizes, especially on a double page layout, and Chari offers many choices. The large 4x12 photograph is the feature photo and the rest of the pictures add interest and tell more of the story.

The paper crafting products I used for this project are from the Bo Bunny Enchanted Harvest line. Although they were discontinued long ago, I found a website that still has a few of the items available, and so you can see what the papers, stickers and embellishments look like in the link provided.

I started with two sheets of the Gratitude paper, then mounted my photos onto plain white card stock and adhered them down.

I then fussy cut several leaves from the Foliage paper and scattered them around the layout.

The three squares are cut from the Autumn and Traditions papers and mounted onto the 'B' side of the Foliage paper.

As well, I fussy cut the word 'Autumn' from the Traditions paper and used a small section from the Autumn paper to mount it on. The rest of the title letters ('photo shoot') are from the Combo Stickers sheet.

I fussy cut the sunflowers border next to my profile picture from the Autumn paper and then added more stickers to the layout from the Combo Stickers sheet.

I inked all of the card stock edges in brown. 

The green gems on the left and right sides of the photos are from Queen and Company.

And that's it! I crossed this task off my list and added the layout to my album.

What autumn inspired activity is on your to-do list?

SHARE:

Thursday, September 22, 2022

Heceta Headland Day Trip

Under The Plum Blossom Tree, Heceta Headland Day Trip

So believe it or not, this was our family's first excursion out into the world since before Covid. James and I, together with our son Tayo and his girlfriend Ellie, took a whirlwind day trip to the Oregon Coast and it definitely revived our spirits and gave us hope for future travels.

The lighthouse at Heceta Headland is a well known sight to most Oregonians. It's a large part of the history of the area, having been built in 1894. It is situated 205 feet above the Pacific Ocean on a bluff carved out of the west side of the 1,000-foot-high headland.

Although we have visited the coast many times over the years, we have never taken the self guided tour of the lighthouse - until now. It's an easy half-mile hike on an uphill dirt trail and it was a perfectly beautiful and warm day. 'The kids' headed up on their own right away, while James and I took our time.

Under The Plum Blossom Tree, Heceta Headland Day Trip

The 54-foot lighthouse tower contains a Fresnel lens that was built by the Chance Brothers of Birmingham, England and originally contained kerosene oil lamps which were maintained by a lightkeeper crew. These days the lamps are electric and automated. To this day it is still a working navigational light that is visible for 21 nautical miles.

After learning about and admiring the lighthouse, James and I then turned our attention to the stunning views. To the south is the sandbar at Cape Cove:

Under The Plum Blossom Tree, Heceta Headland Day Trip

To the east you can see the sheltered Cape Cove Beach and the Cape Creek Bridge in the background:

Under The Plum Blossom Tree, Heceta Headland Day Trip

As we descended back down the trail we stopped to view the Assistant Keeper's Duplex, one of the last remaining on the Pacific Coast. Originally there was also a Head Keeper's House, however it was demolished many years ago.

Under The Plum Blossom Tree, Heceta Headland Day Trip

It was an enjoyable day of hiking, picnicking and sightseeing. At some point during the course of this day, however, it struck me how much we've missed over the last two and a half years. I've realized that I've allowed myself to get caught in the trap of thinking there's no use going anywhere anymore because everything has changed because of Covid.

And while certainly there have been changes in our perceptions and in how we navigate our day to day lives, it's also important to get out of our tightly held, cautious routines and enjoy nature and to see other families out there doing the same. And it also dawned on me how important it is to recommit to spending time with family seeing new things, exploring, and having that feeling of being free to wander and take things as they come, even if only for a day. It rejuvenates the spirit and helps us connect with each other in a wholly different way from our daily lives of work and worry.

For us, family trips have always been an important part of life and this day was an important reminder to continue that tradition, for ourselves and for the younger generation.

Under The Plum Blossom Tree, Heceta Headland Day Trip

Have you taken any trips lately?


SHARE:

Thursday, September 8, 2022

Her Majesty the Queen

Under The Plum Blossom Tree, Her Majesty the Queen features works by Canadian collage artist Danielle Krysa honoring Queen Elizabeth of England who passed away on September 8, 2022

Friends, I don't know anyone that can love Queen Elizabeth more uniquely than Canadian collage artist Danielle Krysa.

Of course by now everyone the world over has learned that the beloved Queen of England passed away today. As I was reading the news and thinking about it this evening I thought I would revisit Danielle's Instagram page and then realized it would be fun to share some of her works to honor the Queen's passing.

The piece above, titled “yes, liz had a little nibble because 1, any good baker would do the same, and 2, ‘shut up, i’m the f’n queen’.” is just one example of Danielle's ability to bring a humorous and joyful approach to an otherwise very serious subject.

In “‘use the pom poms sparingly’ they said - unfortunately liz and her creative muse were already knee deep” (below) we see the queen getting carried away with pom poms and like in the first piece it's fun to imagine the queen in this kind of situation.

Under The Plum Blossom Tree, Her Majesty the Queen features works by Canadian collage artist Danielle Krysa honoring Queen Elizabeth of England who passed away on September 8, 2022
I have enjoyed Danielle's use of round canvases. This one called “in her daydreams, liz was an avon lady” I love all the various pink paint colors and how she used just a few images to get her point across:

Under The Plum Blossom Tree, Her Majesty the Queen features works by Canadian collage artist Danielle Krysa honoring Queen Elizabeth of England who passed away on September 8, 2022
Then there's this gem, entitled “arm’s length away” where Danielle informs us that "yes, that’s liz’s arm waving complete with swarovski crystal bracelet".

Under The Plum Blossom Tree, Her Majesty the Queen features works by Canadian collage artist Danielle Krysa honoring Queen Elizabeth of England who passed away on September 8, 2022
Danielle has also had fun utilizing vintage costume jewelry on some of her canvases. In “queens carry the weight of the world - and we make it look f’n easy” we see more of her humor shining a unique light on Her Majesty's complex role in society.

Under The Plum Blossom Tree, Her Majesty the Queen features works by Canadian collage artist Danielle Krysa honoring Queen Elizabeth of England who passed away on September 8, 2022
I hope you'll agree that Danielle's visual approach to celebrating the life of Queen Elizabeth has been a powerful way to honor the queen and so much of what she has represented in the world.

May Queen Elizabeth rest in peace.

SHARE:

Tuesday, August 30, 2022

Plum Blossom Decor: An Instagram Flash Sale

Under The Plum Blossom Tree, Plum Blossom Decor: An Instagram Flash Sale

Friends, if you love decorating your space in the chinoiserie style I'd like to invite you to a Plum Blossom Decor Instagram flash sale this Friday, September 2nd at 5:30pm Pacific Time.

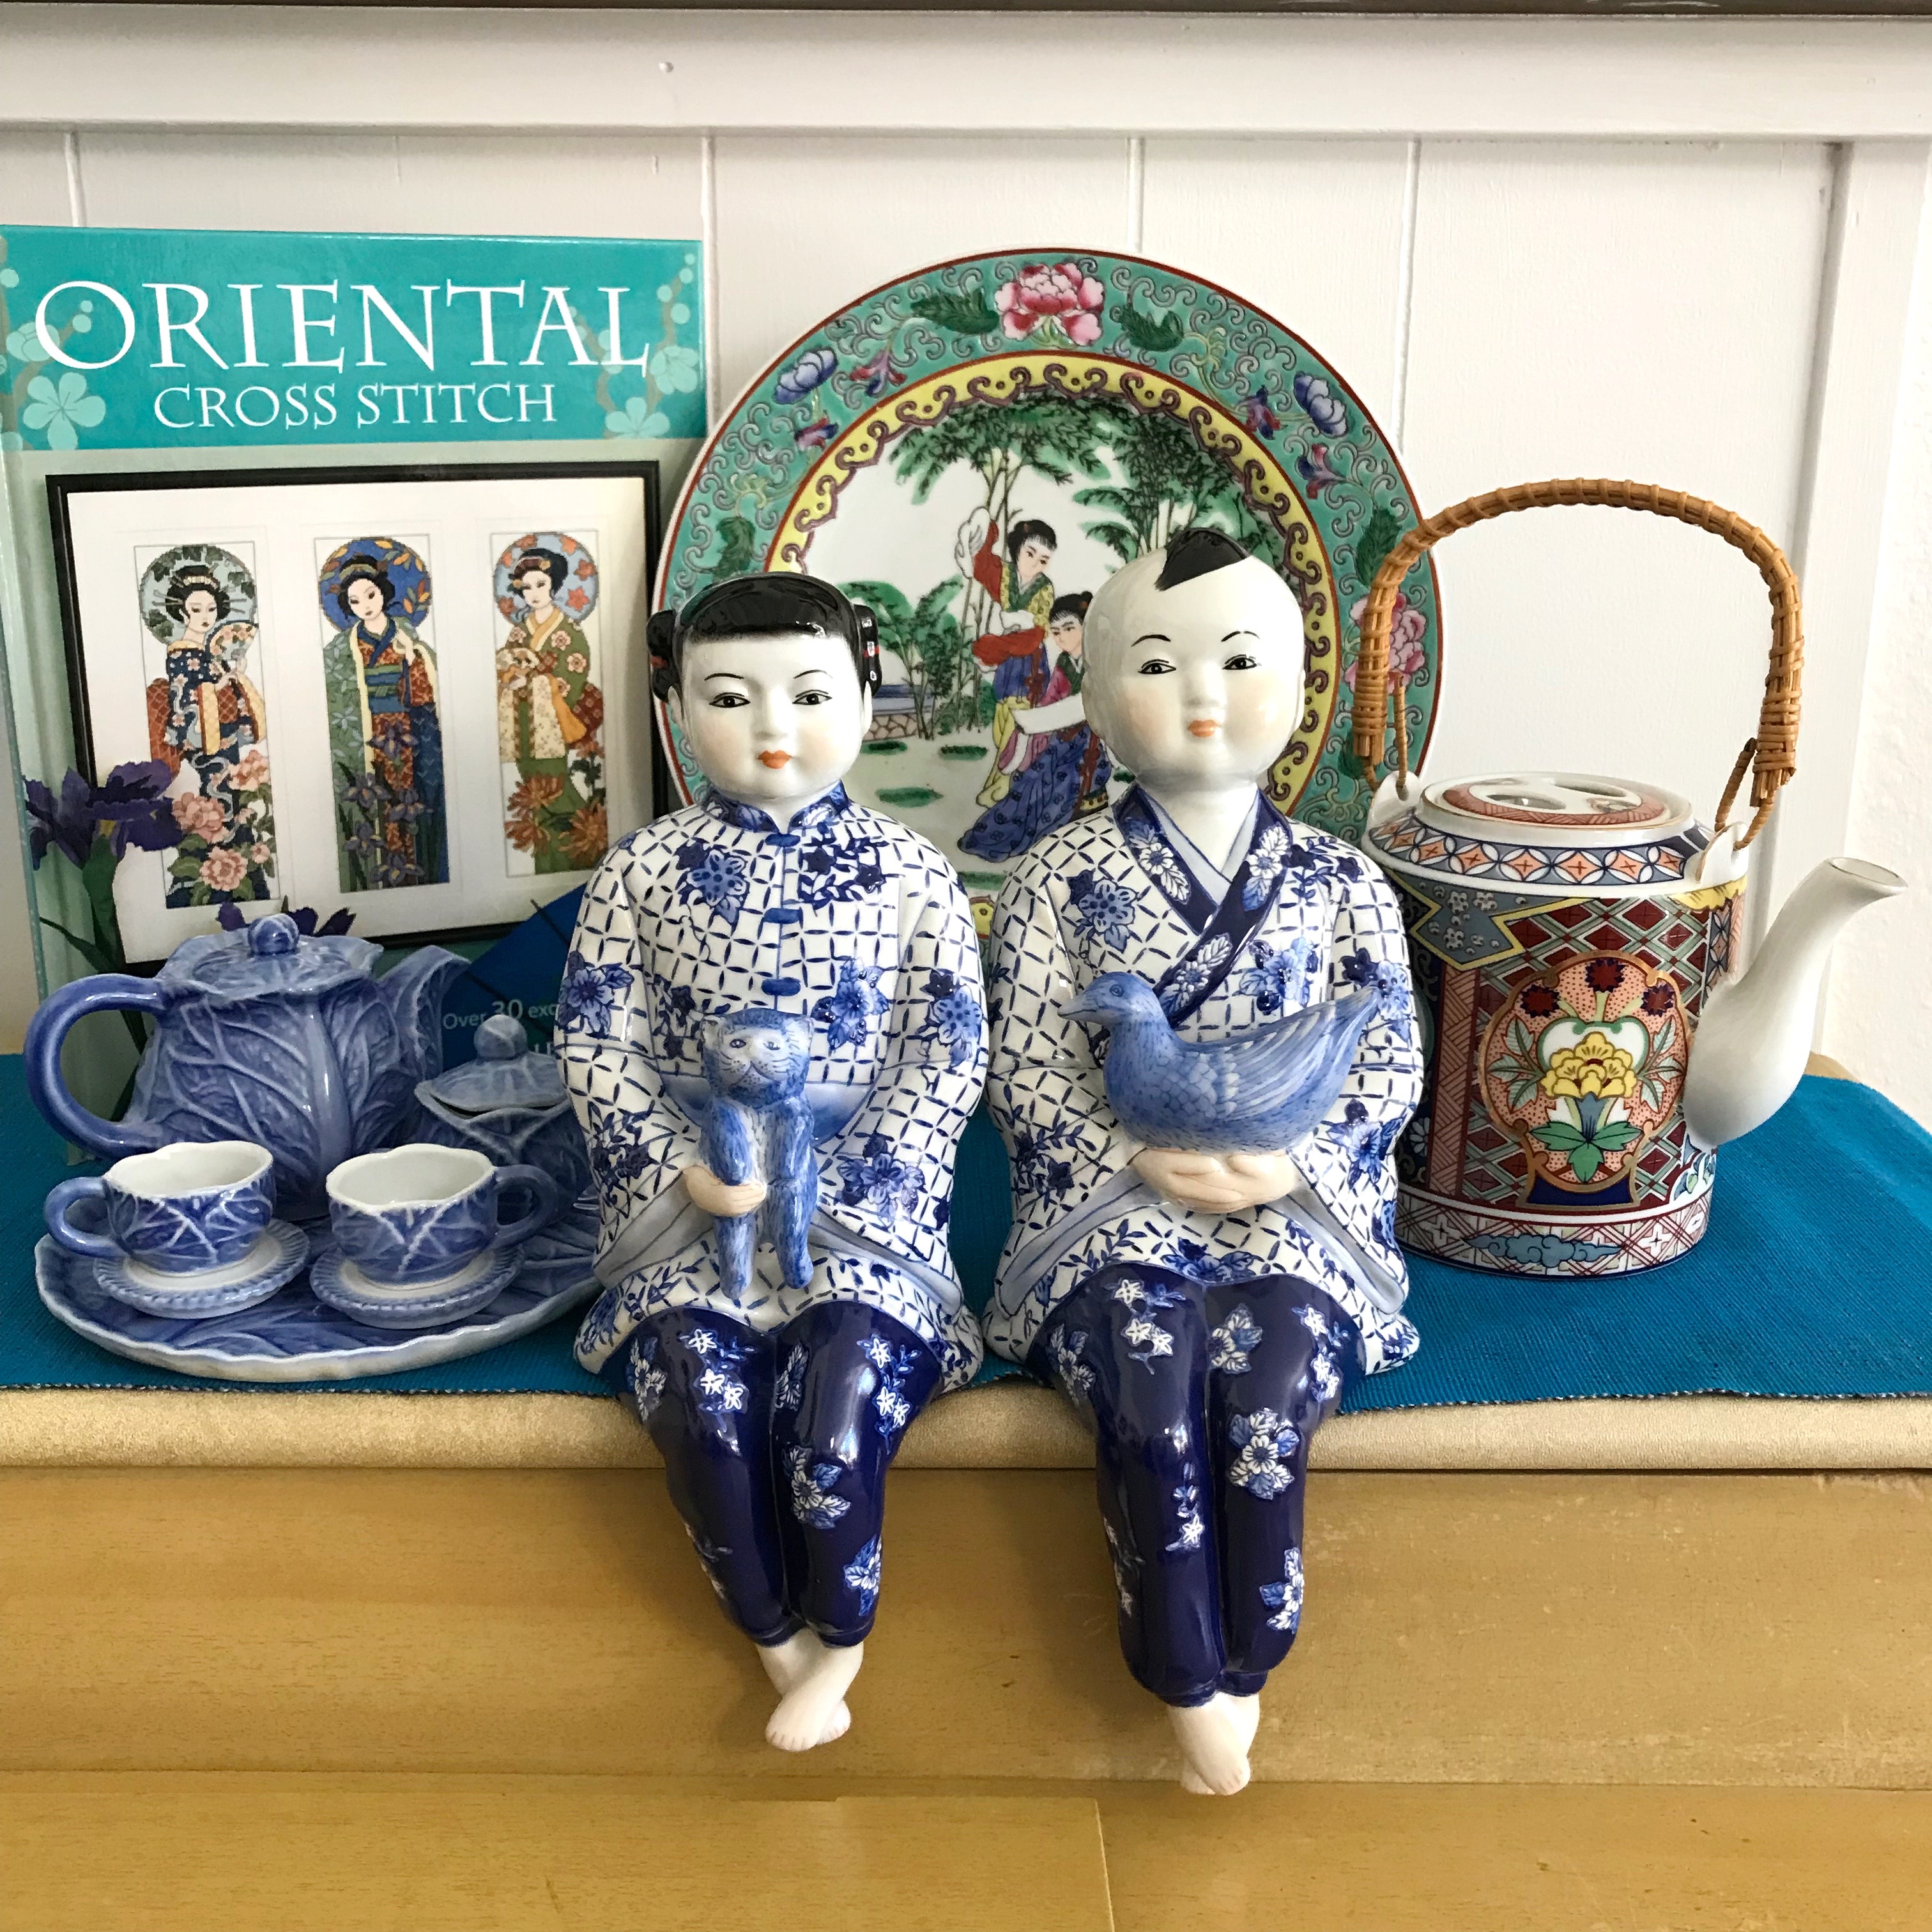
In this 'Five on Friday' flash sale, I'll be offering a Nora Fenton Design display plate, an Oriental Cross Stitch book, a blue cabbage-ware child's tea set, a Japanese Imari teapot and a pair of Chinese shelf sitters.

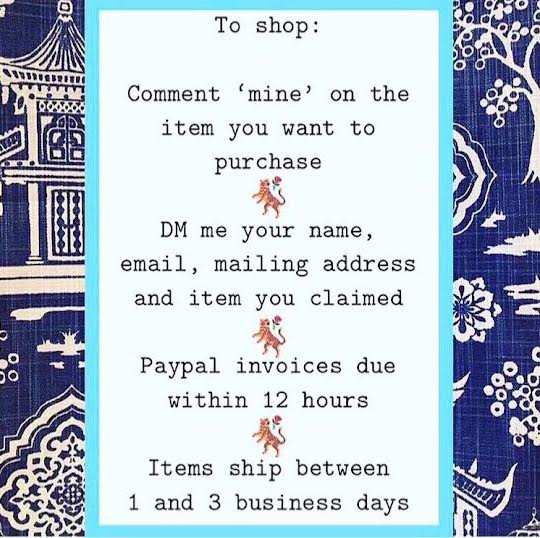
So come join me on Friday! There will be detailed photos, full descriptions and prices. If you've never made a Paypal purchase this way before, these instructions will help facilitate a smooth shopping experience.

Under The Plum Blossom Tree, Plum Blossom Decor: An Instagram Flash Sale

Thanks for looking and I hope you'll join me this Friday!

SHARE:

Thursday, August 25, 2022

Blue & White Italian Staffordshire Style Dogs

Blue & White Italian Staffordshire Style Dogs

Hello friends! One of my favorite things to collect these days is ceramic mantle dogs. They are commonly referred to as Staffordshire dogs or Staffordshire style dogs because the original dogs were made in Staffordshire England by a variety of the English potters as early as the 17th century. Production of these quirky creatures continued into the 19th and mid-20th centuries.

The most common type of dog made was the Cavalier King Charles Spaniel. Greyhounds, poodles, dalmations and pugs were also produced. No matter the animal type, many mantles have been graced with pairs of these adorable animals.

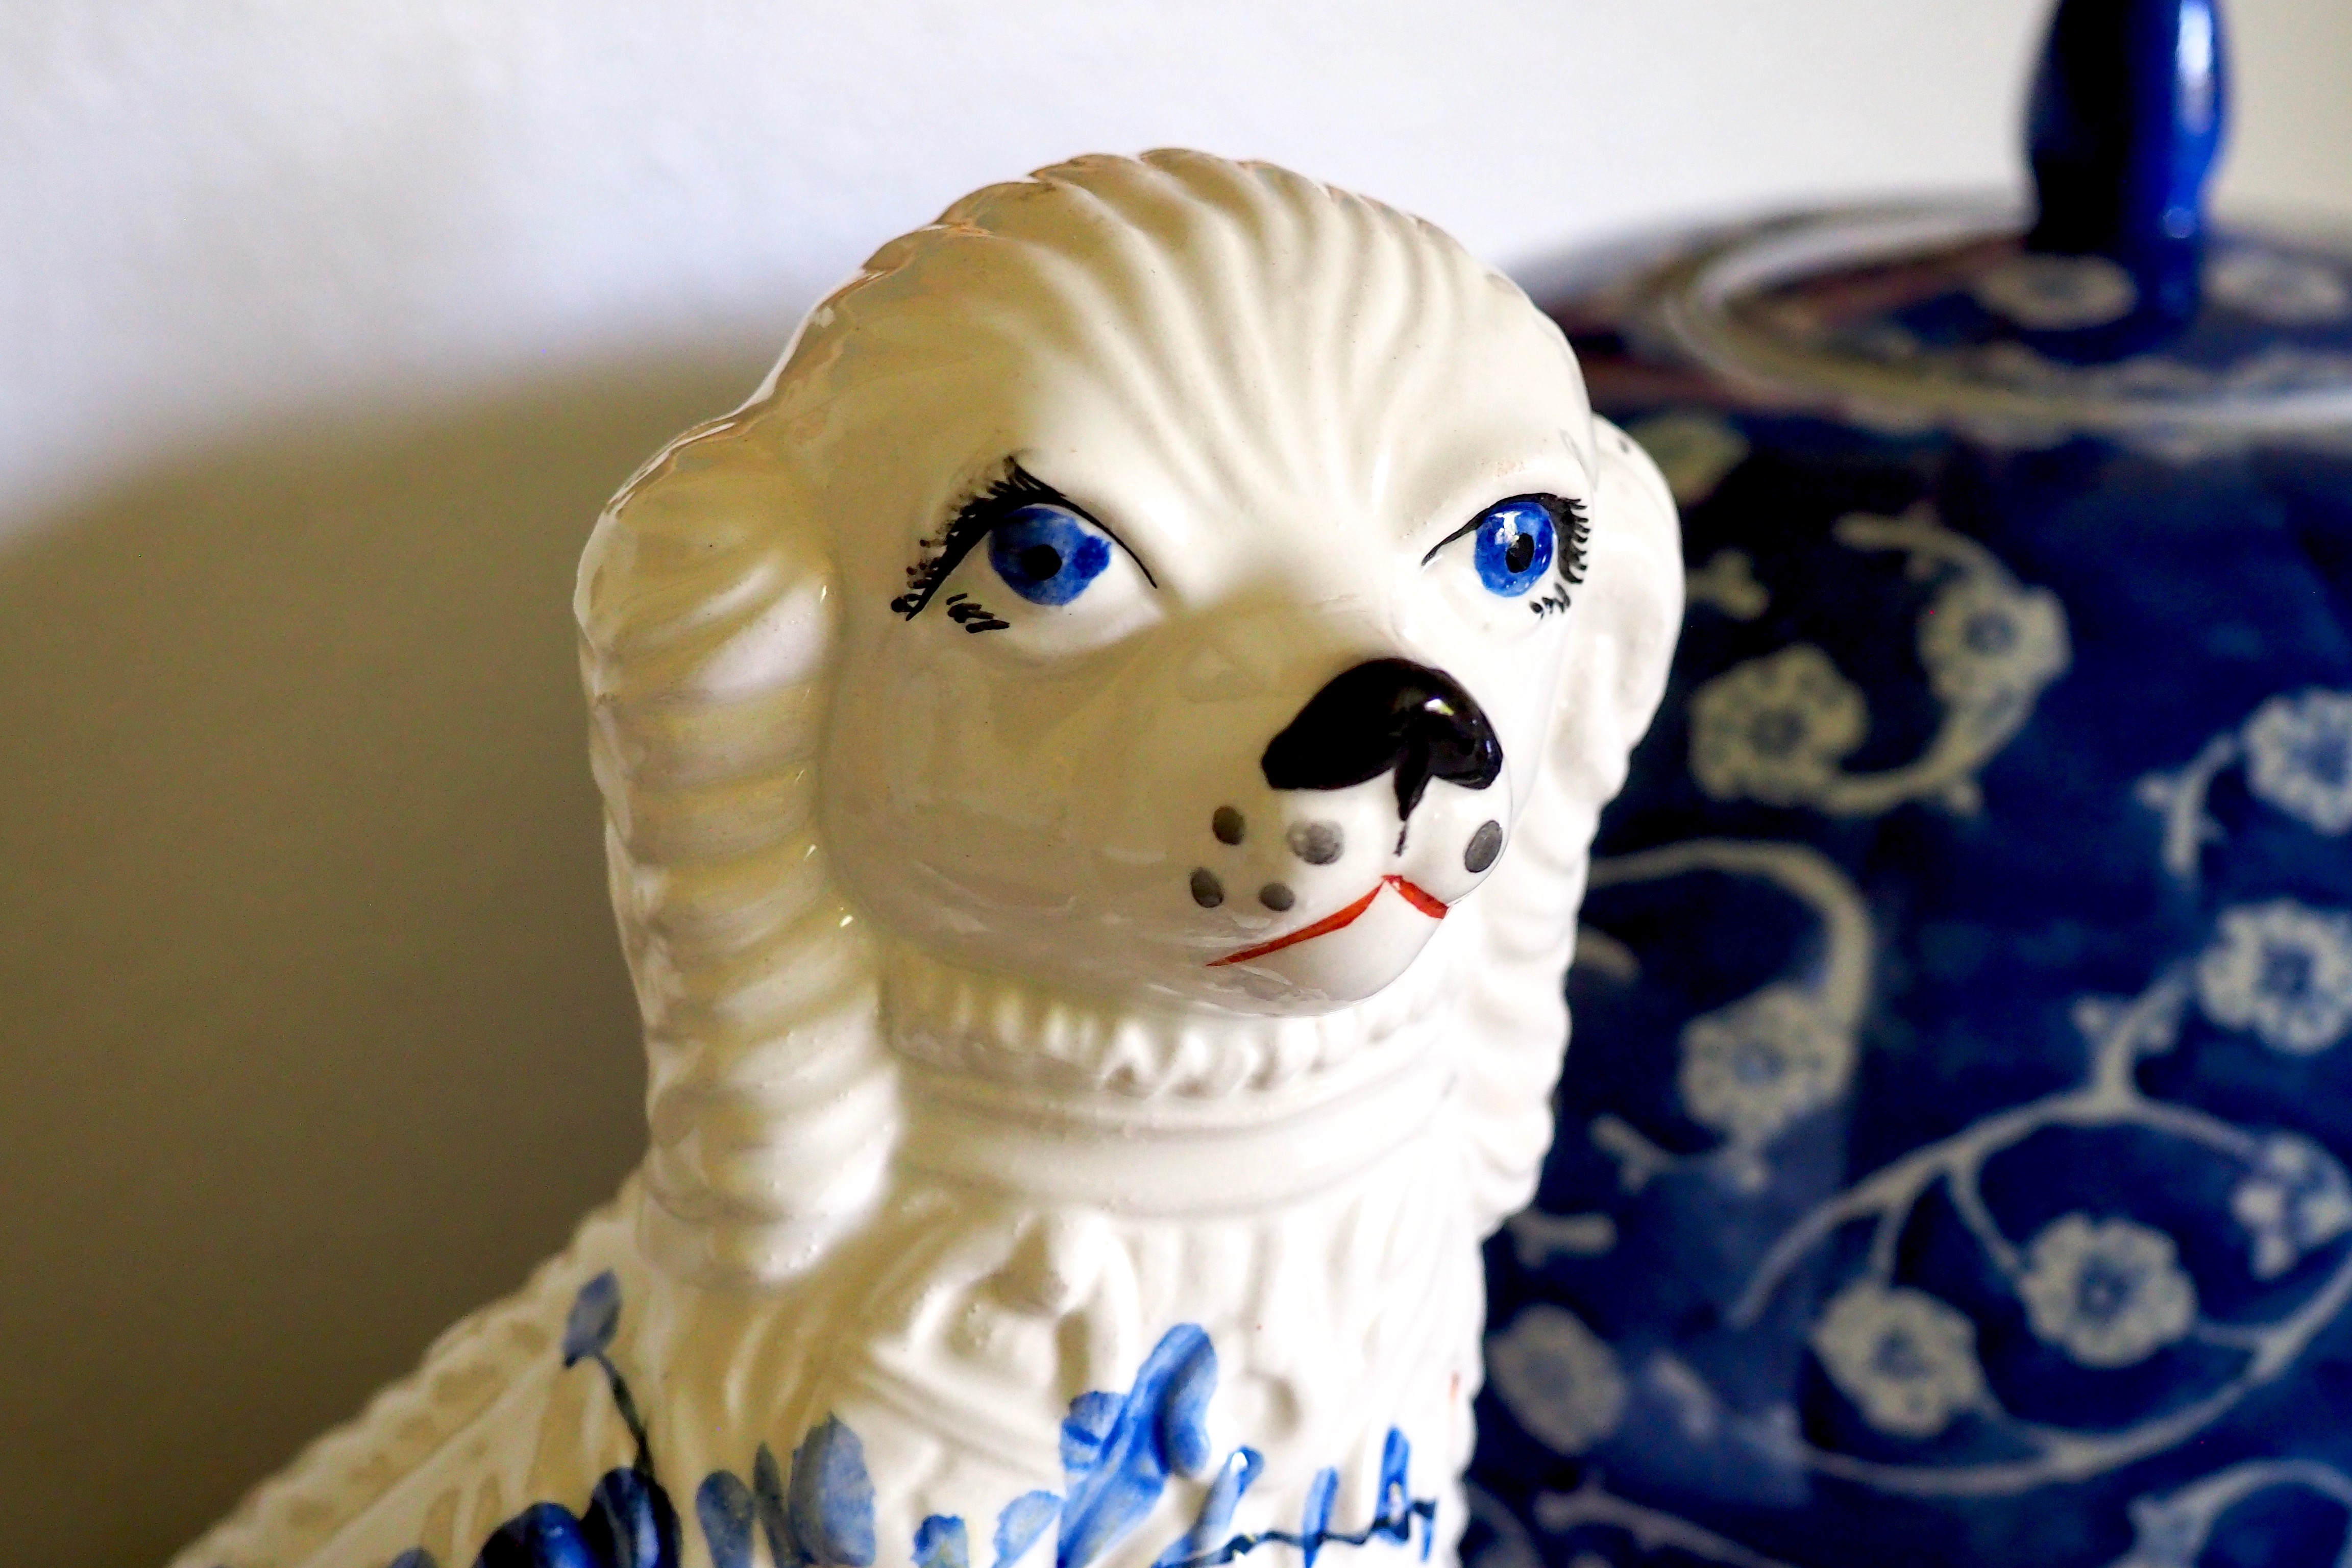
According to Gloria from Willow Road Interiors, this pair of blue and white Staffordshire style dogs were made in Italy. I purchased them from her Instagram shop. They are not antiques but rather a later reproduction - hence Staffordshire 'style'. I love the hand painted blue floral design and who can resist those blue eyes?

Blue & White Italian Staffordshire Style Dogs

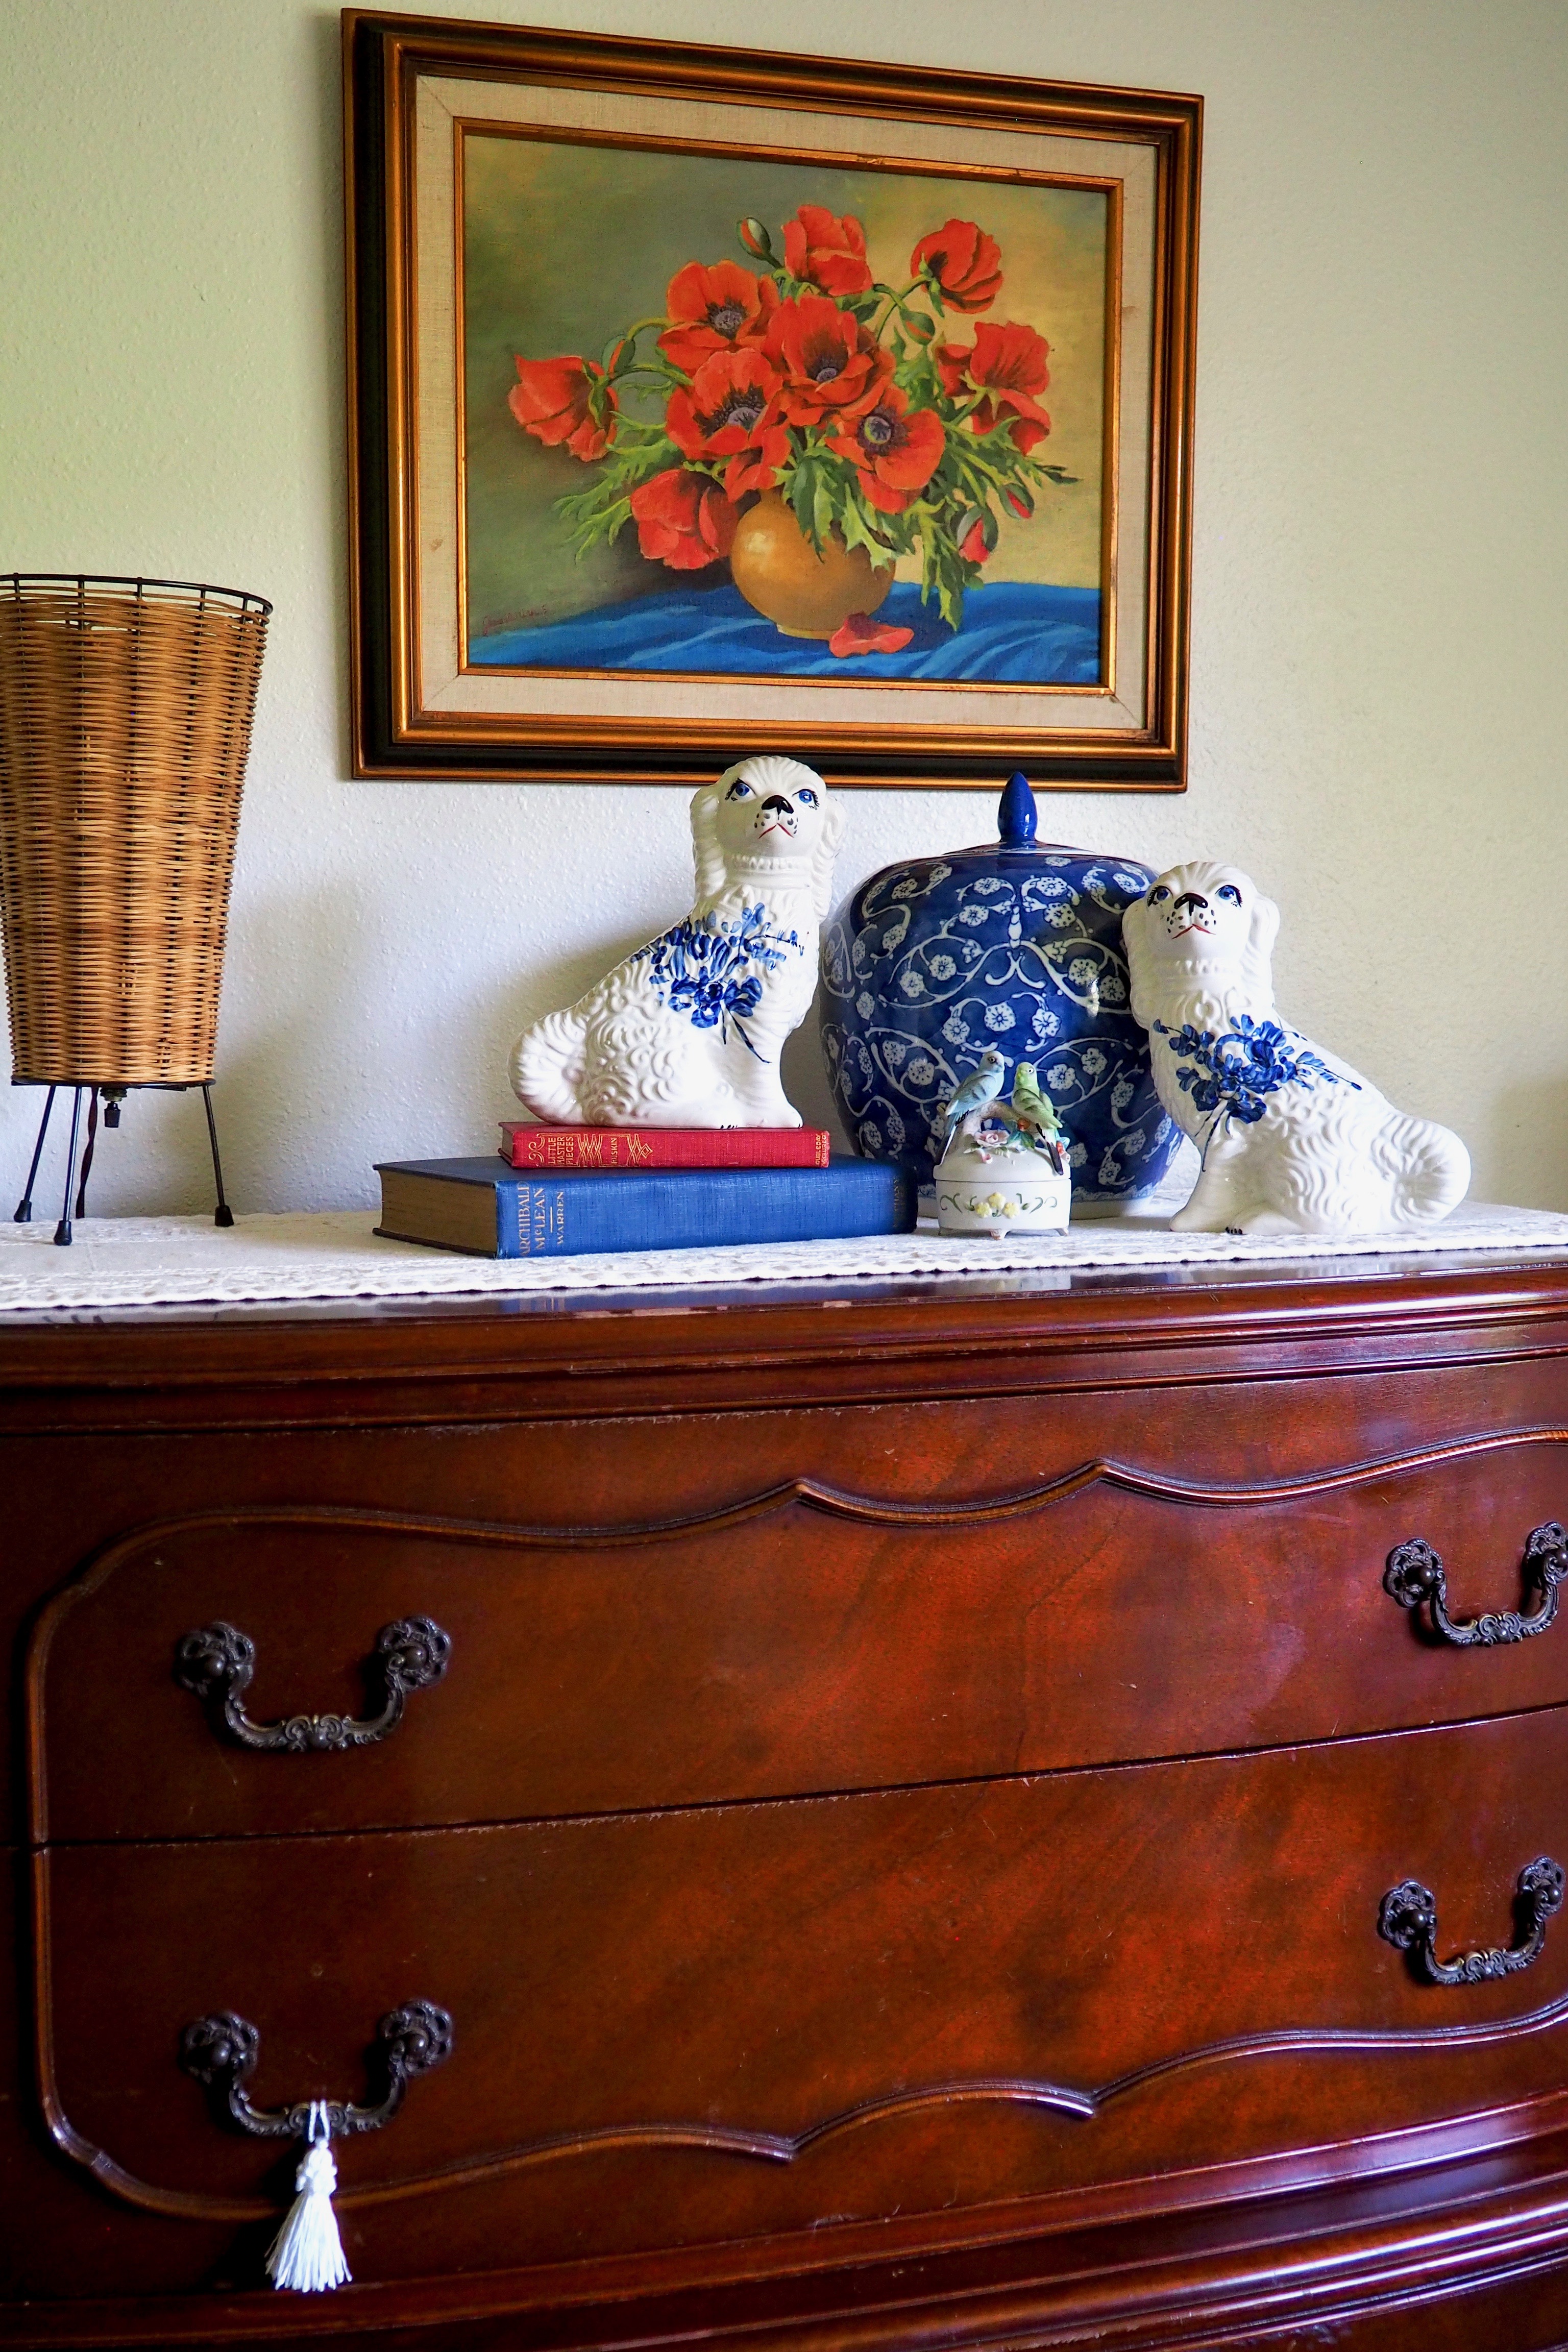
Friends, meet Polly and Suki. Each is about 7" tall and 6" wide at the base. I had fun styling them in my bedroom on top of my antique chest of drawers, along with a blue 'hidden butterfly' patterned Chinese melon jar, some vintage books and a vintage bird trinket box made in Japan.

Blue & White Italian Staffordshire Style Dogs

The pair are unpainted on the back side and have a large 'casting hole' on the bottom. The casting hole comes from the slip mold process - clay and water are mixed to a creamy consistency, then poured into a two-part plaster mold. The slip water is absorbed by the plaster mold, leaving a clay shell next to the mold. The excess water is poured out, the mold is opened and the clay shell removed.

Blue & White Italian Staffordshire Style Dogs

I can't say for sure what breed of dog this pair represents, but I think they are adorable and I hope you enjoyed seeing them. Now if I could just figure out which one is Polly and which one is Suki...

As always, thanks for looking and bye for now!


SHARE:
© Under The Plum Blossom Tree | All rights reserved.
Blogger Template Created by pipdig