Tuesday, February 28, 2023

December Daily and Stories by the Month

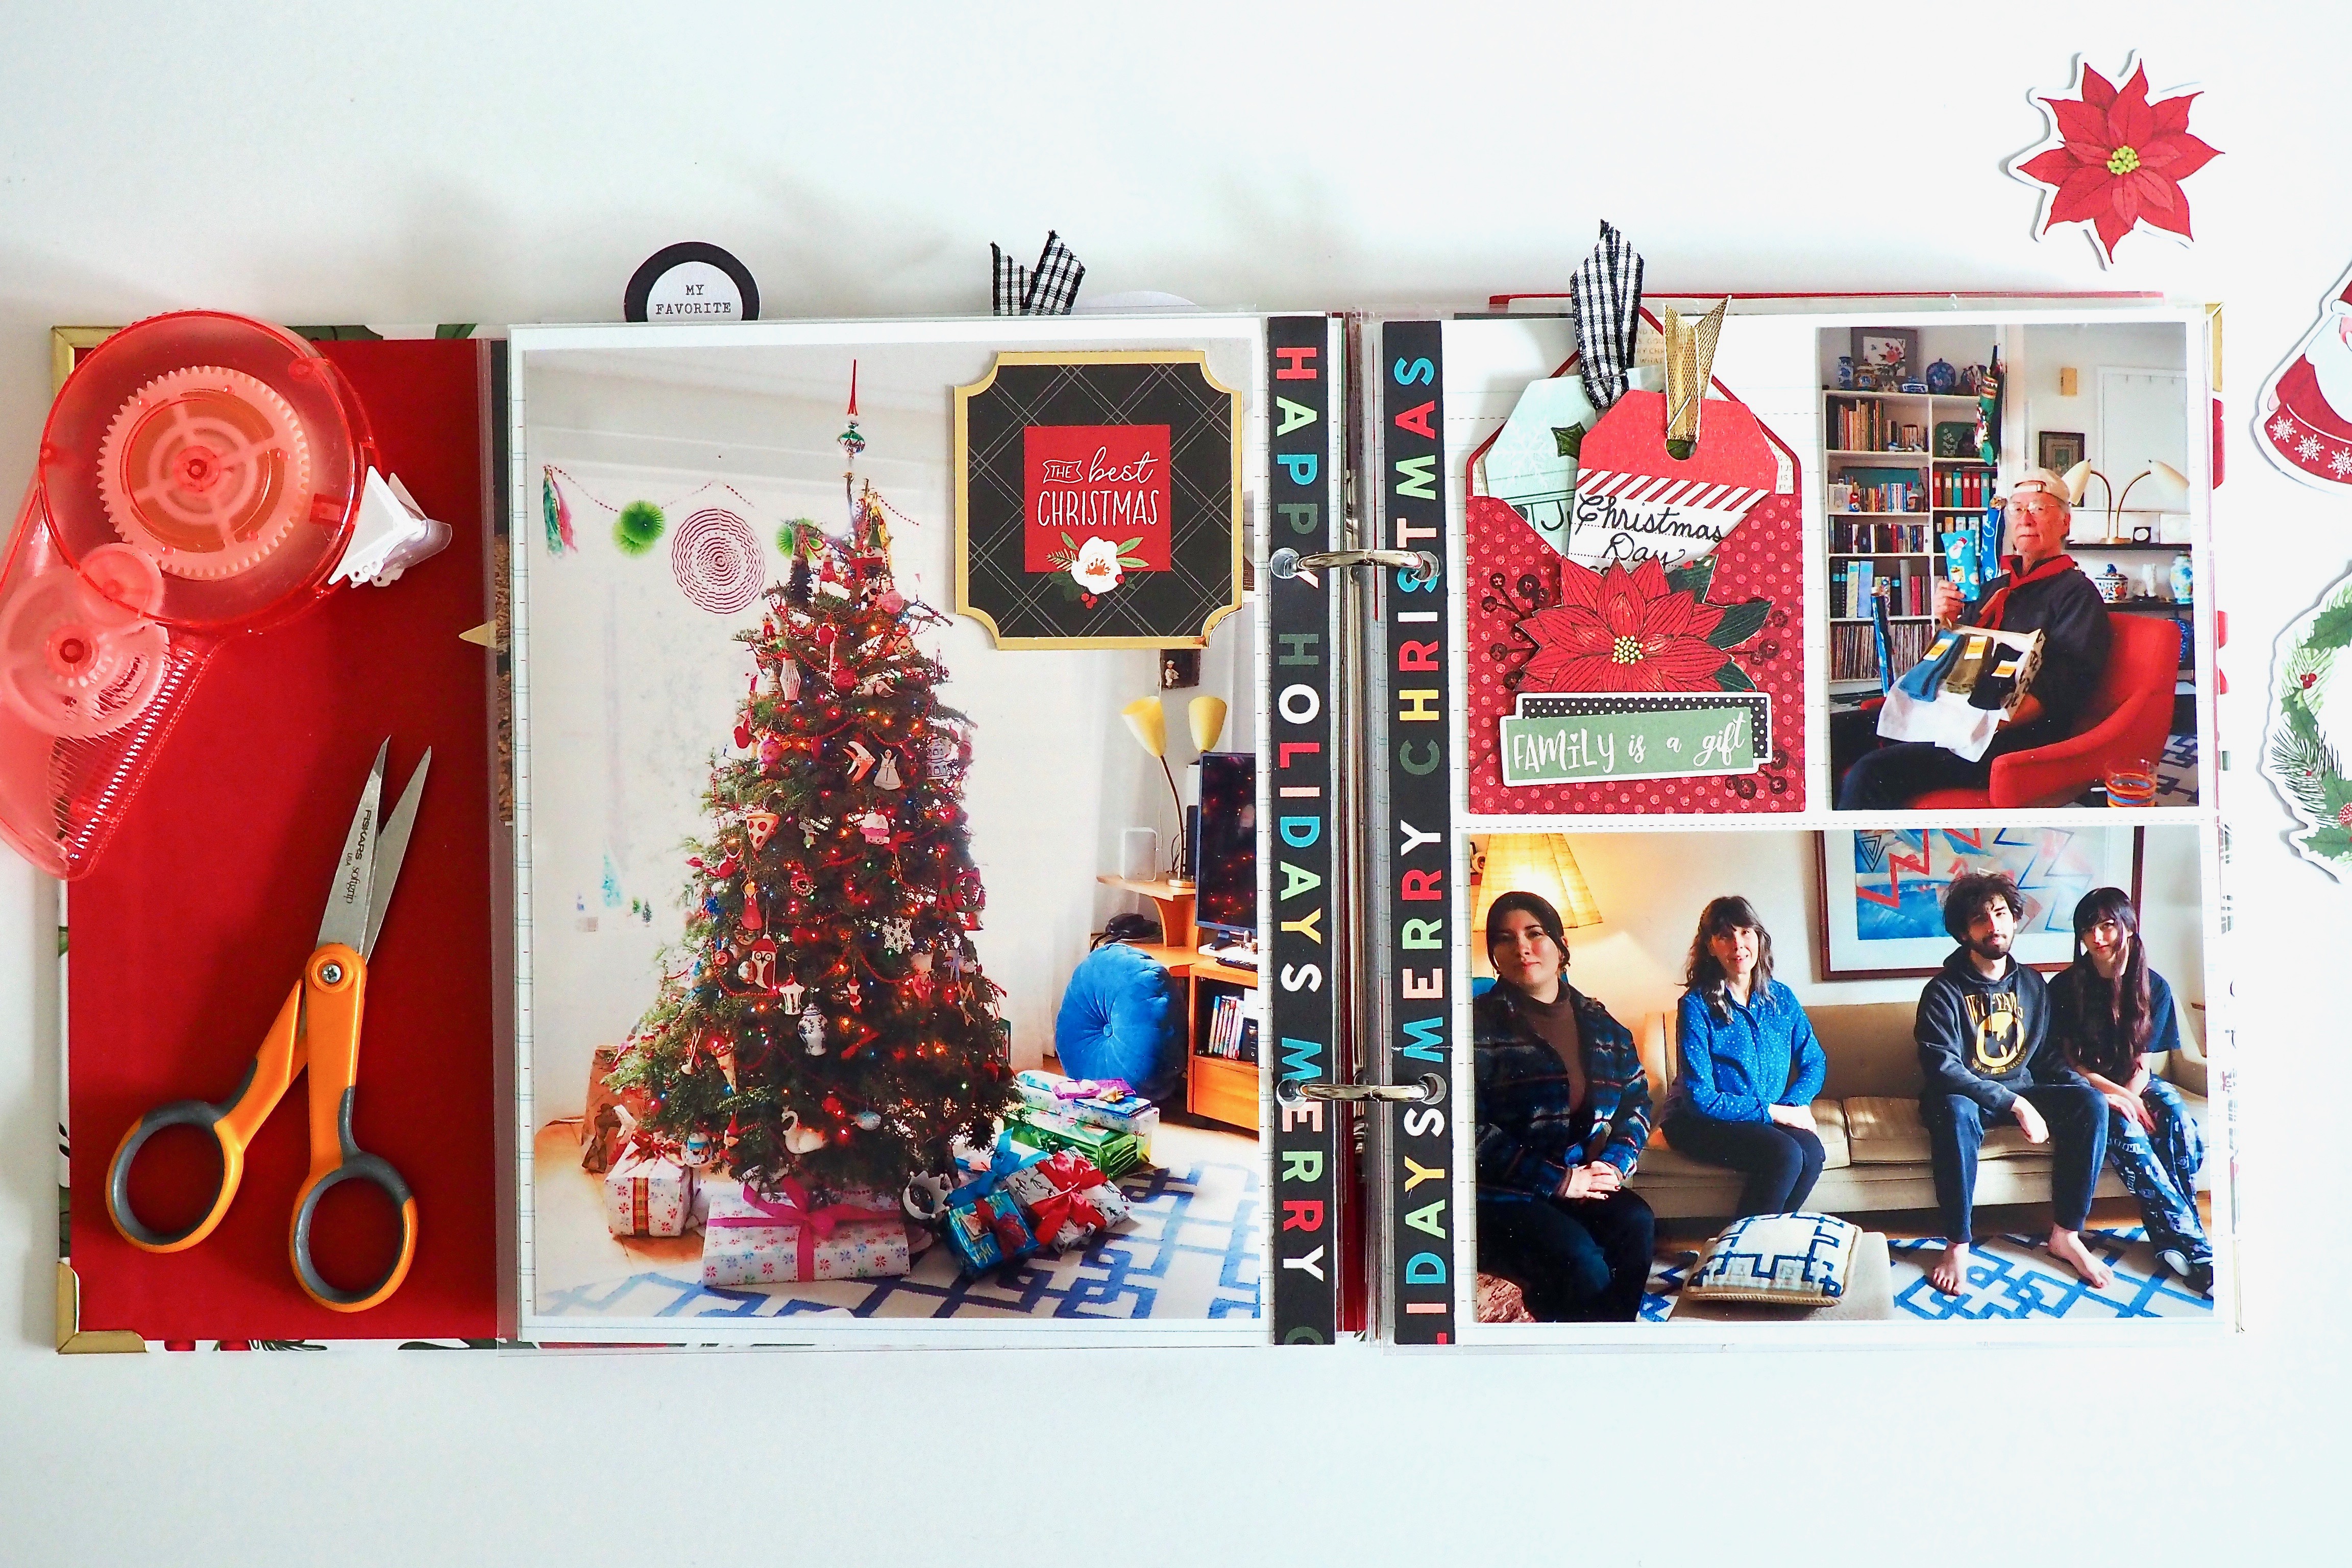
Under The Plum Blossom Tree, December Daily and Stories by the Month, a blog post about keeping my New Year's resolution of documenting more family stories using the Stories by the Month kit by Ali Edwards and her concept of a story a day in the month of December

Hello everyone, how are you doing with your New Year's resolutions so far?

The only one I have this year is to tell more of my family's stories.

The desire to do so came to me last November when I saw that Ali Edwards offers a Stories by the Month kit subscription. Each month you get a small assortment of journaling cards and embellishments, geared towards telling seasonal recurring stories.

At the same time I was seeing that Ali and a lot of the other prominent memory keepers were gearing up for December Daily, which is literally telling one story each day in December, focusing on whatever holiday tradition is being celebrated.

So here is the beginning of my attempts to get those stories told!

This is only my second December Daily. I made the first one ten years ago and of course our lives looked very different then. I'm grateful to my past self for having made that project happen. Knowing how intense the task can be, at first I decided that this year I would just write a small note at the end of each day, and that those accumulated notes would result in one page in my 2022 album. However, as the month progressed I started seeing how those notes could become bigger stories and found myself making a plan to complete an entire album. Now the album is essentially done - there's just a few more items to check off the list.

Under The Plum Blossom Tree, December Daily and Stories by the Month, a blog post about keeping my New Year's resolution of documenting more family stories using the Stories by the Month kit by Ali Edwards and her concept of a story a day in the month of December

In January there was only one big story to tell. My son Tayo got his first apartment with his girlfriend Ellie. Of course such a big life event requires mom getting a photo on the big day and I felt that a large 6 x 8 print was essential in the documenting. I will write in some details on the two journal cards on the left.

Under The Plum Blossom Tree, December Daily and Stories by the Month, a blog post about keeping my New Year's resolution of documenting more family stories using the Stories by the Month kit by Ali Edwards and her concept of a story a day in the month of December

The most appealing idea behind both December Daily and Stories by the Month is that there are no rules about how to document. It just requires that you think about and know your why. For some, December Daily is telling stories every day in the month, while for others it's December 'Daily-ish', acknowledging that there are limits to what one can (or should) get done during a busy hectic month. Same for Stories by the Month - maybe there is only one good story in the month to tell or maybe the plan is to document several smaller stories.

So here is where I'm currently at in my memory keeping journey thus far this year - one big, long story for December and one big important event for January.

It's the last day of February and I had a birthday earlier in the month so I'm hoping to get my photos of that event edited and printed, because, after all the February Stories by the Month kit is just waiting to be crushed, right?

SHARE:

Tuesday, January 31, 2023

Moonshine, Starshine by Yuji Hiratsuka

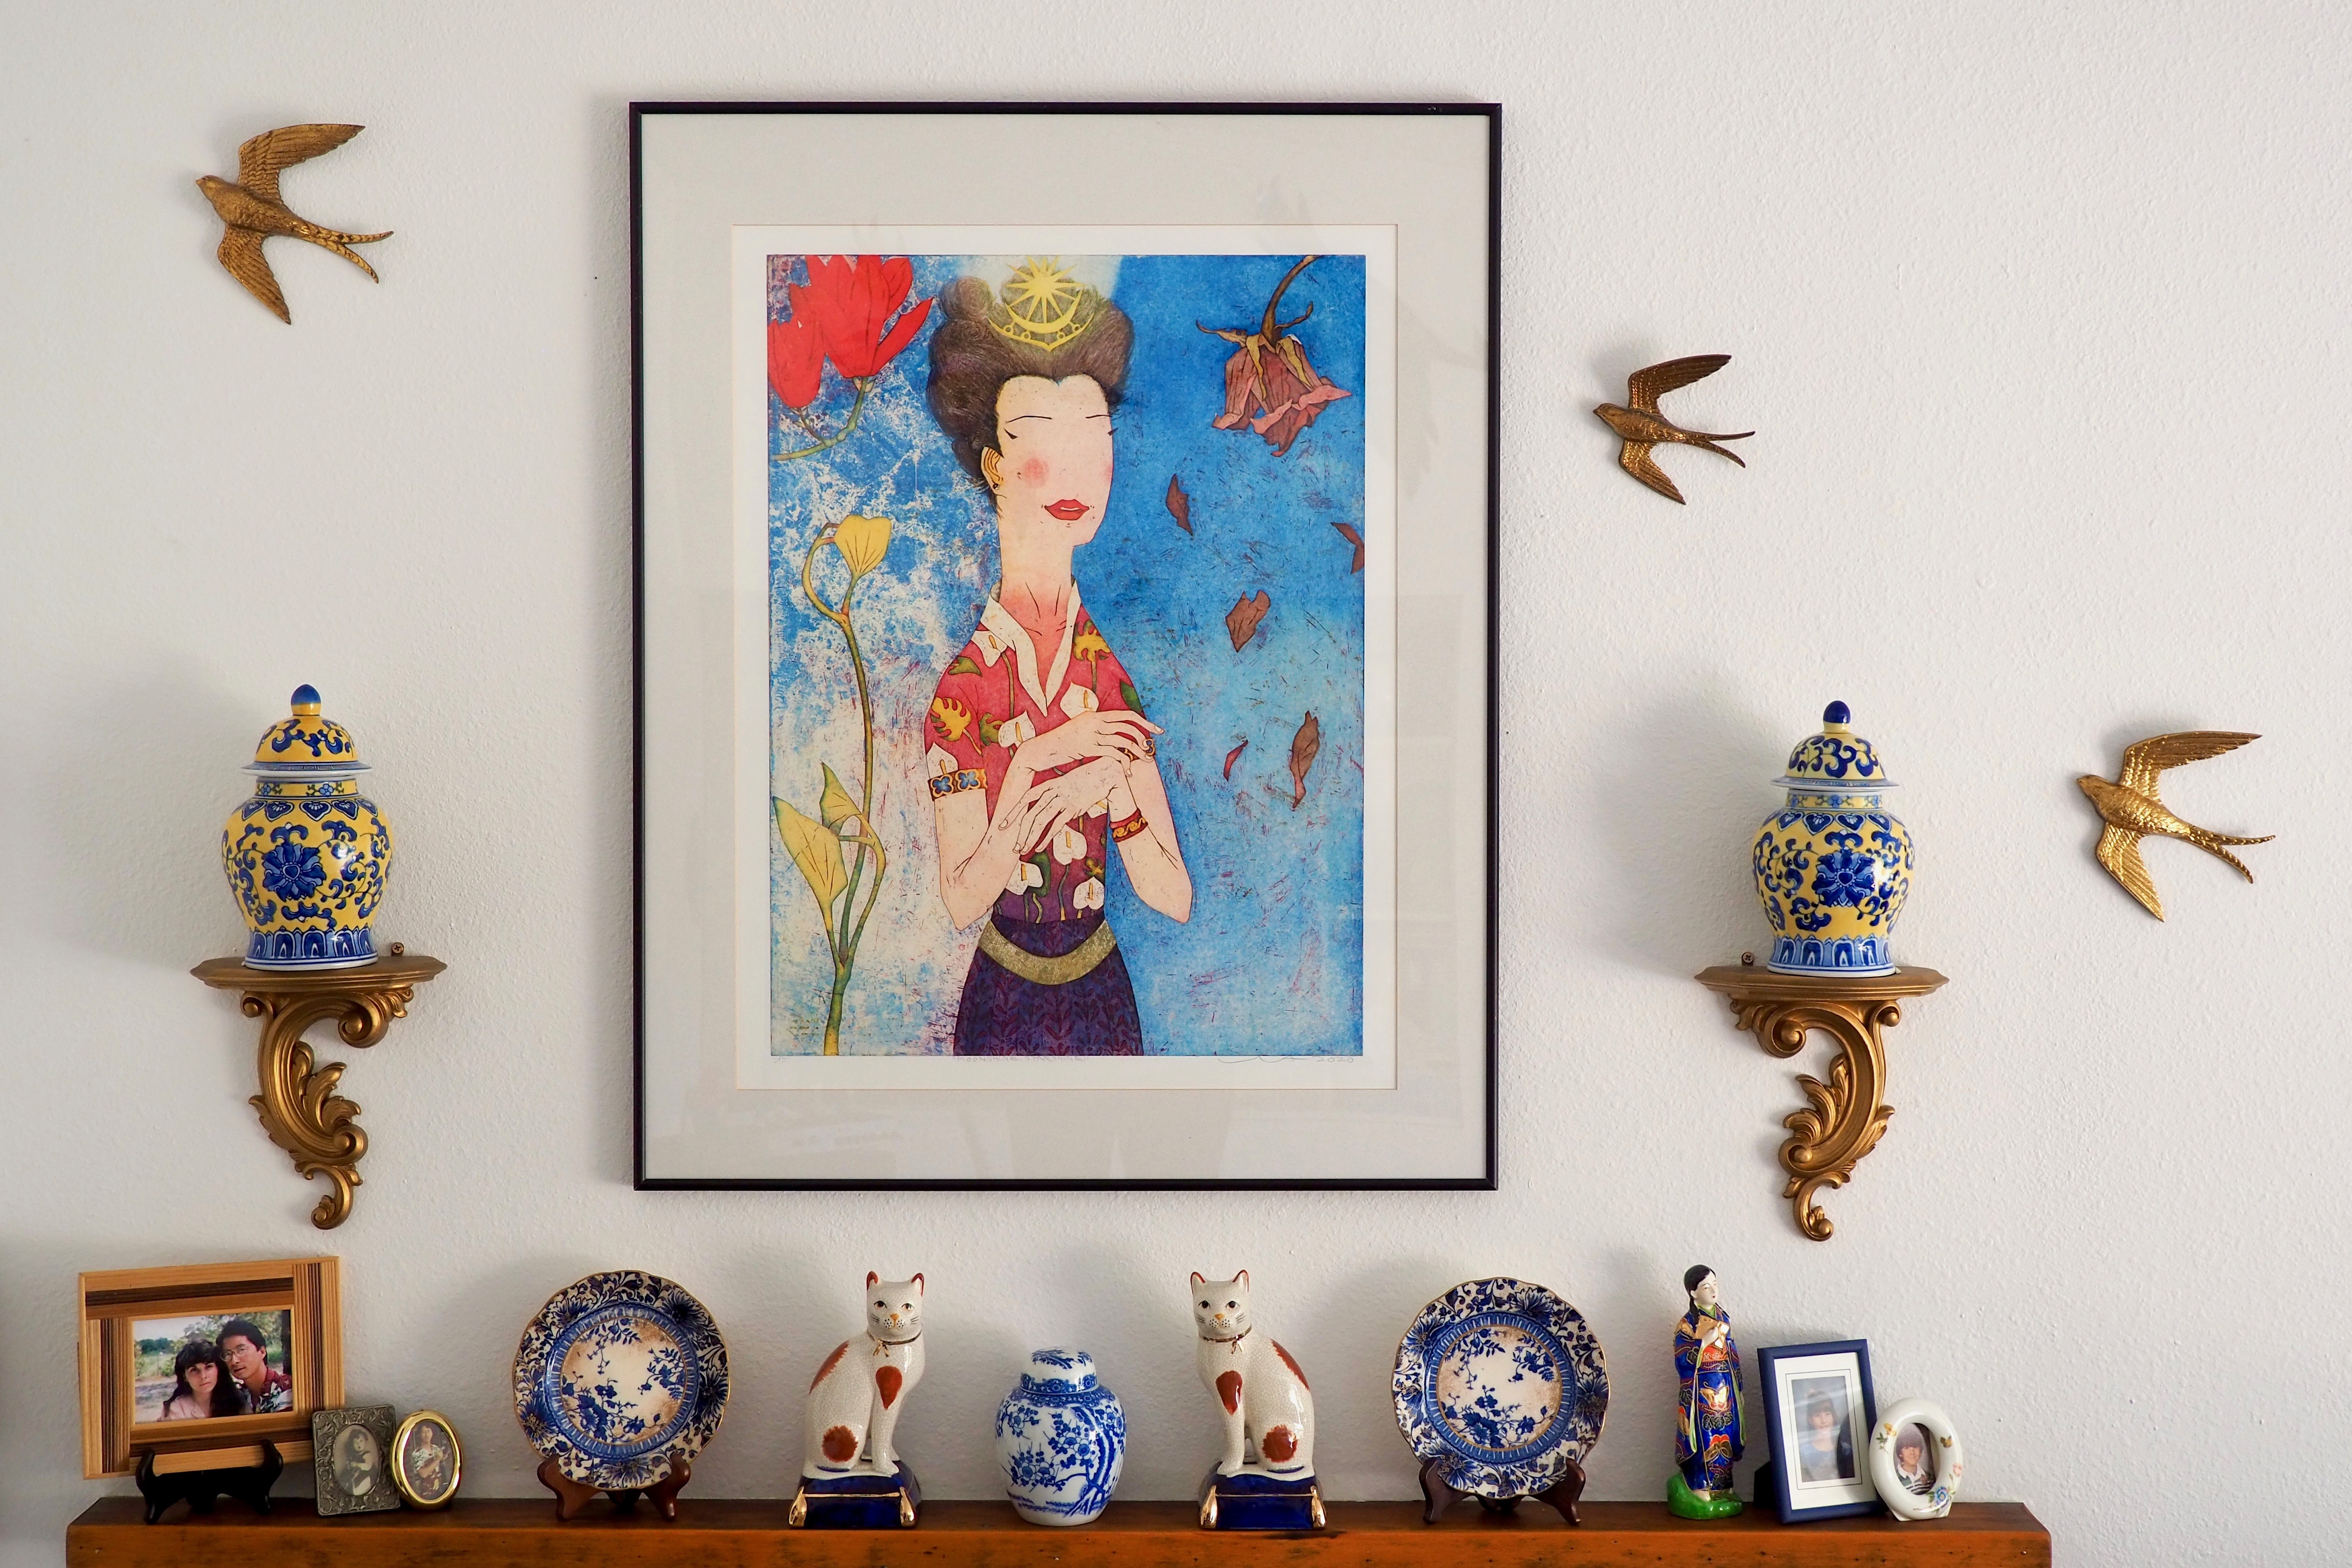
Under The Plum Blossom Tree, Moonshine Starshine by Yuji Hiratsuka, an original intaglio chine colle' print purchased at the White Lotus Gallery in Eugene Oregon

Hello friends and Happy New Year!

Back in 2018 when I started seeing the end of the child rearing years ahead, I started to focus on what I would want my home to look like once my kids grew up and moved into their own homes. That is when I discovered the Style Matters podcast, hosted by Zandra Zuraw.

Zandra calls her approach to home decor 'slow style' and it's all about "developing a personal style in your home and surrounding yourself with beauty in a way that is meaningful." As an avid collector of mid century and antique home wares, I was attracted to Zandra's philosophy and method and have been working on developing a cohesive eclectic style ever since.

So when I started getting the idea that it was time to purchase an interesting modern, colorful (and fun!) piece of art to add to my living room, I visited the White Lotus Gallery in downtown Eugene. I've been there many times over the years and chose that particular gallery for their selection of original Chinese and Japanese prints and paintings.

On one particular visit the gallery was featuring printmaker Yuji Hiratsuka. There were many of his whimsical, yet metaphysical, intalglio prints lining the walls. Most all featured a central human figure or figures engaged in some activity. I found myself drawn to Mr. Hiratsuka's use of character in this way and revisited the gallery a couple more times, trying to pick a favorite to purchase.

After much thought, I settled on Moonshine, Starshine. It is an intaglio and chine colle', meaning it is an intaglio print that has been collaged.

Under The Plum Blossom Tree, Moonshine Starshine by Yuji Hiratsuka, an original intaglio chine colle' print purchased at the White Lotus Gallery in Eugene Oregon

I wanted something that would jazz up the room and I think this piece does just that. I enjoy the fact that it is modern, yet traditional and incorporates both eastern and western influences.

Under The Plum Blossom Tree, Moonshine Starshine by Yuji Hiratsuka, an original intaglio chine colle' print purchased at the White Lotus Gallery in Eugene Oregon

Have you purchased original art for your home? What were some of your considerations? Let me know in the comments.

Thanks for looking and bye for now!

SHARE:

Tuesday, December 13, 2022

DIY: Handmade Christmas Cards

Under The Plum Blossom Tree, DIY: Handmade Christmas Cards, a blog post about making Christmas cards from colorful card stock papers which have been cut from metal dies, hand stitched and have gold embellishments and gems attached.

Hello friends! Once again I am trying my hand at creating some handmade greeting cards, this time for Christmas.

The main attraction on these new cards is a die cut ornament stitched with embroidery floss, decorated with a gold filigree-like element on the top and bottom, embellished with tiny sparkly gems, and finished with a fancy hanger top. The light green leaf sprigs are also part of the die set.

For each ornament I used the Spellbinders Stitched Ornament detailed cutting die set to cut the shapes shown above using my Sizzix Big Shot machine.

For the red finished ornament, (seen in the middle of the above photo and below), I first stitched the white floss to the red top piece, then glued it to one of the gold back pieces, then glued all the other die cut pieces and the Spellbinders Color Essentials gold gems onto the top.

Under The Plum Blossom Tree, DIY: Handmade Christmas Cards, a blog post about making Christmas cards from colorful card stock papers which have been cut from metal dies, hand stitched and have gold embellishments and gems attached.

The dark green card base was made by running a Sizzix 3-D Textured Impressions embossing folder in the Delicate Mistletoe pattern through my Sizzix machine. Right now the stitched ornament is just sitting on the card base as a kind of mock up as I haven't figured out the exact placement yet.

I also have a Spellbinders Mini Christmas Greetings stamp and die cutting set (not shown) that I will use to add the sentiments to the front and inside of the cards.

Who knows how many of the one dozen ornament shapes plus embellishments that I will actually get stitched and assembled so I’m sharing what I have so far! As you can see, this is an ambitious project I’ve set myself up for but I'm hoping to get about eight of them made before Christmas. (Now I'm understanding why the professional crafts people start their projects in July!) With work, family and all the other holiday activities happening I’m trying not to stress myself. Nuff said, right?

So I'll just be over here stitching and gluing whenever I can and hopefully I'll have more to share in a week or so.

Thanks for looking and bye for now.

SHARE:

Wednesday, November 23, 2022

DIY: Autumn Blessings Handmade Greeting Cards

Under The Plum Blossom Tree DIY: Autumn Blessings Handmade Greeting Cards, a blog post showing paper greeting cards made using a die cut machine and metal dies which are then glued onto a card base.

Hello friends! I'm so excited to show you this group of four 'Autumn Blessings' handmade greeting cards I recently crafted to send to my cousins. These incredible leaves were made with my Sizzix Big Shot Die Cutter, and the Concord and 9th Triple Step Autumn Leaf Dies.

Each leaf is a double layer - the bottom layer is a solid leaf and the top layer is a pattern. The bottom layer is cut from a leaf-shaped outline die and the top layer is cut from a patterned die that fits inside the leaf-shaped outline die. When glued together, the leaves become dimensional and are so colorful. The possibilities for color combinations are endless. This is a great way to use up your card stock scraps. I had fun looking through mine and creating the color combinations shown here.

Under The Plum Blossom Tree DIY: Autumn Blessings Handmade Greeting Cards, a blog post showing paper greeting cards made using a die cut machine and metal dies which are then glued onto a card base.

To make the cards, I first applied Recollections Sparkle embossing powder to a piece of Webster's Pages 'Begin Again' wood grain paper (I think it was produced around 2016) and to the white card stock circle embellishment (punched using a circle punch) using Honey Bee clear embossing ink and set them with my heat tool. (I bought my heat tool years ago but here are some options if you want one.)

I then created a card base by gluing a piece of brown card stock onto a Tonic Studio A6 card base and then glued the embossed Webster's Pages paper on top of the brown card stock. I glued each leaf pair together and then adhered onto the base, along with the white circle which I trimmed along the top. And lastly, I wanted to add a little more gold so I die cut more leaves from a piece of Lawn Fawn Metallic card stock (saved for another project) and glued some of the leaf and star-like cut outs into a few of the cut out portions of the leaves.

Under The Plum Blossom Tree DIY: Autumn Blessings Handmade Greeting Cards, a blog post showing paper greeting cards made using a die cut machine and metal dies which are then glued onto a card base.

I used black ink to stamp the 'Autumn Blessings' sentiment from the Spellbinders Fall Greetings stamp set and the three Paige Evans Garden Shoppe leaves (a Scrapbook.com exclusive freebie now gone) using my MISTI stamp tool.

Under The Plum Blossom Tree DIY: Autumn Blessings Handmade Greeting Cards, a blog post showing paper greeting cards made using a die cut machine and metal dies which are then glued onto a card base.

On the inside of the card I stamped the 'May the Season's Bounty fill your heart' sentiment from the same Spellbinders Fall Greetings stamp set, again using the MISTI stamp tool.

Under The Plum Blossom Tree DIY: Autumn Blessings Handmade Greeting Cards, a blog post showing paper greeting cards made using a die cut machine and metal dies which are then glued onto a card base.

And that's it! Which one is your favorite?

If you have any questions, let me know!

SHARE:

Sunday, October 30, 2022

Happy Halloween from Matilda

Happy Halloween from Matilda, a paper collage of a Victorian woman holding a raven and wearing a Halloween mask and surrounded by flowers, a spider and a raven flying in the background

Friends, it's the night before Halloween and my friend Matilda is stopping in to wish you a Happy Halloween!

By this time tomorrow evening, she will be sitting at a large round table with a group of strangers, each one anxious to have 'Madame Matilda' summon their dead loved ones.

They will all gather in the 'Occult Room' of Matilda's large, dark, musty Victorian house. First, she will dim all the gas-lit lamps. Then she will instruct the group of strangers to close their eyes, and when they do, she will raise her arms and commence to move them in a counter clockwise direction. She will then call out to the unkindness of ravens she keeps as her assistants and they will gather on the rooftops. They will flap their wings and cackle loudly. The winds will blow and the gas-lit lamps will flicker, and Matilda, now in a trance, will beckon the dead as they float and rise above the table. And the strangers, terrified, will call out their grief loudly as they learn the secrets of their dead ancestors - secrets they were never meant to know... 

The strangers will beg Matilda to cease her summoning. Matilda, still in a trance, cannot hear their pleas. Suddenly the ravens have mysteriously gotten inside the house and are flying inside the room with the dead ancestors, croaking, cackling and hissing at the strangers! Matilda, laughs maniacally, picks up her wand and thrusts it into the air. A bolt of lightening crashes into the house and the light, now bright and blinding, flashes! Suddenly all the dead ancestors vaporize and the table is littered with shiny black rocks that look like ravens.

The next morning, Matilda is walking slowly through her garden, tending to her flowers, plants and trees. A stranger walks by and lets out a loud croaking, cackling noise. Matilda pretends not to notice and the stranger croaks and cackles even louder. Matilda raises her arm, then brings it down quickly, pointing to the ground. The stranger, animated and lively in their demand that Matilda look their way, suddenly becomes mute.

Matilda smiles, picks a bouquet of orange chrysanthemums, walks into her house, and shuts the door.

SHARE:

Wednesday, October 26, 2022

The Big Send with Vote Forward

The Big Send with Vote Forward graphic which encourages volunteers to write letters to registered voters encouraging them to vote in the upcoming election.

Friends, an important election is coming up here in the United States and I would like to invite my fellow cititzens to join me in writing non-partisan letters to registered voters.

It's very easy.  Just go to VoteForward.org, create an account, 'adopt' voters to write your letters to and start writing. The guideline is easy - write a short sentence or two telling the recipient why you vote.

Here's a few examples of what I am writing in my letters:

(I vote because) "I want to live in a society where our collective voices are heard, honored, and respected."

(I vote because) "I want to live in a society where the people can elect officials that will represent us in our pursuit of life, liberty and happiness."

(I vote because) "democracy protects the people from potential harm and its goals are to move the country towards equality and freedom for all."

You can write as few as five letters or as many as you can. 'The Big Send', or date the letters will be mailed, is October 29th.

I hope you will consider participating in helping to boost voter turnout for 2022!

SHARE:

Sunday, October 9, 2022

DIY: Decoupage Chinoiserie Mini Pumpkins

Under the Plum Blossom Tree, DIY: Decoupage Chinoiserie Mini Pumpkins, a blog post lesson in how to create autumn season faux decoupage pumpkins to use as holiday decorations.

Hello friends! October is here and it's time to get crafty with some faux mini pumpkins! As one who enjoys making scrapbook pages, decoupage is another fun way to be creative with paper. And while I'm new to this wildly popular activity, despite some challenges, I managed to come up with the three designs shown.

It's actually very easy, just tedious and messy.

So let's gather our supplies:

Under the Plum Blossom Tree, DIY: Decoupage Chinoiserie Mini Pumpkins, a blog post lesson in how to create autumn season faux decoupage pumpkins to use as holiday decorations.

You will need:

Step 1 - Apply white acrylic paint to the surface of each of your pumpkins. The paint will provide 'grip' for your napkins to adhere to. I used white because my pumpkins have a lot of negative space showing. You might consider the colors in your napkins as to what your choice of paint color would be.

Under the Plum Blossom Tree, DIY: Decoupage Chinoiserie Mini Pumpkins, a blog post lesson in how to create autumn season faux decoupage pumpkins to use as holiday decorations.

Step 2 - Separate the printed layer of your napkin from the other one or two layers. You only need the printed layer. It will be very thin.

Under the Plum Blossom Tree, DIY: Decoupage Chinoiserie Mini Pumpkins, a blog post lesson in how to create autumn season faux decoupage pumpkins to use as holiday decorations.

Step 3 - Fussy cut your desired elements from your napkin. This is not an exact process - you don't have to cut on the lines and your cuts do not have to be perfect.

Under the Plum Blossom Tree, DIY: Decoupage Chinoiserie Mini Pumpkins, a blog post lesson in how to create autumn season faux decoupage pumpkins to use as holiday decorations.

It's a good idea to cut little snips around the perimeter of your cut-out shape. It helps the image ease onto the round pumpkin better.

Under the Plum Blossom Tree, DIY: Decoupage Chinoiserie Mini Pumpkins, a blog post lesson in how to create autumn season faux decoupage pumpkins to use as holiday decorations.

Step 4 - Apply a small amount of Mod Podge to your pumpkin in the area where you want to adhere your image. Lightly tack your image to the wet medium and adjust as needed.

Under the Plum Blossom Tree, DIY: Decoupage Chinoiserie Mini Pumpkins, a blog post lesson in how to create autumn season faux decoupage pumpkins to use as holiday decorations.

Apply a thin coat of Mod Podge to the remaining areas behind your tacked image. Now you'll want to work quickly using a generous amount of Mod Podge on your brush to apply the medium over the top of your image using light pressure and working from the middle (where you tacked the image) outward. Keep your brush wet with the medium and gently 'push' the paper into place. Be careful because the more wet your paper becomes the easier it will tear. Don't worry about the wrinkles - they will take care of themselves. Once your image is adhered, use your brush to gently smooth the image to the surface. Again, make sure your brush is wet and use light strokes. Repeat for the remainder of your cut-outs.

Under the Plum Blossom Tree, DIY: Decoupage Chinoiserie Mini Pumpkins, a blog post lesson in how to create autumn season faux decoupage pumpkins to use as holiday decorations.

Here's how I cut my napkins to make the other two pumpkin designs:

Under the Plum Blossom Tree, DIY: Decoupage Chinoiserie Mini Pumpkins, a blog post lesson in how to create autumn season faux decoupage pumpkins to use as holiday decorations.

And here are a couple of ideas I had for embellishing the tops of two of the pumpkins:

Under the Plum Blossom Tree, DIY: Decoupage Chinoiserie Mini Pumpkins, a blog post lesson in how to create autumn season faux decoupage pumpkins to use as holiday decorations.

Step 5 - The last step is applying the gold leaf to the stems of the pumpkins. The gold leaf kit has three parts - the adhesive 'size', the metal leaf (thin sheets of metal) and the sealer. (Tip: pull the stems of your pumpkins up about 1/4" so there is a gap - this will make applying the gold leaf easier.) First, apply the adhesive size with a paint brush. The size is very watery so use caution when dipping your brush into it. Be sure your brush goes into the crevices of the pumpkin stem. Let the size dry to a tacky consistency.

Under the Plum Blossom Tree, DIY: Decoupage Chinoiserie Mini Pumpkins, a blog post lesson in how to create autumn season faux decoupage pumpkins to use as holiday decorations.

After the size becomes tacky, cut a piece of the gold leaf. It should be larger than the surface area that you want to cover. Hold the gold leaf up to your pumpkin stem and use a dry paintbrush to gently push the leaf onto the stem. When you see the leaf is adhered to the stem, gently work the leaf into the crevices with your brush.

Under the Plum Blossom Tree, DIY: Decoupage Chinoiserie Mini Pumpkins, a blog post lesson in how to create autumn season faux decoupage pumpkins to use as holiday decorations.

Push the leaf with your brush so that it goes under the stem (see tip above). Gently work your way around the stem with your brush until the leaf is adhered to all the tacky areas. As you cover the size, the still dry parts of the leaf will begin to fall away.

Under the Plum Blossom Tree, DIY: Decoupage Chinoiserie Mini Pumpkins, a blog post lesson in how to create autumn season faux decoupage pumpkins to use as holiday decorations.

And lastly, apply the sealer to the stems with a paintbrush and let dry completely. Now you can push your stems back down onto the surface of your pumpkins.

Under the Plum Blossom Tree, DIY: Decoupage Chinoiserie Mini Pumpkins, a blog post lesson in how to create autumn season faux decoupage pumpkins to use as holiday decorations.

Step 6 - Tie some ribbon to the stems and you are done! Now you have a beautiful hand made craft to enjoy every autumn season for years to come.

Under the Plum Blossom Tree, DIY: Decoupage Chinoiserie Mini Pumpkins, a blog post lesson in how to create autumn season faux decoupage pumpkins to use as holiday decorations.

If you made it this far, thank you for looking! If you have any questions, please leave a comment.


SHARE:
© Under The Plum Blossom Tree | All rights reserved.
Blogger Template Created by pipdig