With November nearly gone, it's time to reflect on some of the recent events that have had the most significance for me. As a memory keeper, it makes me happy to be able to slow down and share some of these cherished 'kitchen table' moments with you.
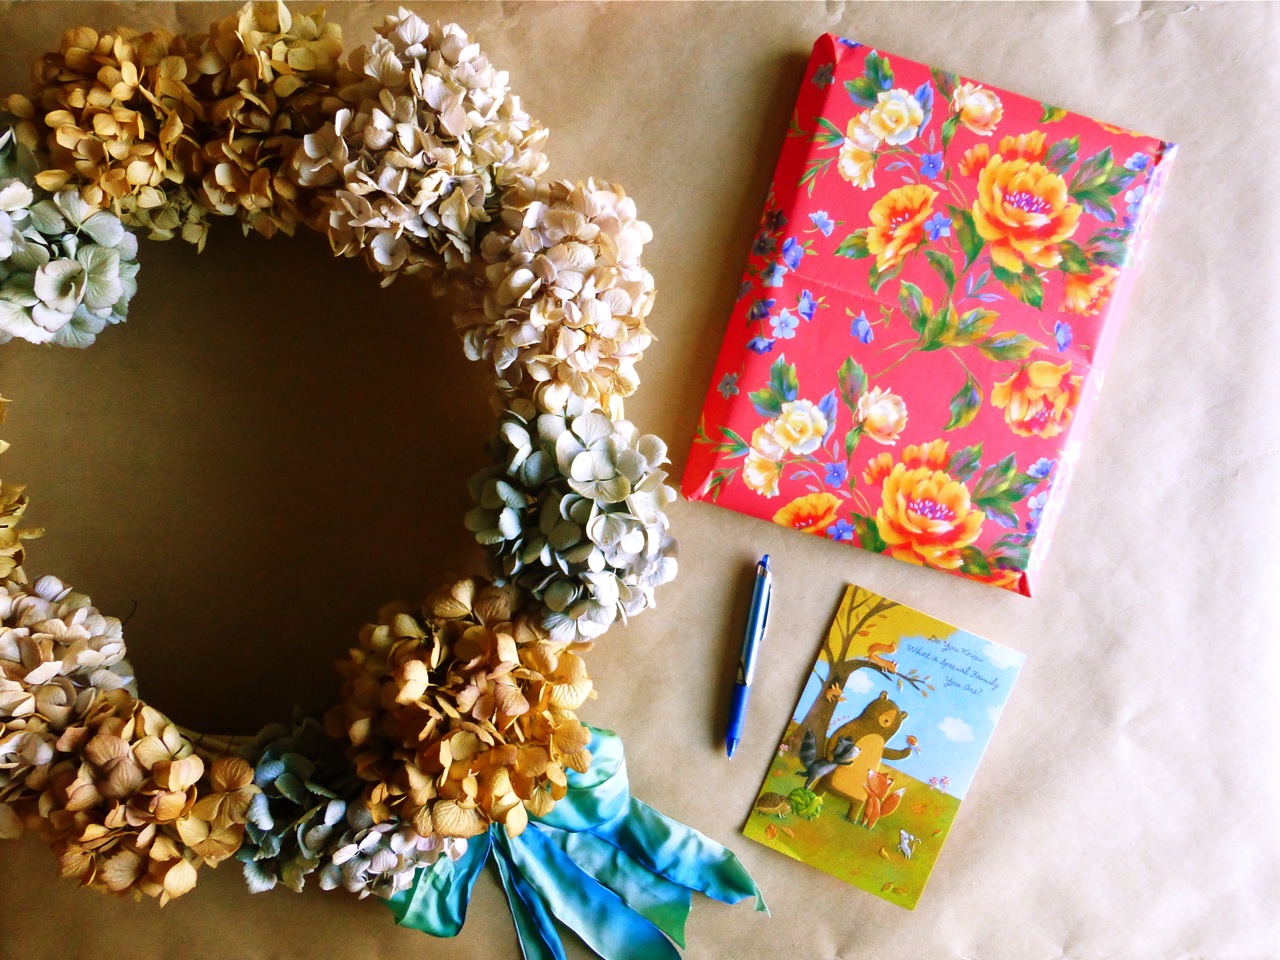
On Thanksgiving morning, I made the hydrangea wreath shown in the above photo for my mom who lives in a nursing home nearby. My daughter Audrey and I brought it to her that same day, along with a small colorful autumn-themed oil painting (shown above, already gift wrapped), and a Thanksgiving greeting card. Mom loves greeting cards, and our visit and the gifts mean a great deal to her.
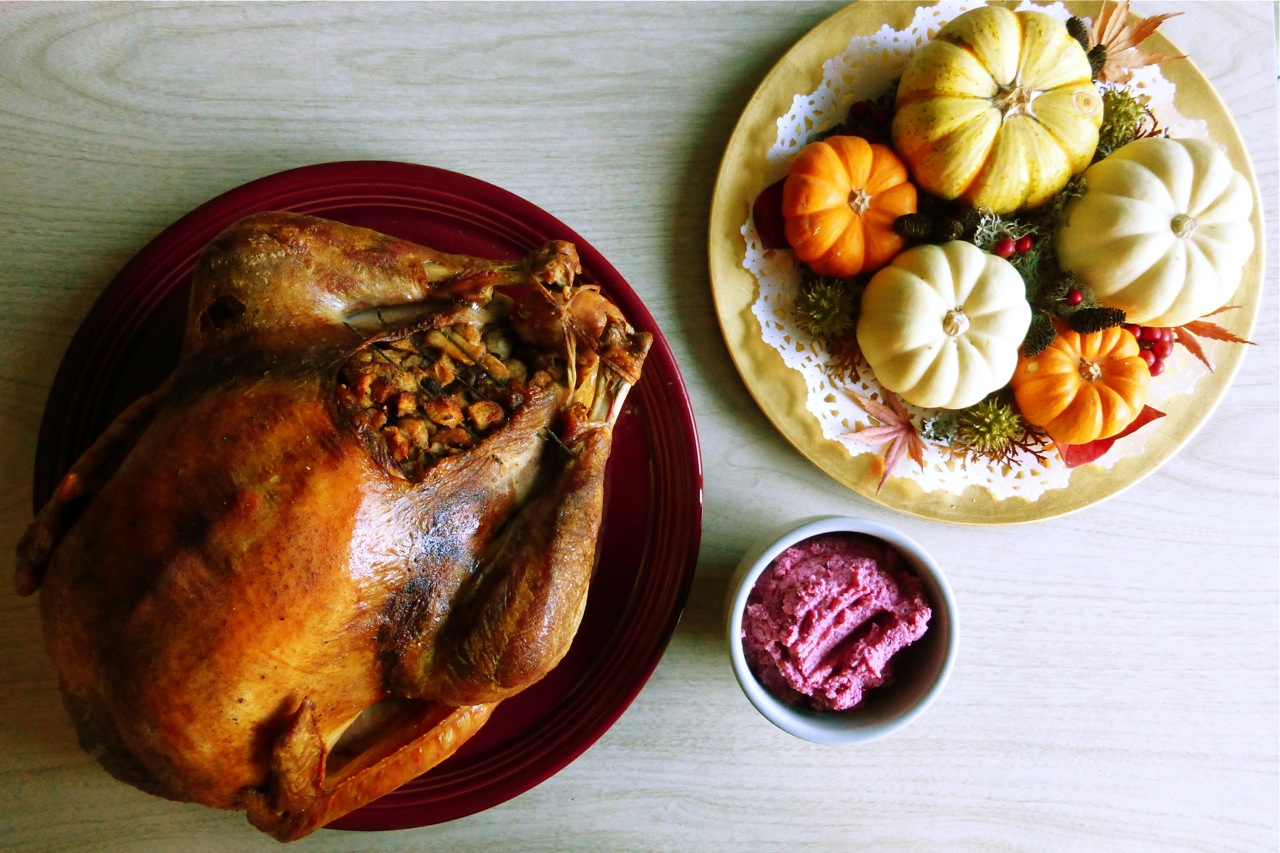
Thanksgiving dinner with my family: this year, we had the traditional roast turkey 'with all the trimmings', as the saying goes. True comfort food! Also shown is my favorite holiday relish, a Martha Stewart recipe that is made with fresh cranberries, apple, orange, and walnuts. I also made the festive seasonal table decoration sitting to the right of the turkey. This year was the first time I've ever purchased the cute mini pumpkins, and I've thoroughly enjoyed playing with them, both as a decoration, and as photo props on Instagram.
In the early morning on the day after Thanksgiving, I spent over an hour photographing mother nature's handy work in my garden - soon to become another blogpost featuring my garden in various seasons. Although it was incredibly cold, I very much enjoyed walking around with my camera looking for interesting compositions. Afterward, I gave myself some time to rest, reflect, and enjoy a warming cup of coffee and a slice of homemade pumpkin pie. Currently, I've been reading Happy Handmade Home by Elsie Larson and Emma Chapman, as well as some other interesting books found at the local library. The remainder of my holiday time will be spent doing chores like raking leaves, organizing my work space, and cleaning up after the holiday. So, all the more reason to enjoy the now...
Styling The Seasons is a monthly photography challenge hosted by Katy of Apartment Apothecary and Charlotte of Lotts & lots. To participate, just style any surface in your home and share it on your blog and/or on Instagram using the hashtag #stylingtheseasons.
Saturday, November 28, 2015
Wednesday, November 25, 2015
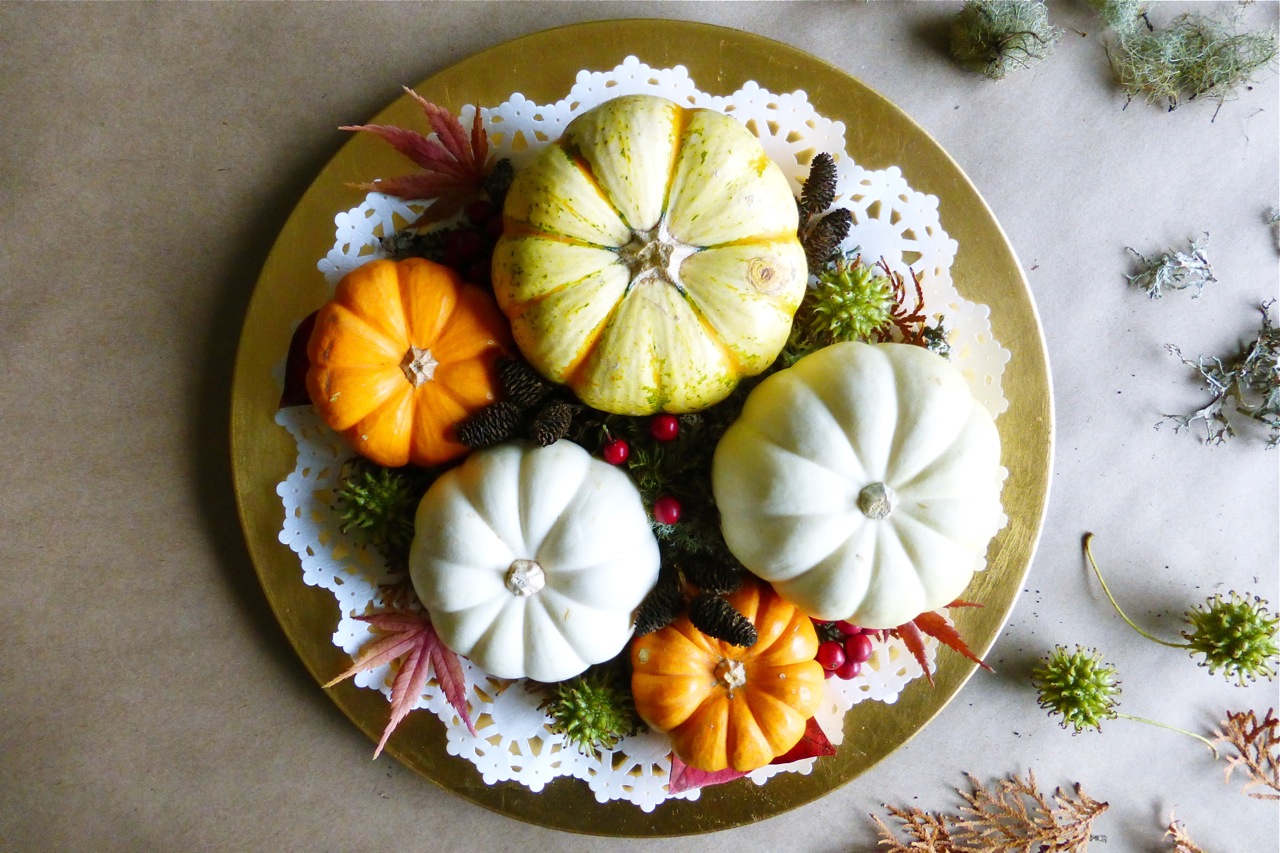
DIY: Autumn Mini Pumpkin Table Centerpiece
To make this table centerpiece you'll need the following:
• 5 mini pumpkins (found at many grocery stores during autumn)
• a variety of leaves, moss, seeds, berries - whatever you can find
• one paper doily
• a gold charger plate (I found mine at a local thrift shop)
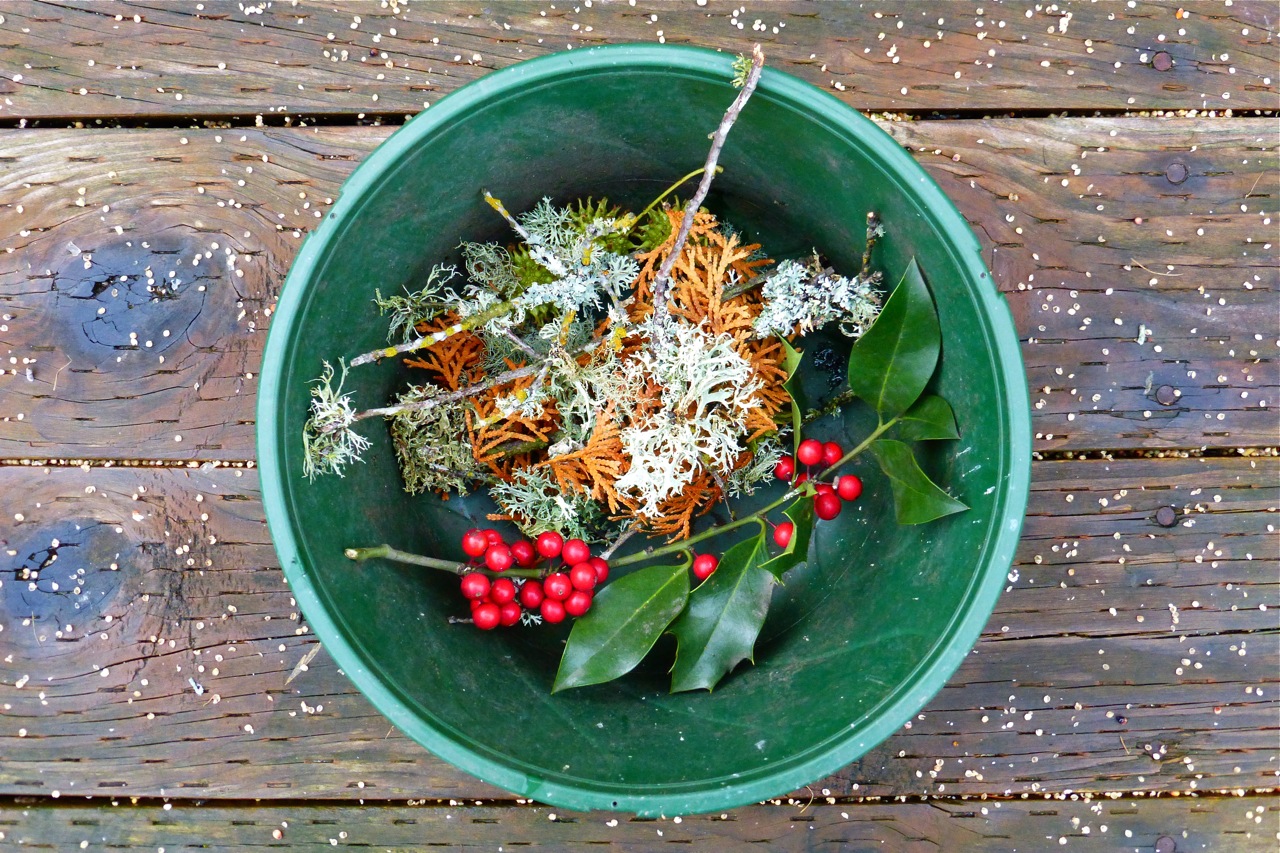
I really enjoyed getting outside and gathering up the bits of nature that were later used to fill in the gaps in and around the pumpkins. It's fortunate having an abundance of natural choices right here in my own yard, and it didn't take long to collect several handfuls of interesting materials:
After coming back indoors, it was fun just laying everything out and looking over this wonderful variety of mosses, lichens, berries, seed pods and arborvitae sprigs:
I had saved a few autumn colored leaves from a Japanese maple and my blueberry bushes, and added those to the mix as well.
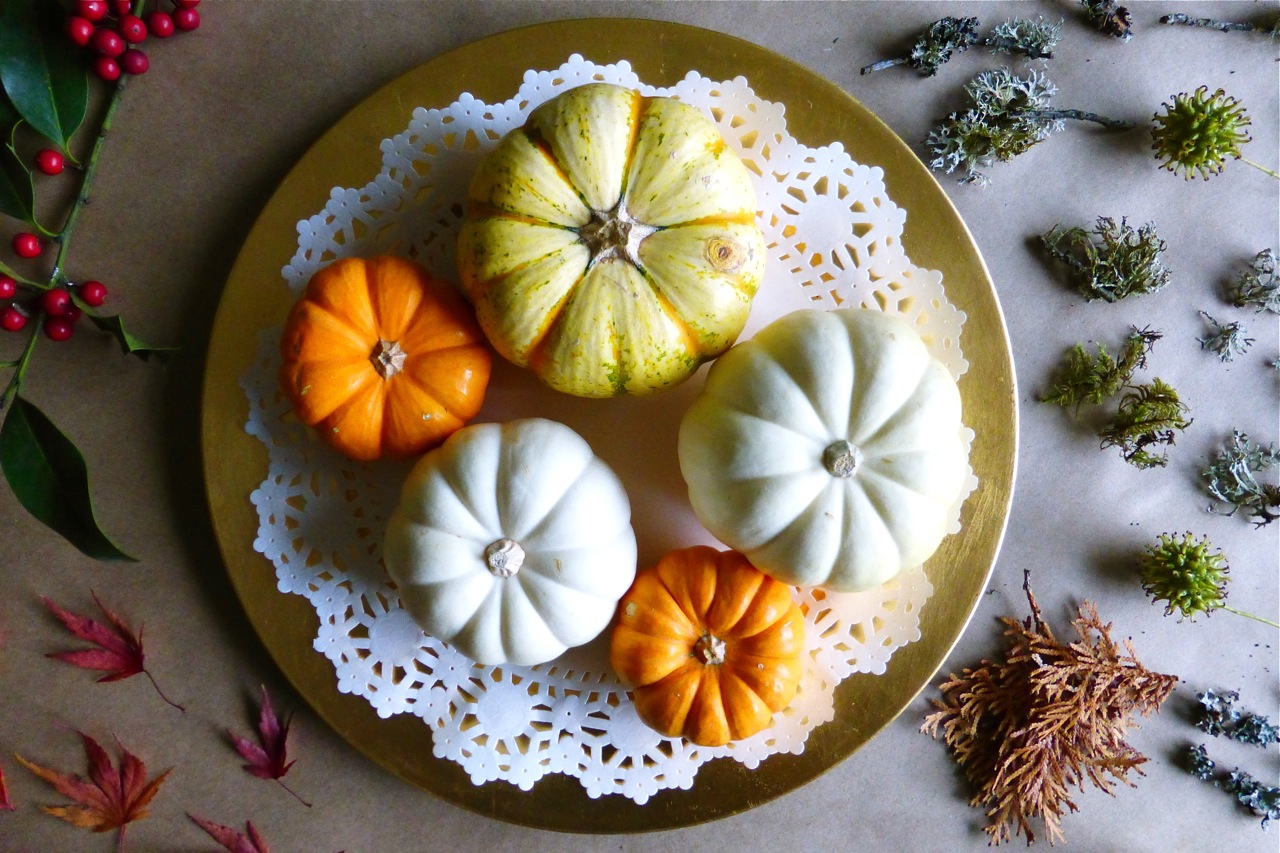
The first step is to arrange the mini pumpkins on your platter. This is where you want to pay attention to color, size and shape, as these elements determine the dynamics of the arrangement:
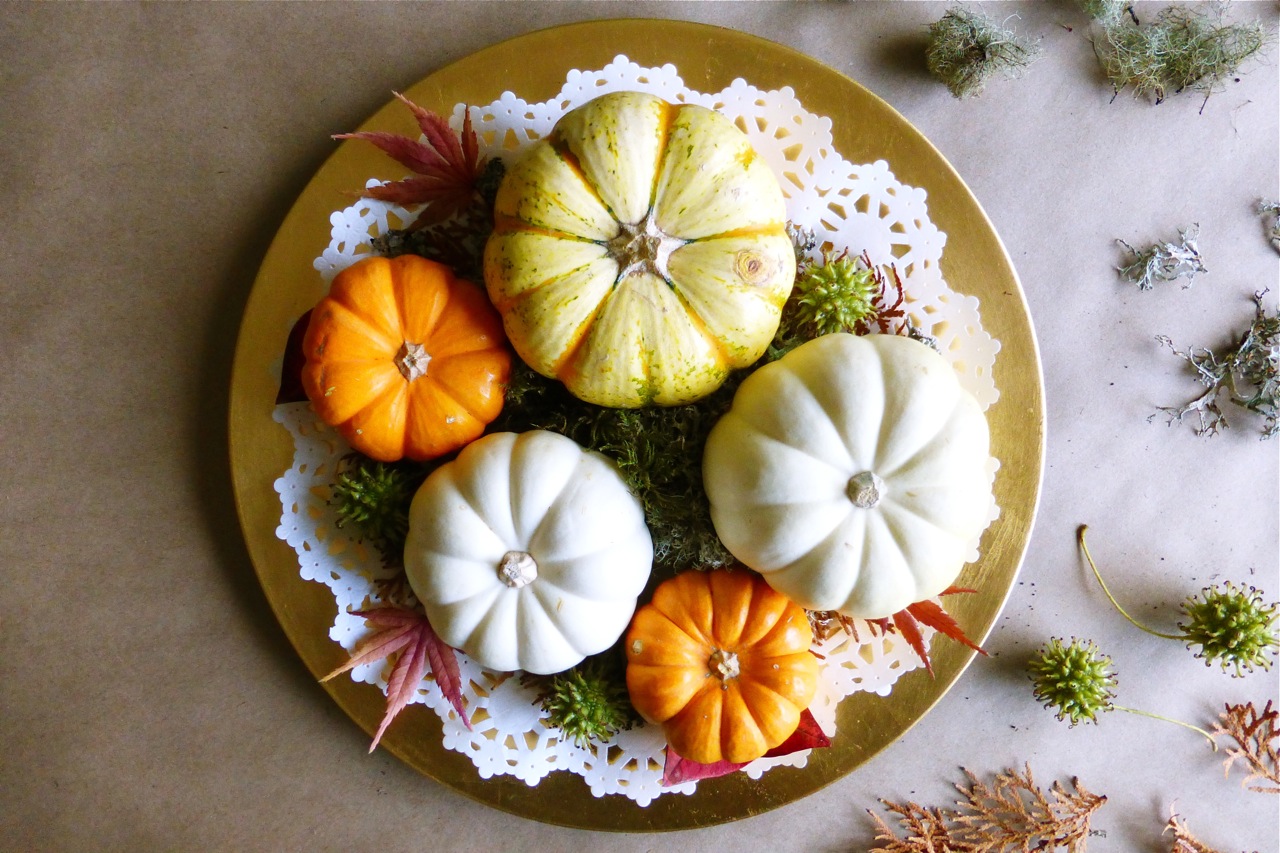
Make sure to leave space around some of the pumpkins; this will be where you will want to fill in those gaps with some of your gathered materials. I started with the arborvitae sprigs, adding in just a few around the perimeter of the charger plate:
Next, I added three sweet gum seed pods:
Then, I filled in the gaps between the pumpkins with moss, as well as adding some around the outsides:
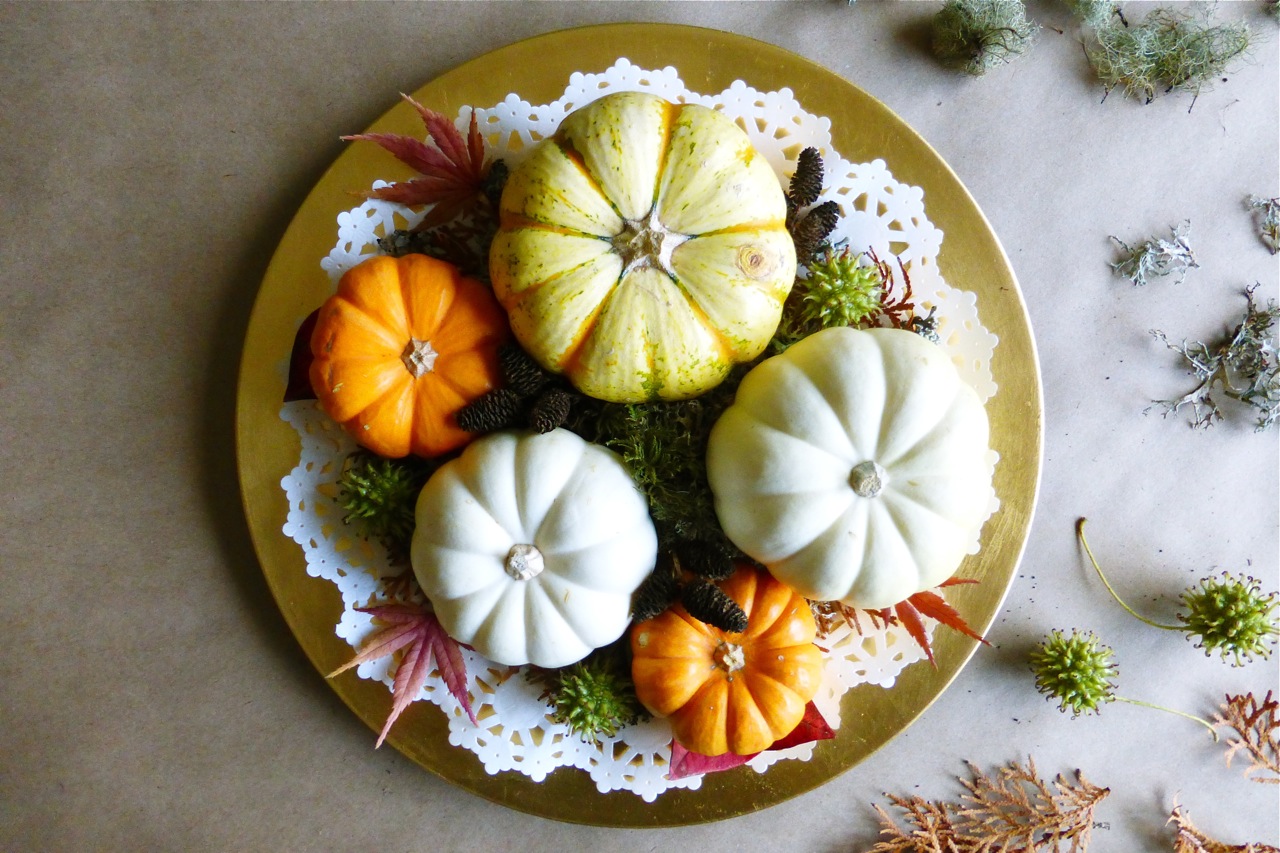
A few leaves:
Some alder seed cones:
And lastly, some holly berries:
And that's it! I plan on using my new centerpiece as part of the table decor for our Thanksgiving Day celebration on Thursday, but of course this display is a great centerpiece for an autumn Sunday dinner, too.
Thanks for reading, and I hope you will consider creating an Autumn Mini Pumpkin Table Centerpiece of your very own.
See you next time!
Sunday, November 15, 2015
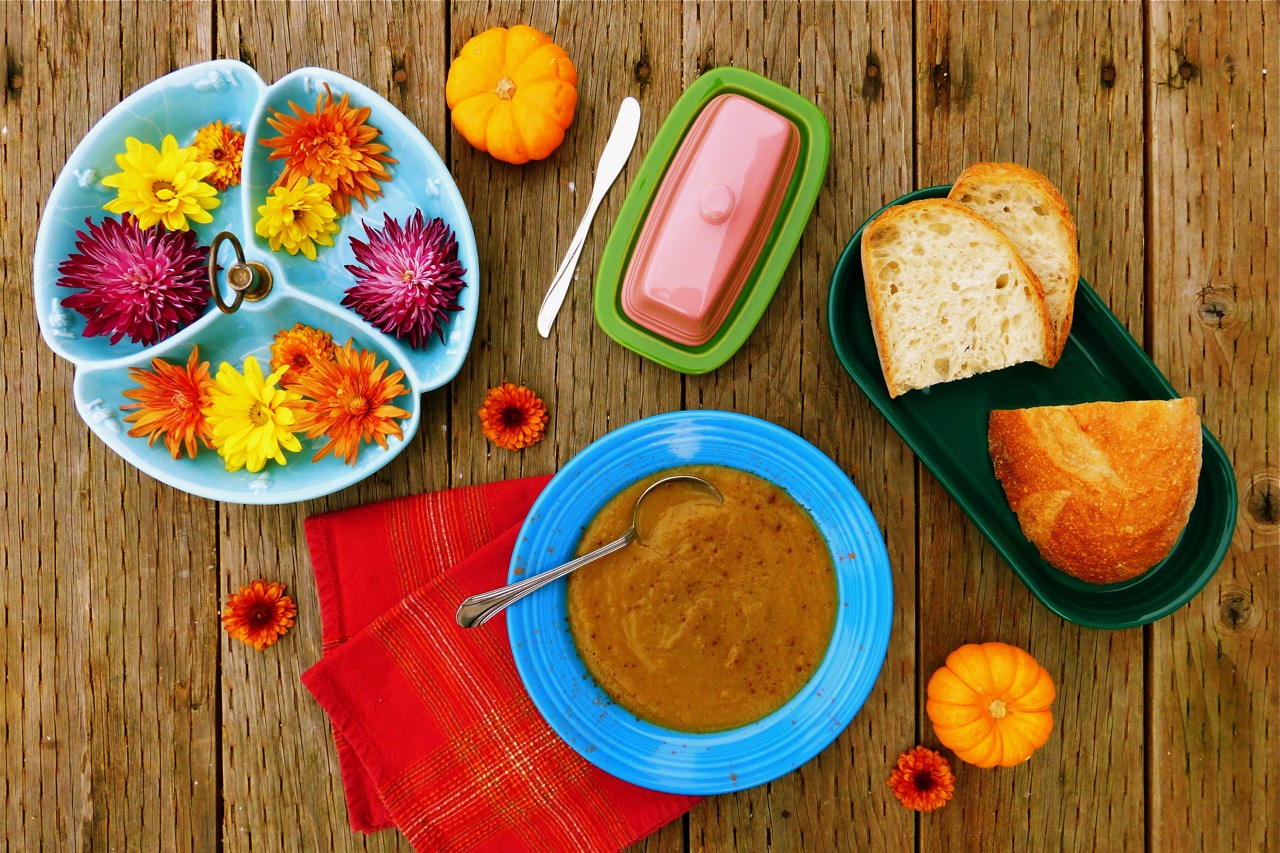
Roasted Pumpkin Soup
Hi friends! Is it getting chilly in your part of the world? The cold weather is beginning to sink in here in the Willamette Valley of Oregon. I shouldn't complain, though - up until now the days have been sunny and pleasant.
But now that the rain is back and the temperatures are no longer mild, it's time to get out the soup pot and make some homemade soup. I enjoy sitting at the kitchen table, watching the birds flit in and out of my garden while I linger over a hot bowl of soup. There are sparrows, wrens, towhees, blue jays, finches, bushtits, flickers, downy woodpeckers, and starlings. But that is a story for another day. Soup is on the menu today.
And the taste of pumpkin soup, in my mind, must include pumpkin pie spice. As everyone knows, pumpkins and spice go together. Traditional pumpkin pie spice mixture is a blend of powdered cinnamon, cloves, ginger, nutmeg, and allspice. Considered a warming spice, pumpkin pie spice is often found not only in pumpkin pie, but also soups, stews, curries, vegetable dishes, breads, and even ice cream! 'Pumpkin everything', as the saying goes!
I pondered over several recipes both in my collection of cookbooks and on the internet, and found that I prefer a savory, rather than a sweet pumpkin soup, so there is no sugar in this recipe. I think that onions, and a pumpkin that I roasted myself, also contribute to that savory flavor I was looking for. Here is my version of this classic soup:
Roasted Pumpkin Soup
1/2 of a medium onion, diced
3 Tablespoons olive oil
2 pounds roasted pumpkin, mashed
4 cups chicken broth
1 Tablespoon butter
1 Tablespoon flour
2 teaspoons pumpkin pie spice
salt and pepper to taste
2-4 cups water
In a soup pot, heat olive oil and sauté the diced onions until tender, about 10 minutes. Add the roasted pumpkin and the chicken broth and bring to a boil. Combine the butter and flour, and stir it into the boiling soup. Add salt, pepper, and the pumpkin pie spice. Turn the heat down and simmer the soup for 30 minutes with a lid on half way to retain liquid, and add water as necessary, stirring occasionally. Adjust seasonings to your preference. Once your soup has your desired taste and consistency, remove from the heat and take off the lid. Let cool for about 30 minutes, stirring occasionally to release the steam. When cool, pureé in a blender or food processor, and return to the soup pot. Reheat the soup, and serve garnished with a pinch of pumpkin pie spice. Enjoy!
Yield: about 8-10 cups
Cooking time: about 2 hours
Sunday, November 8, 2015
Ode To A Summer Garden, Through The Lens
The summer garden brings so much joy; it's hard to let go...
Echinacea, I will miss your sturdy colorful petals bobbing in the warm gentle breeze...
And blueberry, I am already anticipating next summer when I can taste your sweetness in my cereal again...
And hosta, your broad, ribbed leaves and delicate purple flowers are a sight to behold. See you next year, my friend...
Maple - you are the brightest star in my garden galaxy! With each passing day, your long branches are becoming more visible, reminding me that this past summer is now just a memory...
I will never forget you, dear lily. Your sweet scent on a warm summer night is wrapped up in my mind's eye, and shall live there forever...
All photos taken with my iPhone.
Echinacea, I will miss your sturdy colorful petals bobbing in the warm gentle breeze...
And blueberry, I am already anticipating next summer when I can taste your sweetness in my cereal again...
And hosta, your broad, ribbed leaves and delicate purple flowers are a sight to behold. See you next year, my friend...
Maple - you are the brightest star in my garden galaxy! With each passing day, your long branches are becoming more visible, reminding me that this past summer is now just a memory...
I will never forget you, dear lily. Your sweet scent on a warm summer night is wrapped up in my mind's eye, and shall live there forever...
All photos taken with my iPhone.
Saturday, October 31, 2015
Styling The Seasons - October
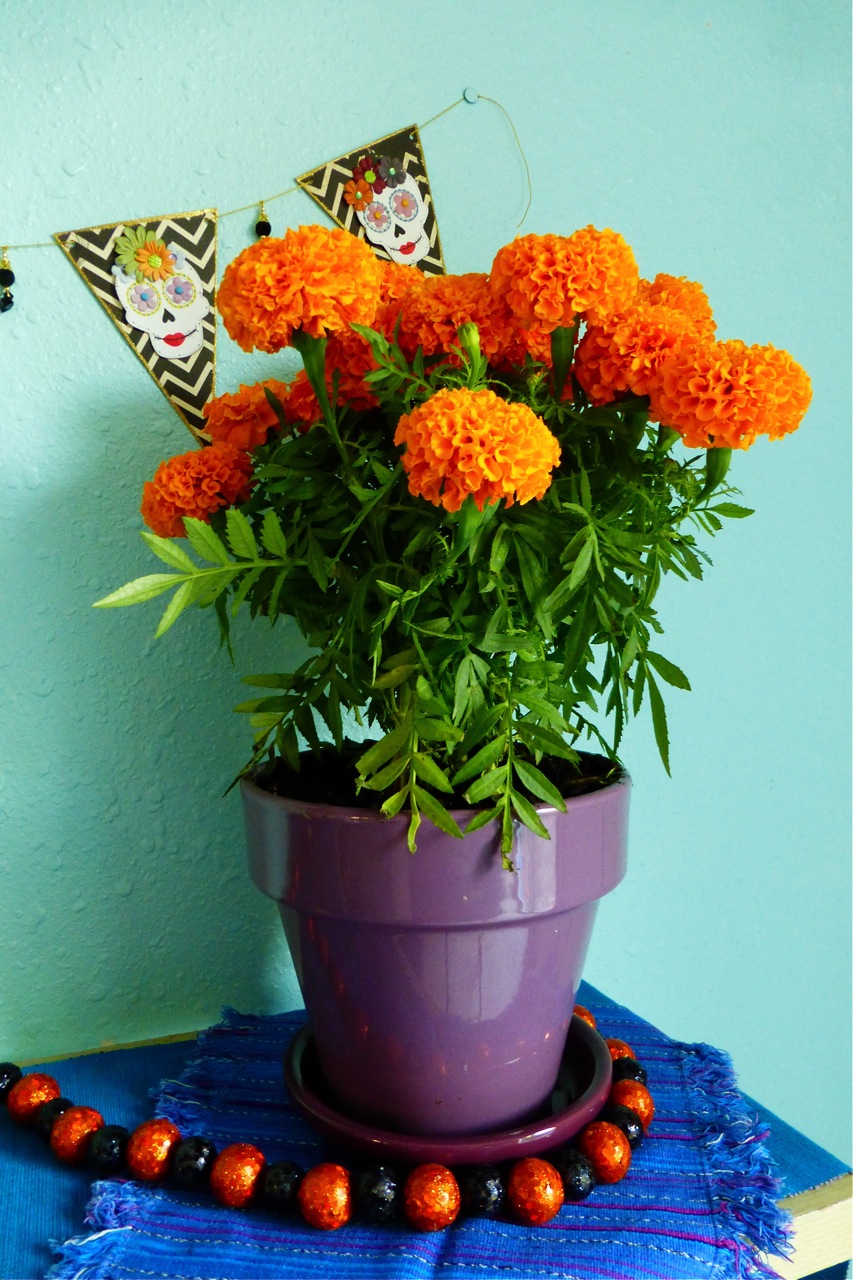
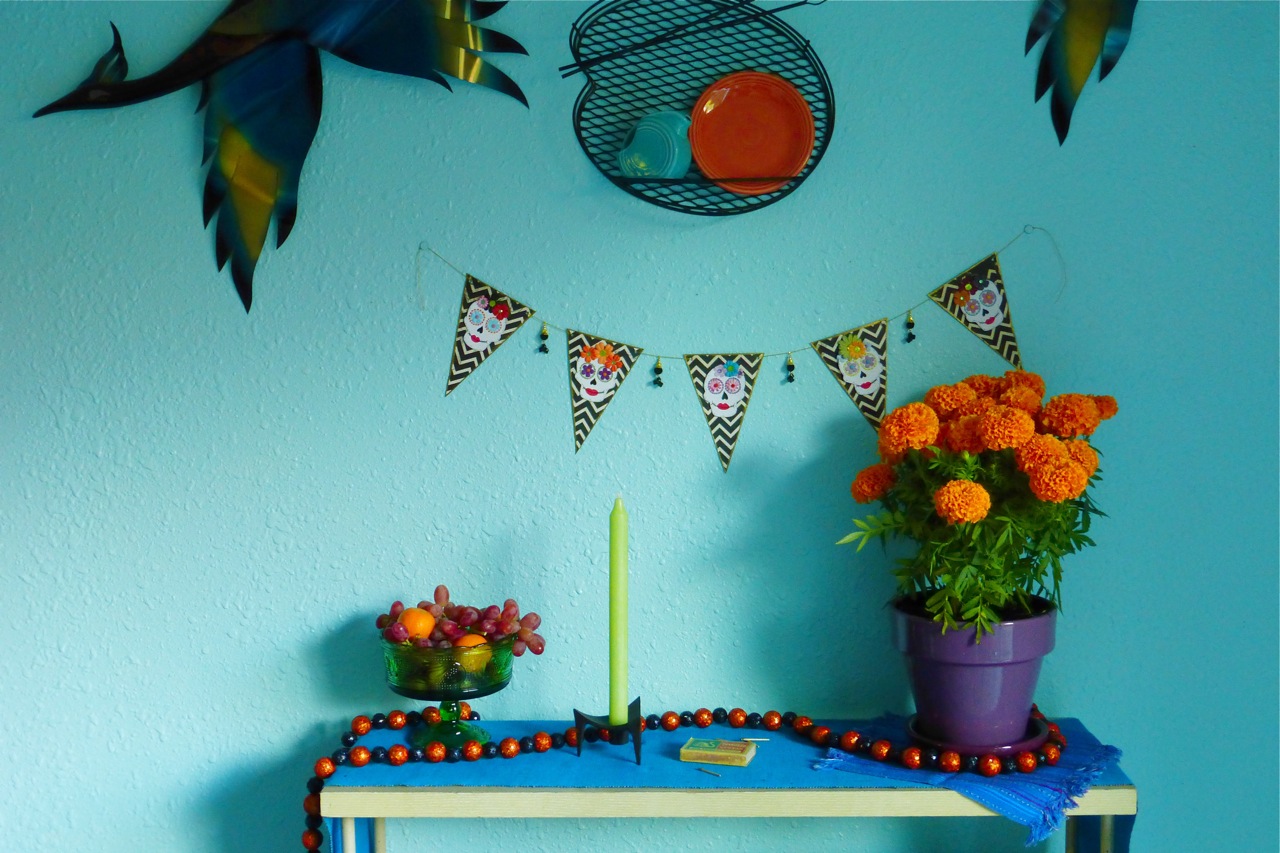
Serendipity, or the accidental discovery of something which you were not in quest of, perfectly describes my October Styling The Seasons display. It all started last weekend when, inspired by the seasonal change that has finally taken hold in my town, I went to the grocers to get some stems of mini pumpkins, and use them as a springboard to style a surface in my home. But much to my surprise, I saw potted marigolds displayed on some hay bales, and was immediately drawn to them. I looked at the tag and it said "Hay mas tiempe que vida", or "There is more time than life."
You may have heard of Dia de los Muertos, or the 'Day Of The Dead'; beginning on October 31st and ending on November 1st, this holiday honors those that have passed on. It originated in Mexico, but is celebrated throughout Latin America, and there are similar celebrations in Europe, Asia, and Africa, all of which take place during autumn. In my own family, we have joined the late summertime festivities of the Buddhist Obon festival, which also honors past ancestors, for almost twenty years now.
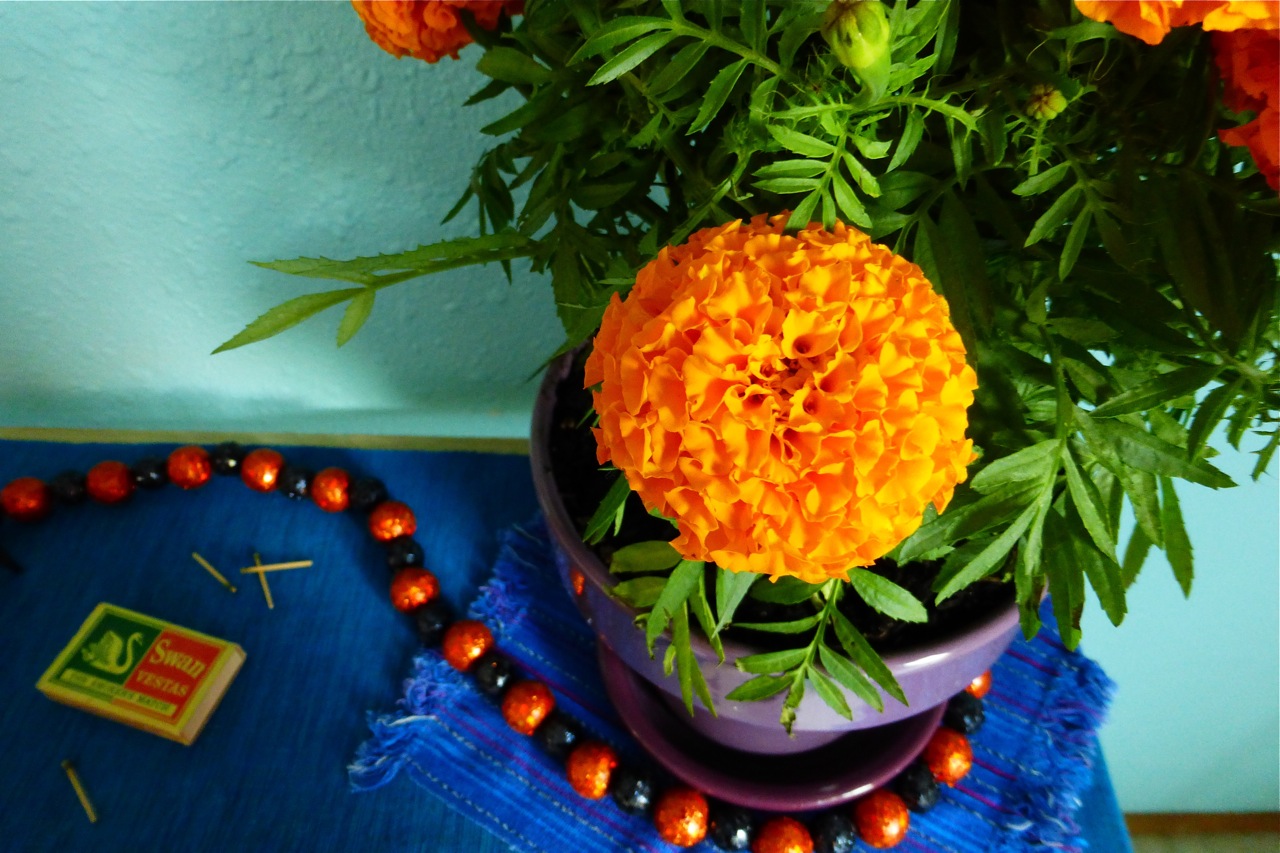
Marigolds, or Tagetes erecta, are native to Mexico and Central America and are referred to as the Flower With 400 Lives, or Flower Of The Dead (Flor de Muerto). They are used during The Day Of The Dead as decorations for ofrendas (graves or alters). The adornments also include foods such as candied pumpkin, pan de muerto (a kind of bread), sugar skulls, candles, photographs, and personal mementos of the person being remembered. As well as being decorative, marigolds are thought to attract the souls of the dead to these offerings.
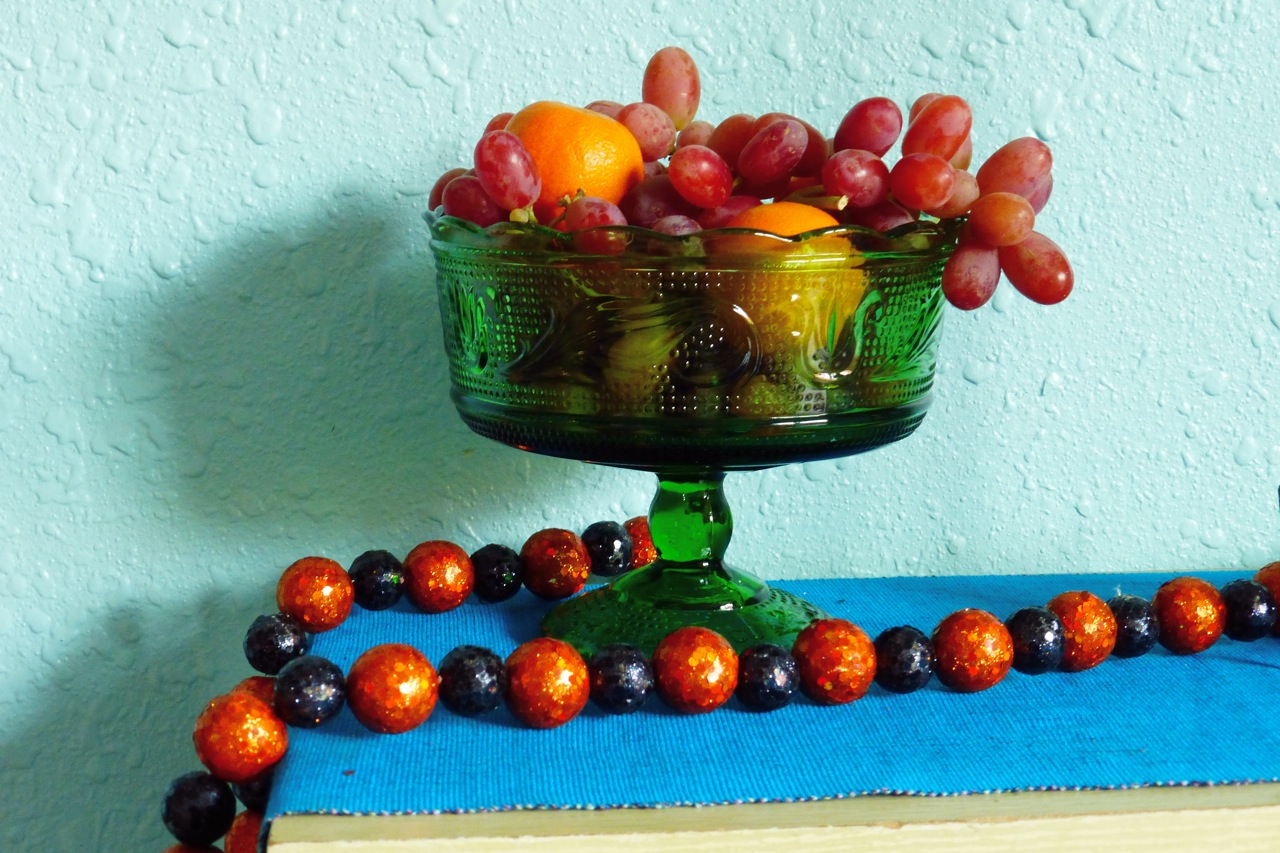
Here in the United States, as in many other countries, All Hallows' Eve, or Halloween, is celebrated on October 31st. Our family has always celebrated this holiday - my kids love to dress up and I enjoy putting up some lights and a few decorations. This year is no different - the lights and decorations have once again found their traditional places in and around our home, but this year, I've also added my own version of an ofrenda. I used Pinterest to create a board of ideas to help me decide how I would like to design my own ofrenda. Building on the idea of honoring the dead, and in addition to my beautiful potted marigolds, I added a vintage footed pedestal bowl that I filled with fruit:
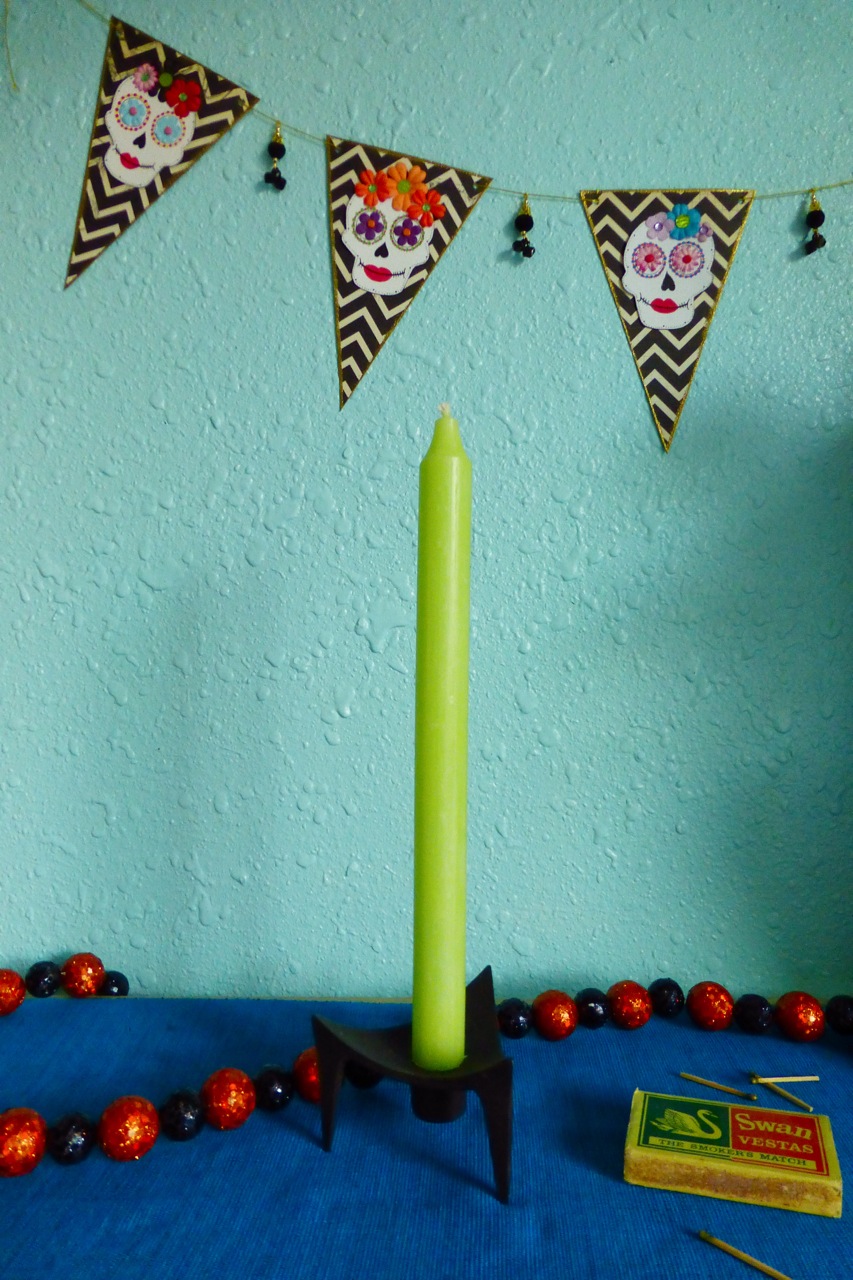
And placed a candle in a vintage 1950s black cast iron Danish candle holder:
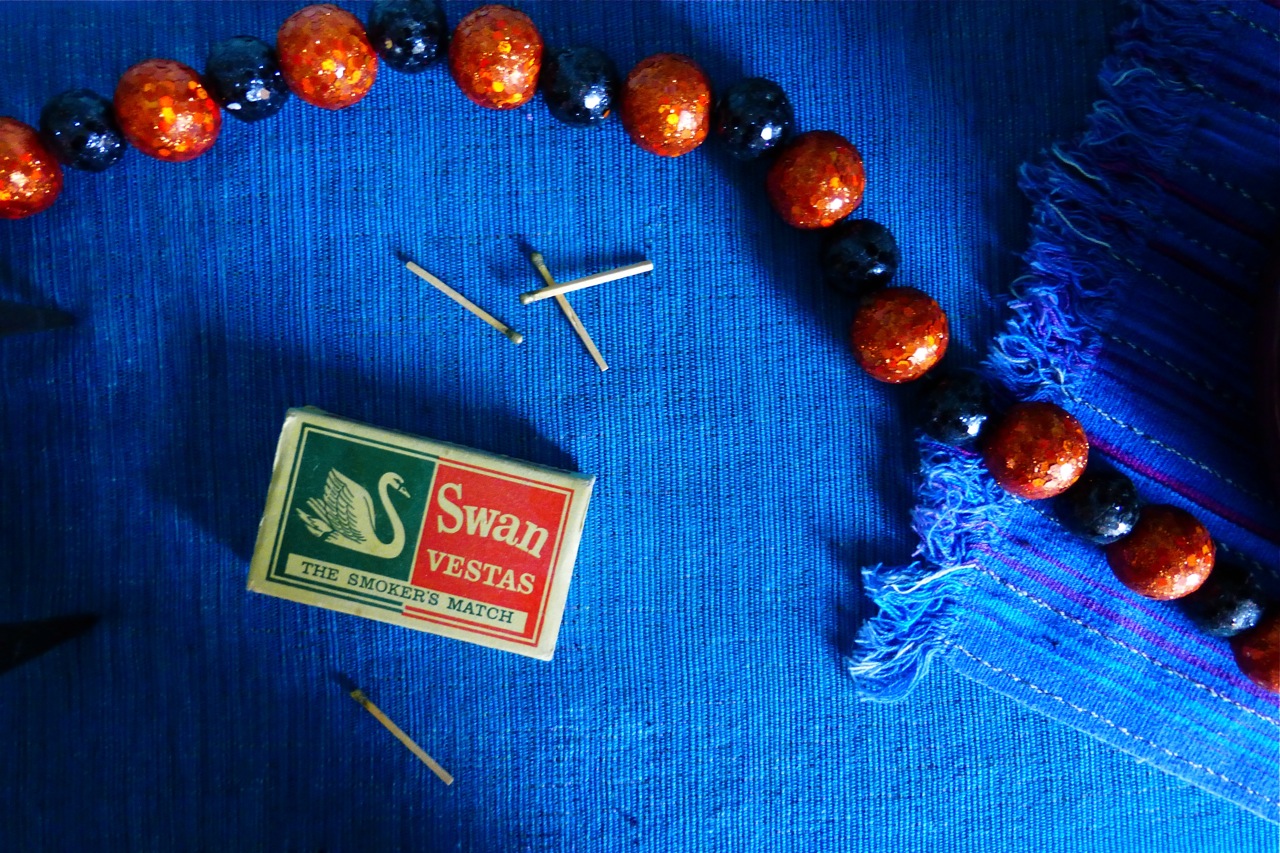
An old box of matches is at the ready - I think I'll light my candle tonight:
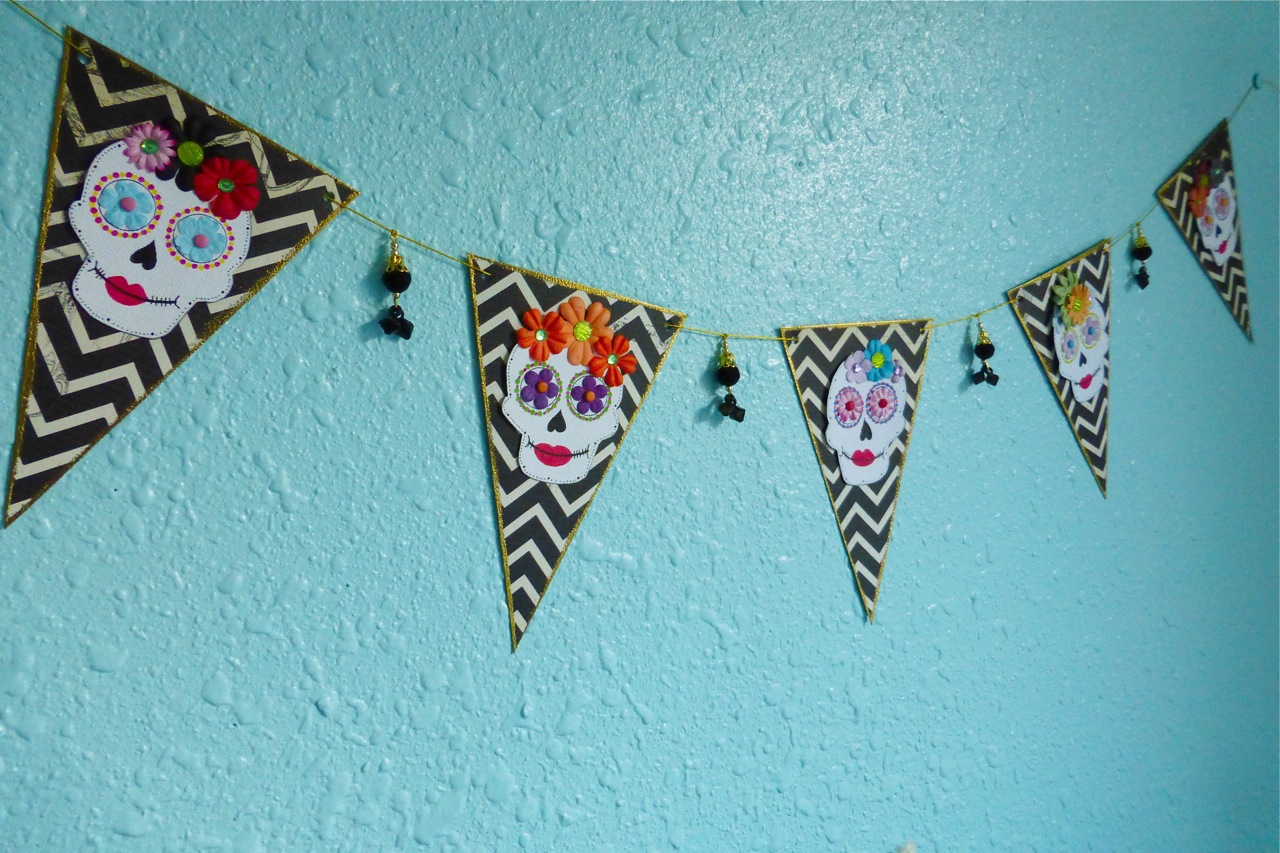
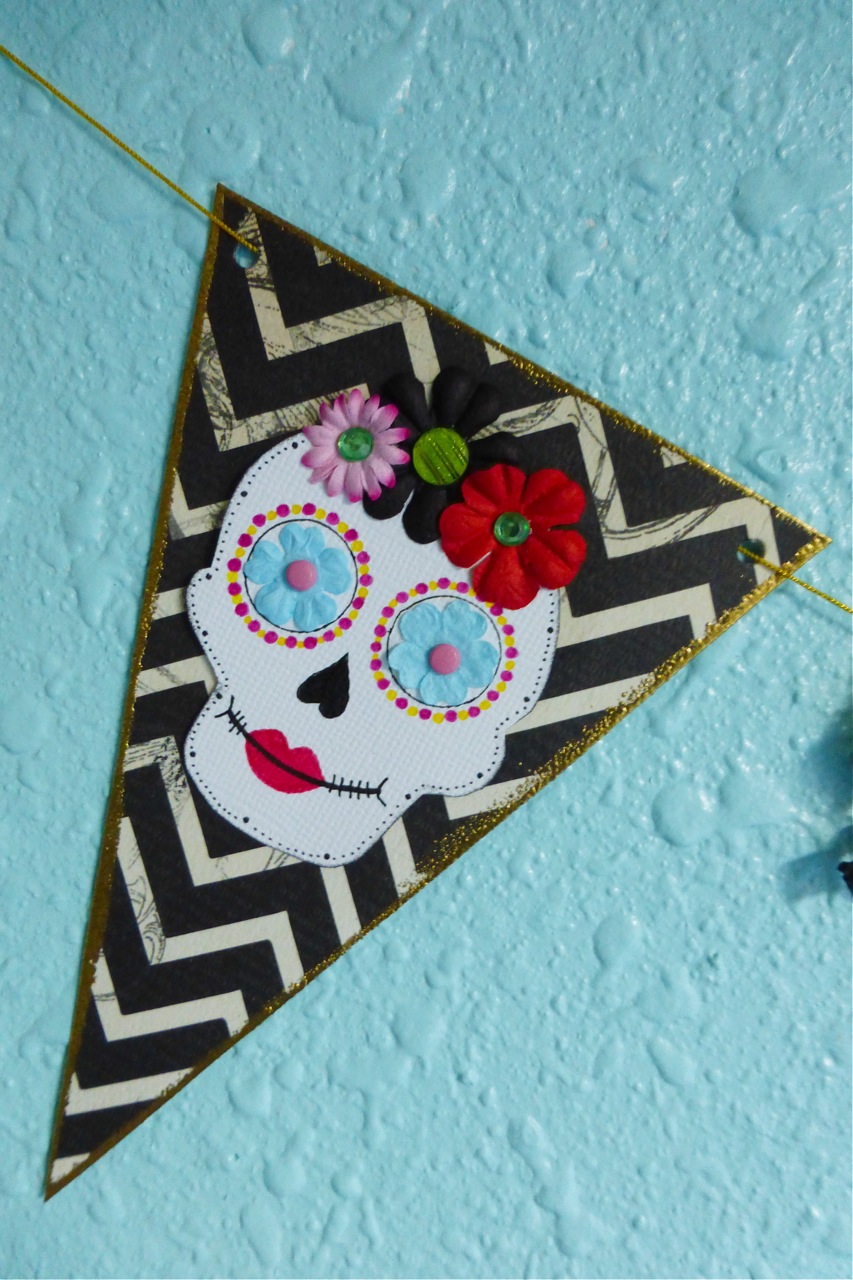
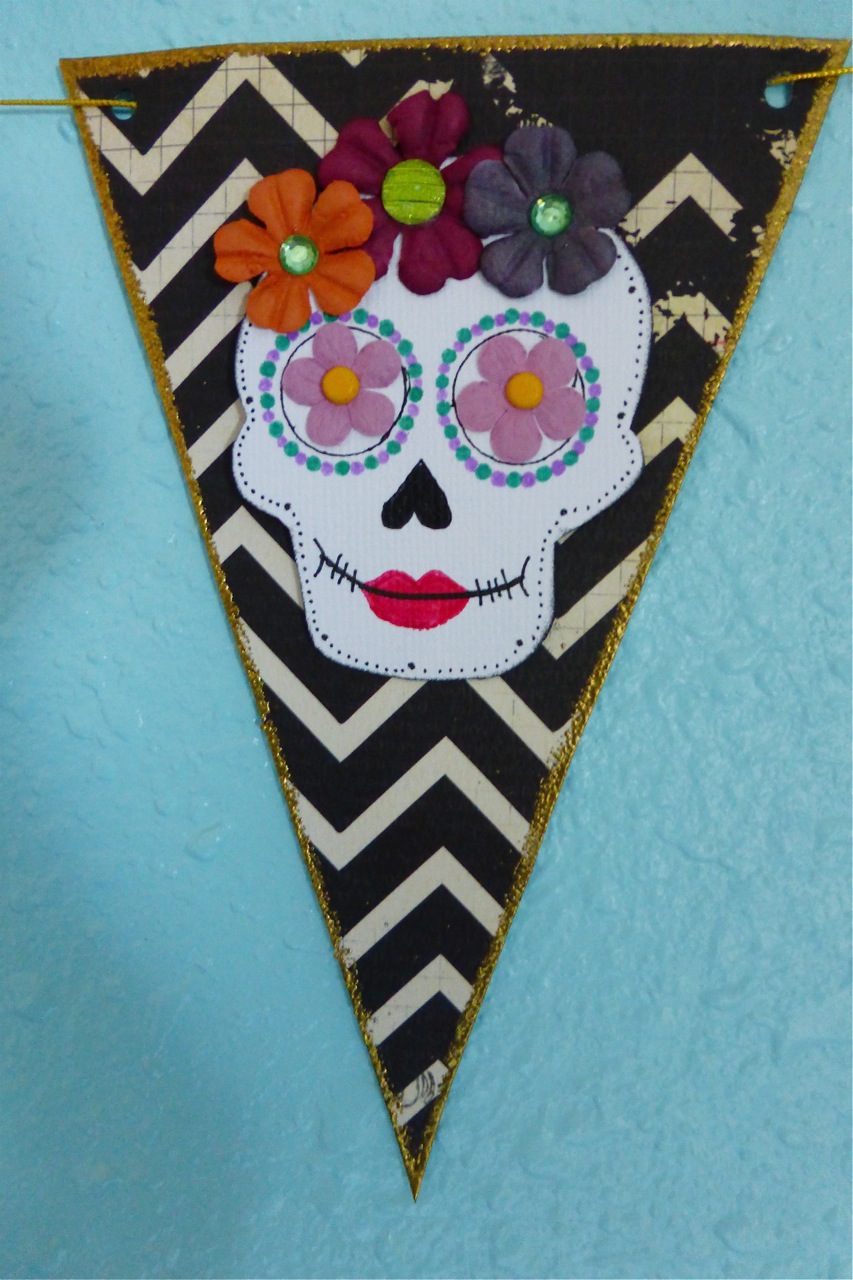
And because skulls are a large part of both Halloween and Day Of The Dead, I decided to make the banner hanging on the wall behind this display. I simply hand drew a skull shape on white cardstock and cut it out, then used it to trace four more skulls. I had fun pulling out my scrapbooking supplies, hand drawing the faces of the skulls, and decorating each one with flower headdresses:
Here's a close up view of each paper skull:
October has unexpectedly opened up a new experience for me, of being inspired by fall flowers, and developing that inspiration into something special that my family and I can enjoy in our home.
Styling The Seasons is a monthly opportunity to style a surface in your home and share it on your blog and/or on Instagram. If you would like to know about Styling The Seasons, visit Katy Orme's blog Apartment Apothecary or Charlotte's blog Lotts & lots. You can also search for the hashtag #stylingtheseasons on Instagram.
Oh, and if you'd like to see the Dia de Los Muertos Pinterest board I created for this post, click here.
Thanks for reading!
Monday, October 26, 2015
DIY: Autumn Floral Crown
The golden days of autumn are here in the Willamette Valley of Oregon. Summer has taken its time leaving, giving us chilly mornings, warm sunny days, and making all the colors of autumn a more joyous experience with glorious sunlight shining through the changing leaves.
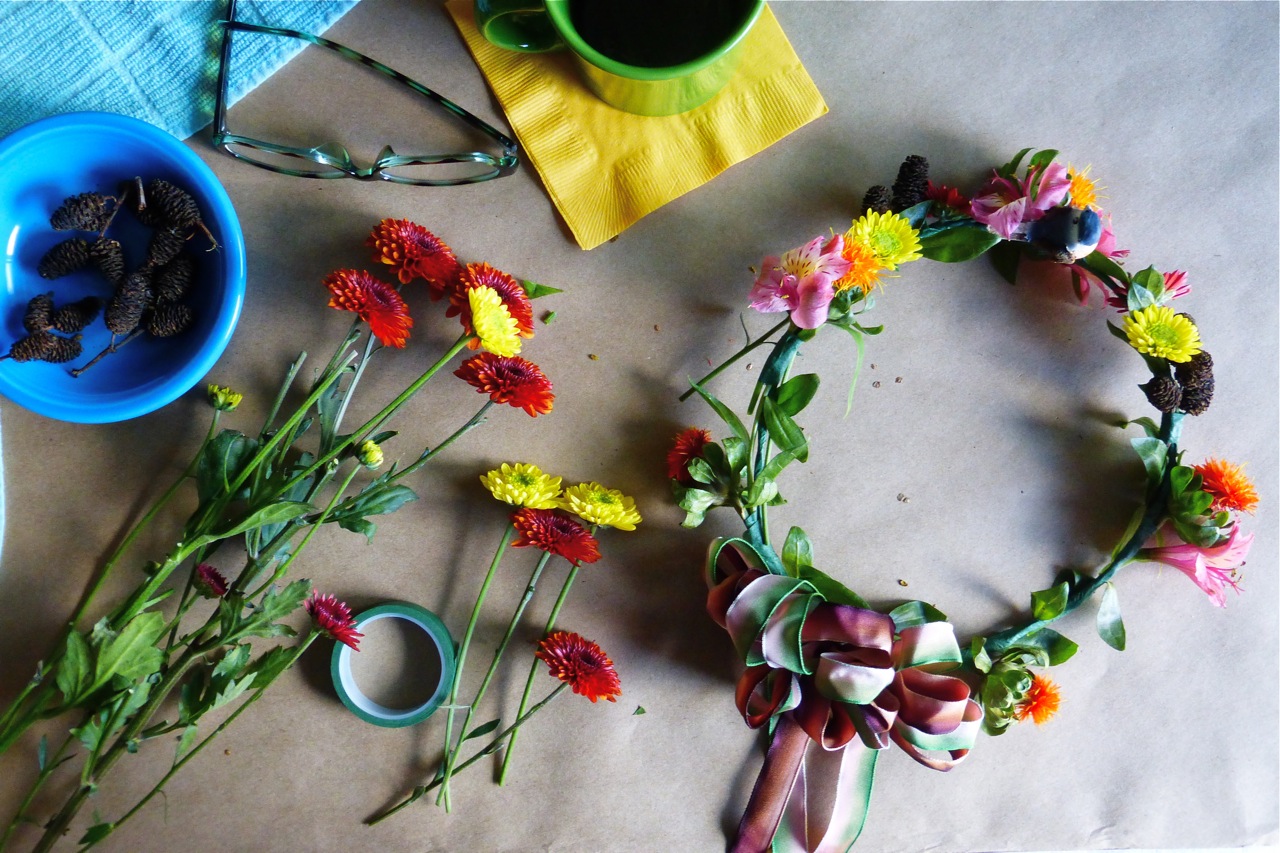
And with those colorful changes my mind has turned to fun ways in which to celebrate the season, and flowers, of course, are the perfect way to do that. I recently picked up a fall bouquet at a local market and was inspired by the seasonal color palette to create an autumn floral crown. The mix of colors in the bouquet reminded me of all the hues I see in the changing leaves - yellow, orange, pink and red, with green hanging in there for as long as it can.
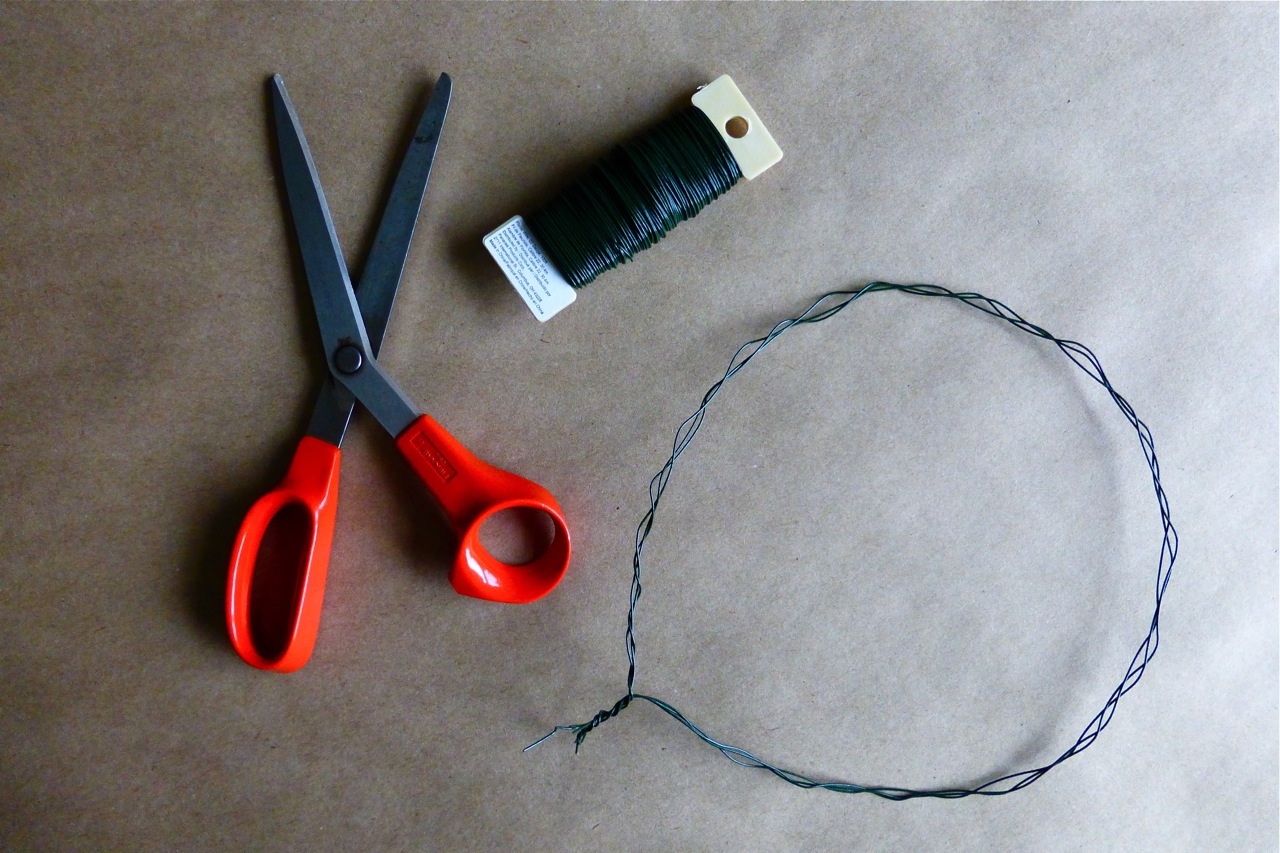
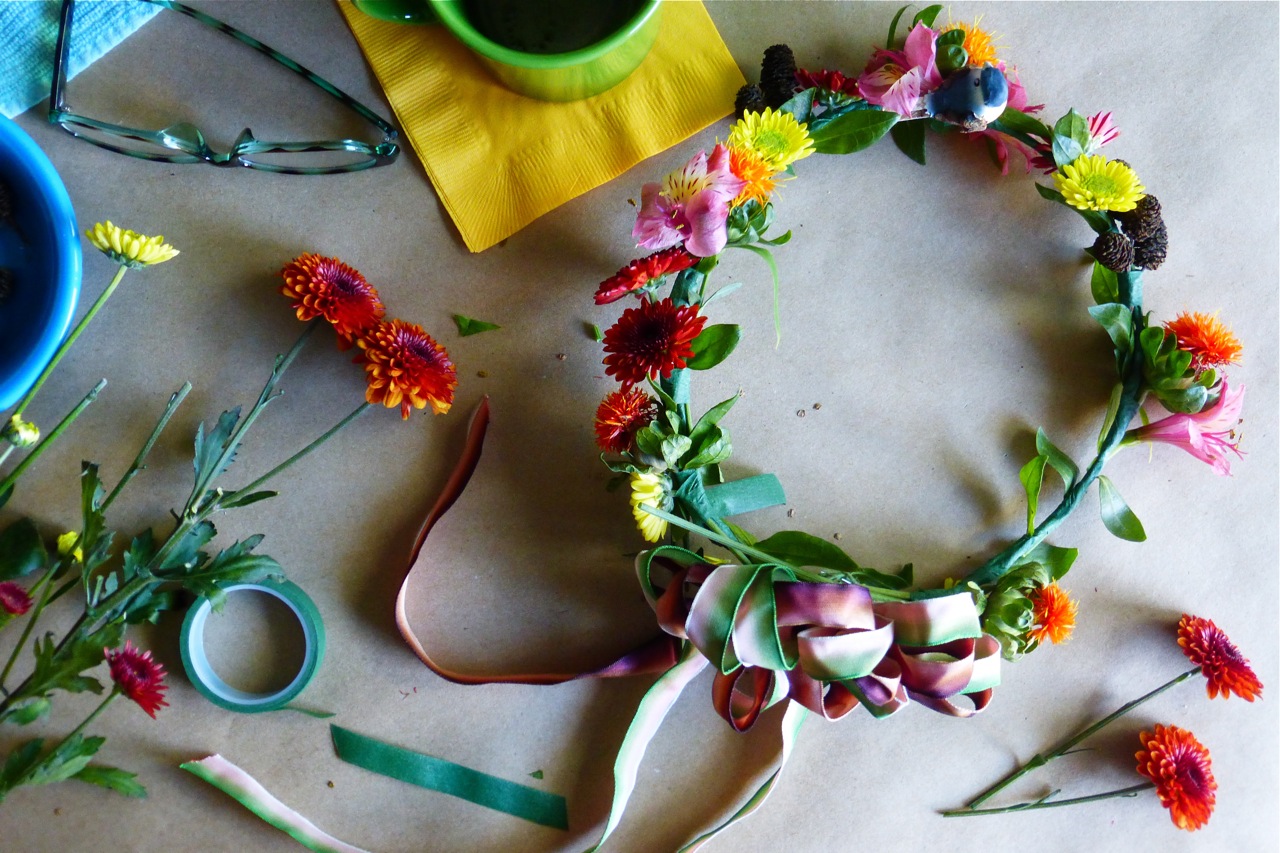
This simple yet colorful crown can be made with just a few supplies: floral wire, floral tape, some junky scissors, and of course flowers. Along with the flowers in the bouquet, I already had on hand a bow and some little birds, left over from a silk flower crown I had made a couple years ago. I also happened to gather some alder seed cones when I was out walking with my daughter recently, and decided to use those as well.
The first step is to create the shape of the crown with the floral wire. This is as easy as pulling out enough wire from the spool, and then wrapping it around your head and adding about 1-2 inches to that measurement. Cut the wire. Repeat this two more times until you have three strands. Twist the strands together, and make a circle with them, twisting all six ends together, like so:
Wrap all six strands into the circle you've made. This will be the back of the crown. Now it's time to wrap the entire crown with floral tape - here's mine in the process:
Since I wanted my crown to be symmetrical, I started in the front with the two pink flowers you see here:
Now it's time to fill the rest of the crown with flowers. If you'll notice, I next used some small bright orange pompoms because its leaves run for the full length of the stem, and make a perfect foundation to develop the crown from:
At this point, I added the bow at the back of the crown, and placed one of the birds at the front where the two pink flowers are. Then, I continued wrapping the orange pompom flowers around the crown:
Once all the pompom flowers were in place, I began adding in the yellow flowers and used two bunches of the alder seed cones - one on each side near the front:
Next, I added in the red-orange flowers and two more yellow flowers towards the back of the crown:
And here is the finished crown:
Tuesday, October 13, 2015
DIY: Autumn Hydrangea Wreath
Hydrangea, also known as Hortensia, is a flowering shrub native to eastern Asia and the Americas. It is very easy to grow and produces large pom-pom flowers which bloom from spring through autumn. If you have hydrangeas in your garden, you may notice that the stems of the flowers are starting to dry at this time of the year. Now is a good time to take your cuttings and prepare them for this very easy autumn wreath.
First, gather your flowers. Cut long stems and place them in a container in which you've added just a few inches of water. Place your container in a cool shady spot:
The idea here is to give them just enough water to keep them moist while the water slowly evaporates. What happens is the flowers will dry but the petals will stay fresh looking. My cut flowers sat in this watering can for about two weeks before I made my wreath.
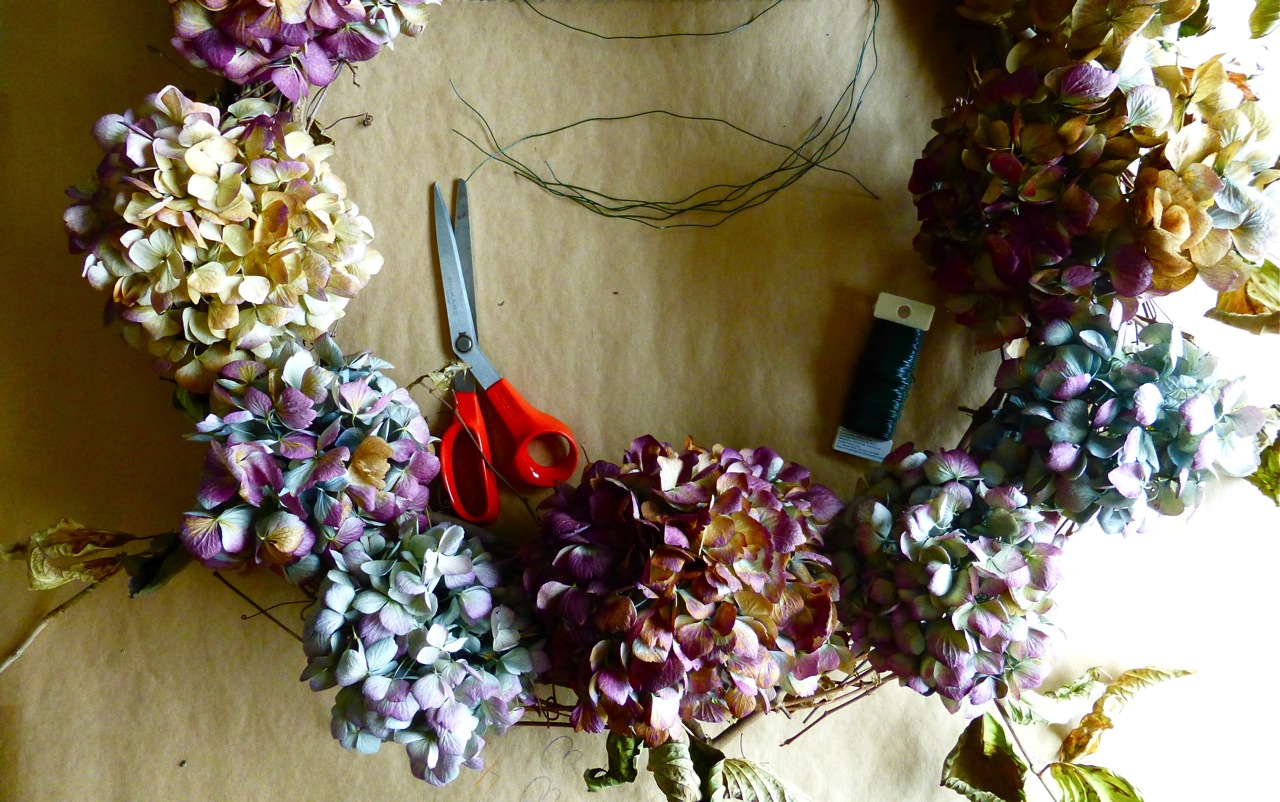
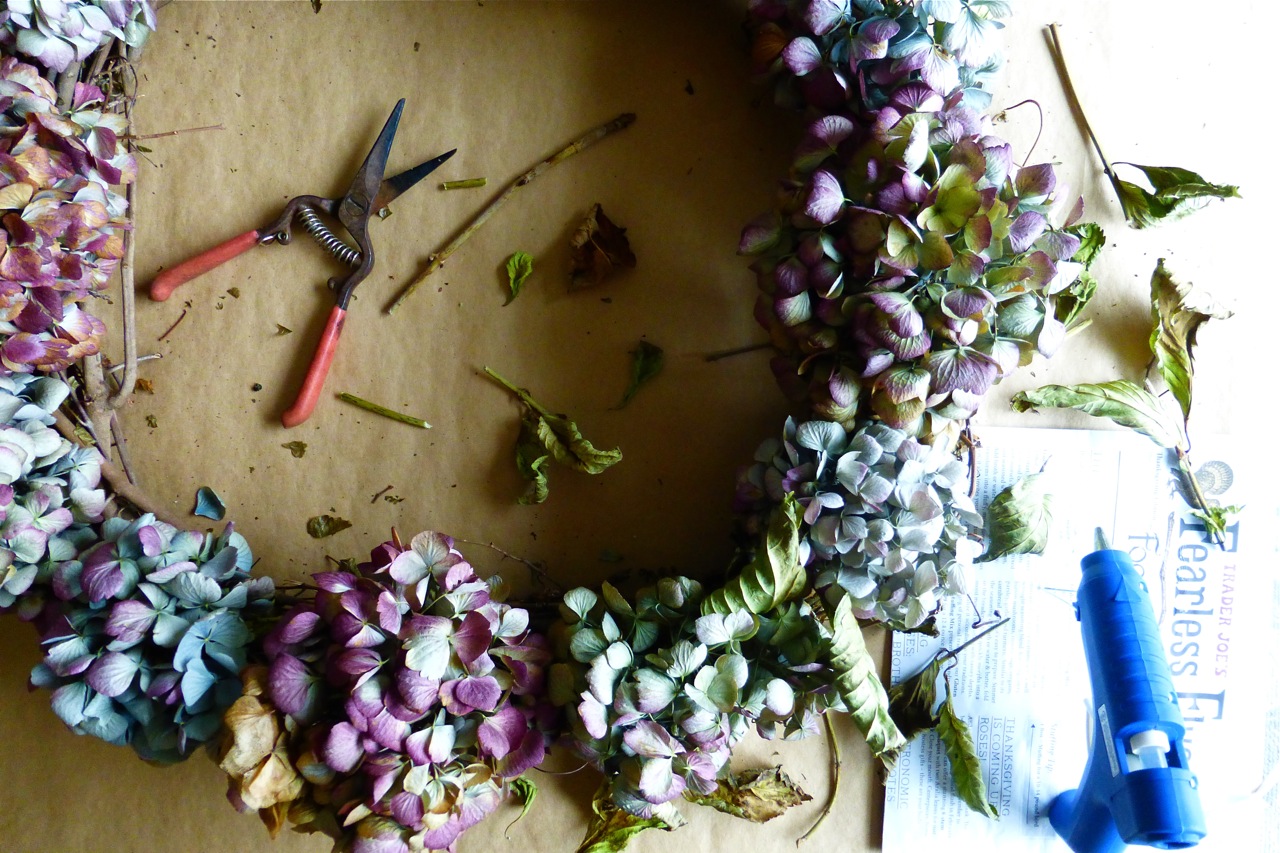
Once your flowers are dry, gather your supplies: a wreath form of your choosing, some junky scissors, and some florist wire:
I purchased a grapevine wreath at a craft store, and it's about 22" in diameter.
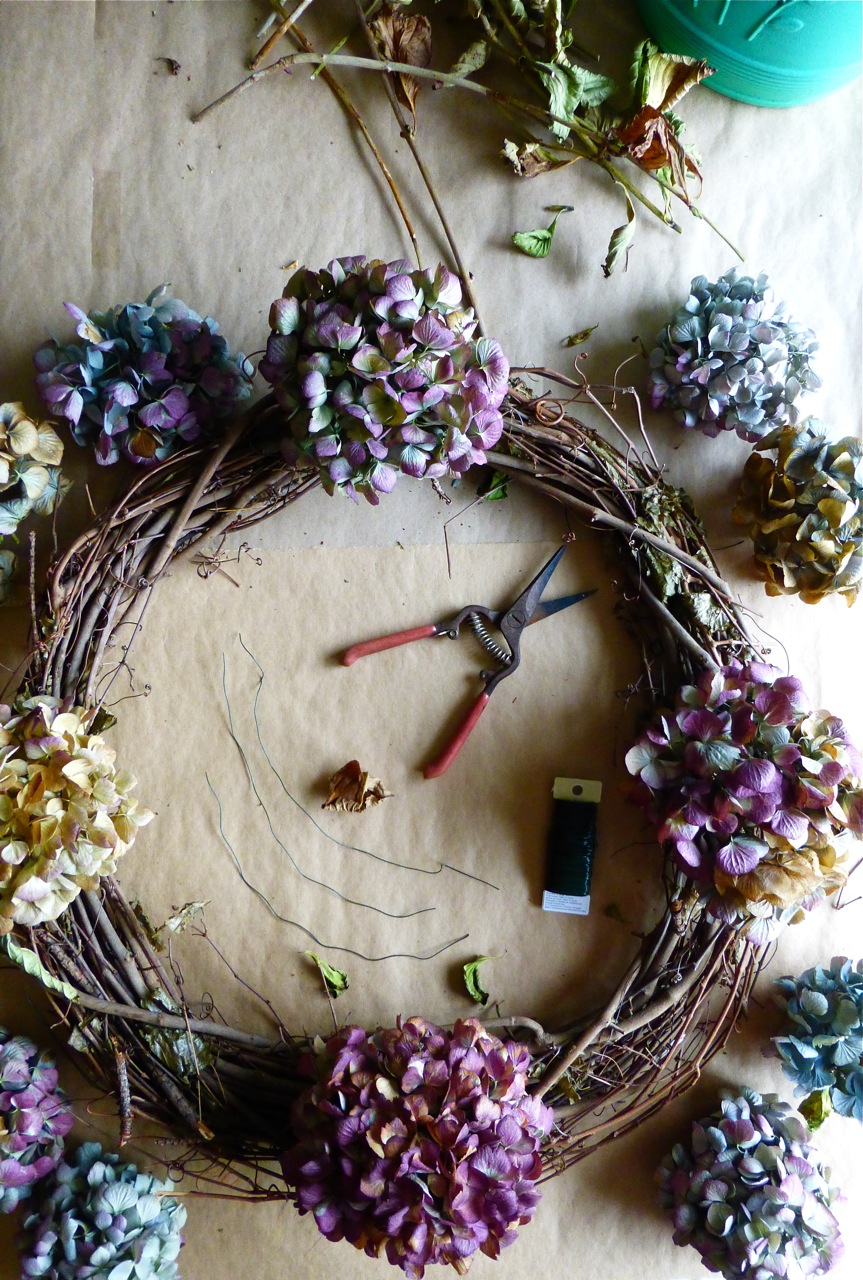
The next step is to start placing the flowers around the wreath form to get an idea of how many you need and decide on placement:
Once you know how many flowers you will be using, cut a length of wire for each flower head. I used 12 flower heads and cut my wire into about 8 inch lengths.
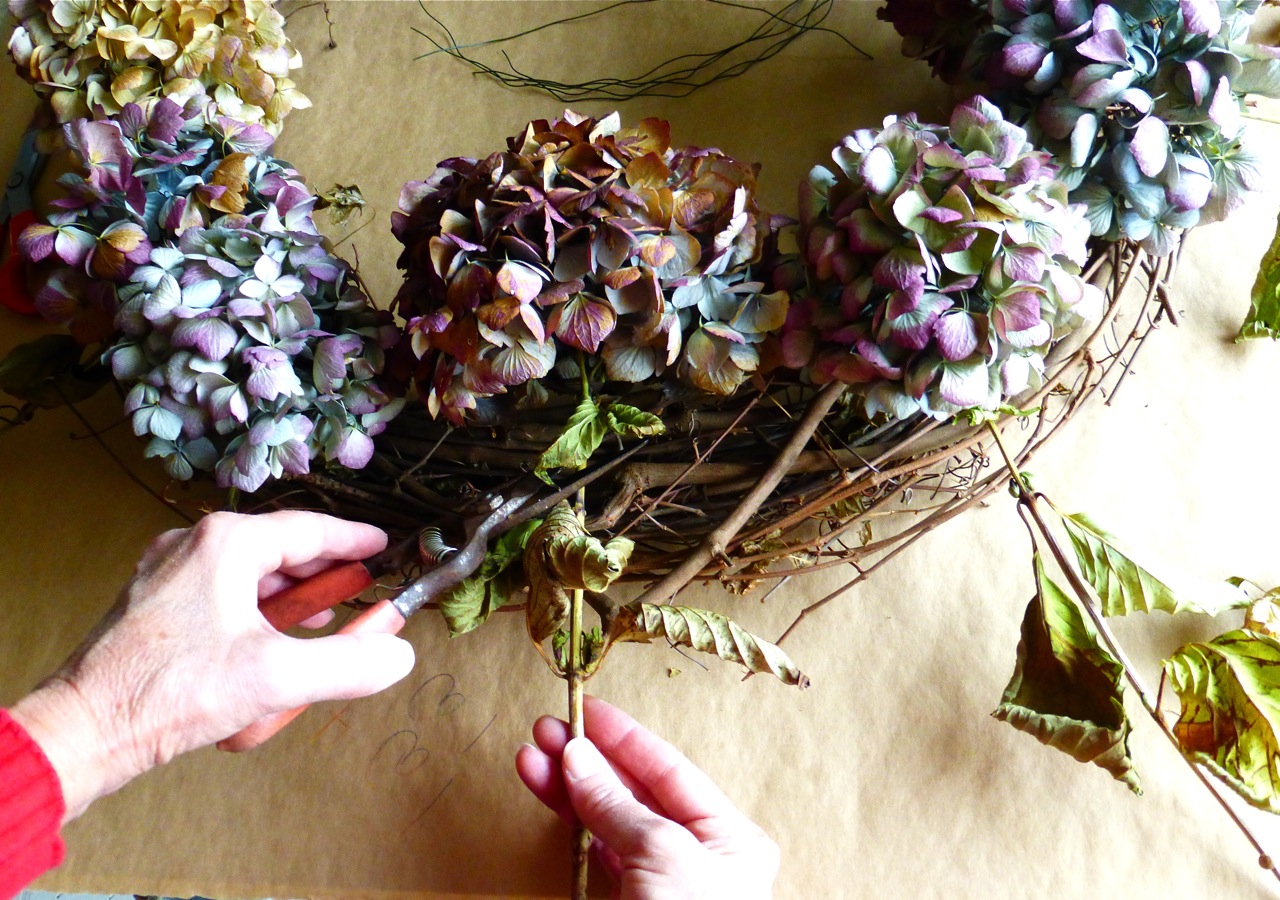
Next cut the stems from your flower heads, leaving about 2-3 inches:
I let the size of the flower heads dictate the placement on my wreath, putting the four largest flowers at the top, bottom, and sides, and then filling in the other areas of the wreath with the smaller flowers. I also paid attention to color and weight balance with the remaining flowers.
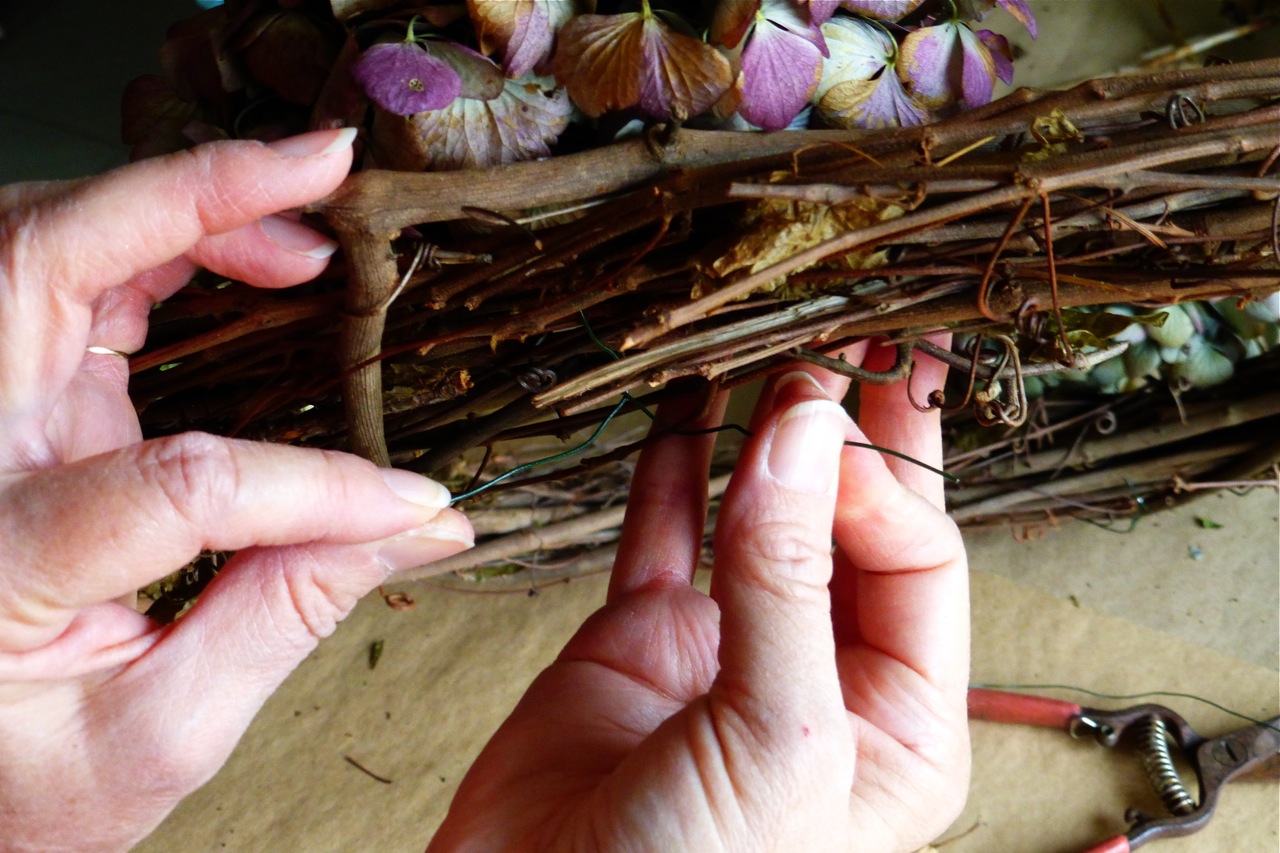
Now simply place a piece of wire through the dried stem of each flower like this:
Then place the flower on top of the wreath and carefully lift the wreath and wrap the wire around it and twist it in the back to secure it onto the wreath:
Do this until all your flowers are fastened to the wreath.
An afterthought I had was to use a hot glue gun and glue some of the dried leaves in various places around the wreath, tucking them here and there.
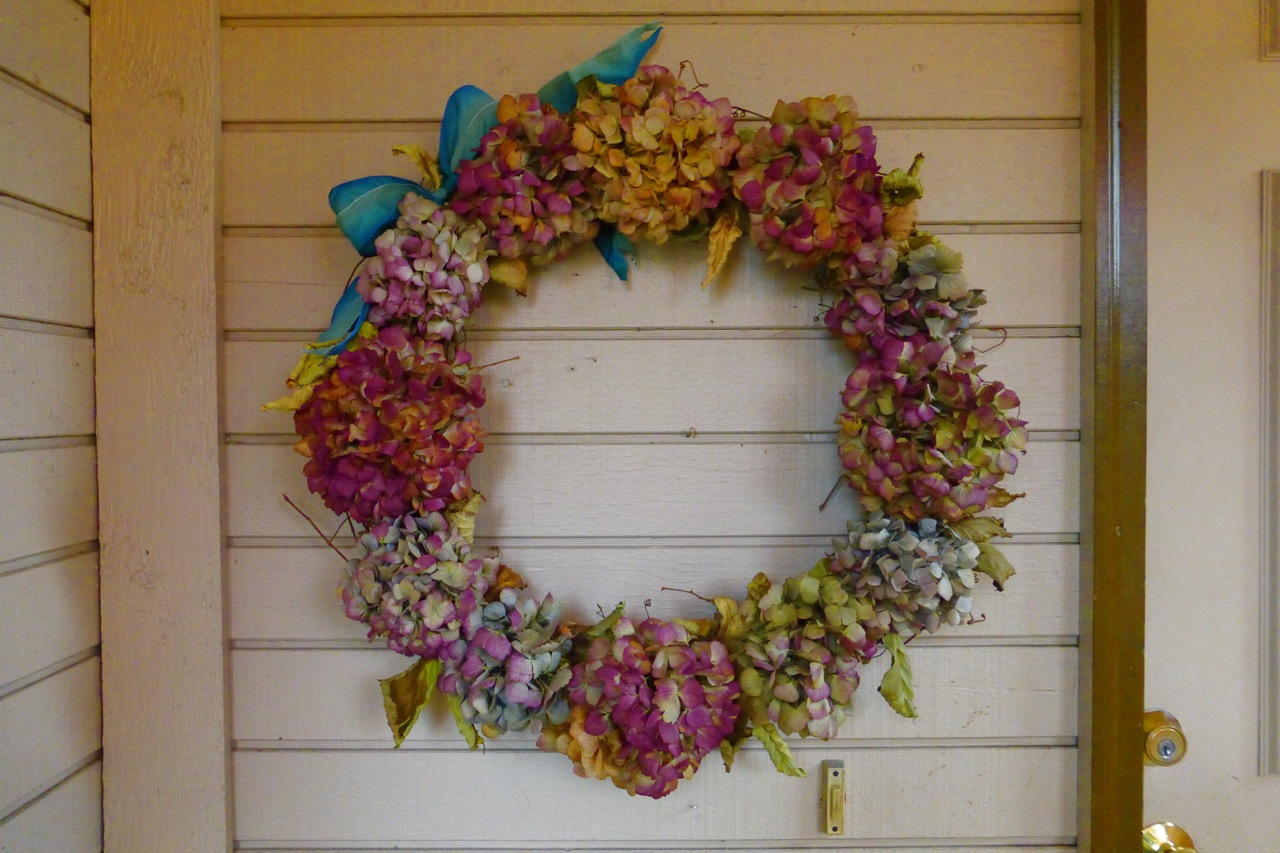
And now your wreath is ready to hang and enjoy! I added a blue ribbon to mine. I love blue!
I hung this wreath on my front porch, and over time the colors of the flowers will continue to fade. So if you want your flowers to become 'antiqued' or 'shabby-chic' looking, that would be how to affect it. I can say though, that if you want the colors to remain as they are, then keep your wreath inside and away from direct light.
Do you enjoy wreath making? What materials do you use?
Thanks for reading!
Subscribe to:
Posts (Atom)
©
Under The Plum Blossom Tree | All rights reserved.